What can you make from leftover siding with your own hands? Useful little things when working with siding DIY crafts from leftover siding
Editor Decoration elements 8176
Completion of construction country house and its auxiliary buildings means a transition to improvement personal plot. This is an interesting and exciting job that allows you to transform an ordinary piece of land into a place pleasing to the eye and soul. It is necessary to organize the landscape design of the site, which requires considerable funds. It is possible and necessary to reduce costs by using leftover building materials.
Preparing to work on the landscape

You get a rare opportunity to create art to transform the space adjacent to your home, harmoniously connecting it with surrounding nature. Here you must follow an immutable rule experienced designers that there should be nothing artificial, not natural, not natural. And the shortcomings of the nearby landscape can be carefully corrected or hidden. Everything that is built or planted in the garden must be balanced, as in nature.
Usually, after completion of construction, a lot of suitable and damaged building materials and various construction waste remain. All these leftover building materials can go to work on summer cottage. In order for such goods to be convenient to use, it should be pre-sorted. It is better, of course, to do this during construction. Separately, whole and broken bricks, rubble stone remaining after the foundation, crushed stone, sand, lumber, labor and all other remains should be stacked. Before using them, it is worth drawing up an approximate project for transforming the site, making pencil sketches of what you want to see. First of all we're talking about on the design of the site using construction residues. To do this, it’s a good idea to familiarize yourself with special publications, good examples actually.
We make paths and platforms
 It’s better to start with objects that will require greatest number specific material. For example, brick, stone, crushed stone. With their help, you can pave original winding paths and various areas on the site. Sites refer to places where people use them most intensively. These could be areas in front of the entrance to the site on both sides of the gate, around the summer washbasin, near the toilet, under the table for family meals, etc. It is necessary to arrange such areas in front of the garage and for parking guest cars.
Creating such paths and platforms is not very labor-intensive, but requires preparation. Here you need a shovel, a silicone or rubber hammer, which is used in straightening work, a cord with pegs for marking, and gloves for work. You also need a polyurethane mat under your knees. Then, according to the markings made, the soil is removed with a shovel to a depth of ten centimeters. A thin cushion of crushed stone and sand is poured. You can use sifted construction waste mixed with sand or instead of it. It should be taken into account that paths and areas for drainage purposes should have a slight slope towards the edges. Then they will dry quickly after rain.
After the cushion is completed, you can begin laying the brick. Whole bricks are usually laid along the edges, and damaged ones in the middle. Using the latter, you can create an original design of a path or platform. The laid brick is carefully tapped with a hammer for tight installation. After laying 40-50 centimeters of the path, the gaps between the bricks are filled with sand. The bricks are again carefully tapped with a hammer until they are completely stable. After laying the bricks, moisten the paths generously with water from a hose. The sand in the cracks will sink into the middle. You can pour earth into the resulting depressions along with lawn grass. The green of the rising grass combined with the color of the brick will create a unique pattern.
Decorate your landscape with ponds
 If small artificial ponds are expected on the site, the remains of waterproofing materials, which are usually sheets or rolls, can be used for this. It’s easy to make such a pond yourself. It is enough to dig a recess 50-60 cm deep in the chosen place. Thoroughly clean its walls of sticks and other sharp objects. Cover with waterproofing material so that its edges, 25-30 centimeters wide, lie on a flat surface on top. If necessary, close it all on top plastic film. Secure the edges with pegs. Top on waterproofing material and the film can be laid with bricks and stones, which are covered with a layer of turf. Sharp corners and horizontal surfaces should not be visible. Flowers and plants brought from the banks of a river or lake will look good here. Small crucian carp and ornamental fish take root well. Floating burning candles will look romantic in the dark.
Such small ponds can be built in a cascade and connected by an artificial stream with small waterfalls made from the remains of natural stone and bricks. Wooden bridges over an artificial stream, which can be made from leftover timber, will harmoniously fit into such a cascade. Such bridges will look great with paths made from leftover scraps wooden beam. Such cuttings 15-20 cm long are buried in the ground with their flat ends up, forming original track
from round wooden slabs. Longer cuttings of such timber and the remains of planed boards can be used to install small benches along such a stream.

and the taste of its creator. It is not difficult to make such a composition from unnecessary building blocks, brick fragments, leftover gravel, crushed stone and sand. A mandatory requirement is the absence of any smooth surfaces and sharp corners. For this purpose, created from various materials the slide must be carefully strengthened, laid out appropriately and covered with turf. All its outlines should be smooth and not irritate the eye. Around such a slide can be paved. It will look very natural with wild and forest flowers. On and near such a hill, the simplest plants brought from the forest or meadow will look organic. Moss would also be quite appropriate here.
After the device is completed ventilation systems and chimneys, asbestos-cement pipes remain. They can also be used in landscape design. Firstly, as water conduits, and secondly, by placing them vertically along paths as candlesticks or stands for lamps with solar panels.
Their ordinariness can be reduced by painting them in a suitable color. green color and planting plants around that will cover such columns. The remains of slate can also be used, ceramic tiles. They must first be trimmed using a grinder or other tool. After this, such remnants of the roof can act as excellent delimiters of beds in the garden. In addition, not very small fragments of bricks, sunk into the ground at an upward angle, can serve as a low fence around flower beds and flower beds, areas with seedlings. When making such corners, the planes are painted with paints remaining from construction.
Fragments and trimmings of various materials remain after the completion of any construction work. Since the cost of building materials is quite significant, you should not throw them away, but try to use them for all kinds of crafts. The above fully applies to PVC siding, and especially to its basement variety.
Most common cause the formation of scraps is the joining of corners when covering buildings, when a significant number of lamellas and panels having standard length, have to be cut based on the dimensions required to perform a specific finishing operation. By saving the cut fragments, you can later use them to make many beautiful and useful things that can decorate your home or garden.
Large crafts
If large projects are planned, then it is best that they are installed outside the house, since vinyl siding used for major developments inside living quarters, it looks quite rough. As an example, we can advise you on the following options for using siding trim:
- Leftover siding can be an excellent material for arranging a playground. They can be used to cover children's slides, they can be used to build, for example, a sandbox, playhouse etc.
- Cuttings of plastic slats are an ideal material for arranging borders bordering flower beds and other similar fencing.
- Fragments of this facing material can be used for finishing auxiliary objects such as toilets, garages, sheds. Thanks to this, these buildings are given a certain style, they become part of an integral ensemble of country houses.
Small crafts
The remains of siding made to look like wood or stone can be successfully used for various options interior decoration:
- Cuttings of siding lamellas and panels can be used as decoration for terraces and verandas. They are wonderfully suitable as cladding material for doors and sometimes countertops. garden furniture, which in this case acquires an unusual and attractive appearance.
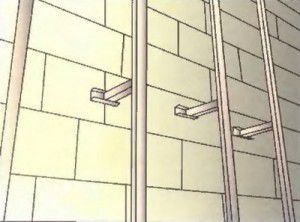
- The remains of the slats are suitable for making shelves designed to store fairly light items in the hallway or kitchen, in the barn or garage.
- Wood or stone siding, used as isolated elements, is excellent for decorating smoothly plastered walls, even in city apartments.
There are quite a few options for using leftover PVC gardening. To effectively use vinyl scraps, you just need to be guided by your imagination, without limiting it in any way.
– an excellent material for cladding a house. At its affordable price, it has many positive operational and technical characteristics.
You are invited detailed instructions By self-installation siding. The guide is universal. Following its provisions, you can complete any finishing that involves installation on a lathing: fiber cement, wood, metal, vinyl, etc.

We install the sheathing
Siding is best attached to pre-installed sheathing. We work in the following order.
The first stage - choosing the material

The frame can be assembled from wooden beams or metal profile. Metal products are stronger and more durable. In addition, metal lathing is much easier to attach to an uneven base.
Find out and also familiarize yourself with the calculation algorithm with an emphasis on possible nuances.
Installation of profiles is carried out in half-meter increments. Hangers are used for wall mounting. This technique will allow you to level out differences in the surface and secure the frame elements at a level.
Wooden sheathing is cheaper. When choosing this option, pay attention to the condition of the wood. It is prohibited to:
- the material has peeled off;
- was deformed;
- had bluish spots and traces of rot, etc.
Elements of wooden sheathing must be impregnated with fire retardant and antiseptic. If the house is built from wooden elements, the walls should also be treated with the listed preparations.

Stage two - preparing the base
The sheathing is easiest to attach to a flat base. First of all, we remove any parts that may interfere. These are all kinds of tiles, bars, platbands, gutters, etc.
The third stage - installing guides
Siding is best mounted horizontally. In this case, we fix the bars or sheathing profiles vertically.
For attaching guides to wooden walls use nails or screws. If the house is built of concrete blocks or bricks, we fasten it with dowels, having previously drilled holes for them in the wall of the house.
We align each rail by level.
Important! If you plan to do exterior work, it is best to install the siding sheathing after all insulation work has been completed. IN in this case There will be two lathing: for insulating materials and for cladding. In this case, the slats of the two frames should be placed parallel to each other.


You can, of course, try to lay insulating layers after attaching the siding sheathing, but this is not very convenient.

Mounting J-profiles
The starting guides must be secured perfectly, because... The quality of the entire cladding depends on the correct installation.

First step. Take a level and find the lowest point on the sheathing. We step back 50 mm from it and put a mark. To do this, screw a little self-tapping screw into the rail.
Second step.
We consistently move around the building and continue to place marks with self-tapping screws to fix the starting profiles. We also screw screws into the corners of the house.
Third step. We stretch the ropes between the corner marks. Fourth step. We mark the boundaries of installation of corner profiles on the slats. We take the profile itself and apply it to the corner

frame structure
and put marks along the edges using a pencil.

Important! We leave a 1-centimeter gap between the profiles to compensate for temperature deformations. Leave a gap between the starting guides and the nail strips. To avoid making a 6mm indentation, you can cut off parts of the nail strips so that when

temperature changes
If you install guides that deviate from the level, the siding will also warp. It will be extremely difficult to correct this in the future.
Prices for profile mounts
Profile fastenings
We install external corner profiles

First step. We mark the soffits. We need to see where the edges of these elements will be located in the future.
Second step.
We apply the guide to the corner of the frame. We do this with a 3mm gap to the soffit or roof. We fasten the profile with self-tapping screws.
Place the bottom border of the element 0.6 cm below the edge of the starting profile.

Third step.


Checking the vertical installation. If there are no deviations, we fix the bottom, and then the remaining places. Experts do not advise placing fasteners in corner elements too often.
If the house is higher than 300 cm, the profiles will need to be placed one on top of the other. To do this, we trim the top profile. As a result, there should be a 9 mm gap between the planks of the joining elements. When laying the elements, maintain an overlap of 2.5 cm.
Important! We join the profiles at the same level on each side of the house.

If the base has a protruding structure, shorten the profile so that there is a 6 mm gap between it and the base.
Helpful advice! Instead of a corner profile, it is allowed to install 2 J-elements (starting). This way you can save money. But this solution also has its drawback - the corner will not be as tight as when using a special corner profile. If you decide to use this method, first glue the wall around a similar corner with a strip of rolled waterproofing material. We install internal corner profiles The installation procedure for these elements does not differ significantly from the installation technology
external corners
– between the profile and the soffit we leave a gap of 3 mm, and lower the lower end of the profile below the J-bar by 0.6 cm.

If there is a protruding plinth or other element from below that stands out from the general level, then between it and the profile we also leave a 6-mm indentation - the profile of the internal corner must not rest against it.

We leave a 9 mm gap between the slats, carefully cutting off excess material. The overlap of the upper element on the lower one is 2.5 cm. We install fasteners in 4-centimeter increments, placing them strictly in the center of the holes intended for this. The exception is the highest point. Here the fasteners need to be installed at the top of the hole.
We install frames of openings

For most inexperienced craftsmen, difficulties arise precisely at the stage of framing and doorways. The order of work will vary depending on how the openings are arranged in relation to the plane of the wall.
Openings in the same plane with the facade

In this case, we do the following.
First step. We waterproof openings.
Second step.
We attach platbands or J-profiles to the openings. We equip each opening using 4 platbands: a pair of vertical and a pair of horizontal.

Third step.

Connecting profiles.
To make the connection of the platbands as neat as possible, we do this:


The platband at the bottom is connected in exactly the same way, only the bridges will need to be cut and bent on the side elements for their further laying on the profile below.
Openings are recessed into the facade

When installing near-window profiles, we follow the same recommendations as when installing platbands, i.e. We create cuts on the profile corresponding to the depth of the opening, and then bend the bridges and insert them into the finishing elements.

Take the time to understand the principles of bending such bridges. We make them so that they cover the joint of the cladding elements. As a result, moisture will not be able to penetrate inside.

Installing the first panel
We start cladding from the least noticeable wall of the building. This way we can practice and work out all sorts of inaccuracies. First step. We insert the first cladding panel into the corner profile and into the locking connection of the starting strip. Important! Between the first cladding element and
bottom
For the corner profile lock, we leave a 6 mm temperature gap. Second step. Attach the panel to the sheathing.

It is important to maintain the dimensions of technological indents. If cladding is carried out in

warm weather
, maintain a 6 mm gap; if it’s cold, increase the gap to 9 mm. When installing panel trims, the indents can be reduced.

Installation of the H-profile is carried out similarly corner elements– at the top we retreat 0.3 cm from the soffit, at the bottom we lower it by 0.6 cm in relation to the starting profile.
Important! We leave a 6mm gap between the H-profile and any obstacles on the house.
Installing the rest of the siding

We continue covering the house with siding. The operating technology is similar to the procedure for attaching the first panel.
Important! Every 2-3 rows we check the horizontality of the cladding using a level.
Having reached the opening, we remove the unnecessary piece of the panel falling on the opening.
We ensure reliable fastening of the panels using “hooks”. For this we need a punch.

We install an additional finishing profile at the bottom of the opening. This will allow the cladding to be leveled.

Installation under the roof

Under roofing structure We attach the J-profile.
We work in the following order.
First step. We measure the distance between the bottom of the lock of the finishing element and the lock of the penultimate facing panel.
Second step.
We subtract a 1-2 mm indent from the resulting measurement. Third step. We mark the whole panel, cut it off
top part
with locking connection.

Fourth step. We create “hooks” in the upper part of the element in 20-centimeter increments. To do this, we make cuts and bend them to the front side.
Fifth step. We insert the trimmed element into the penultimate siding panel. With a slight upward movement, we snap the inserted element into the locking connection of the finishing profile. We mount the pediment

We sheathe the pediment around the perimeter. All fasteners, except the top one, are installed in the center of the holes. The upper one fastener install at the top of the hole. It can be sheathed either with profiles for arranging internal corners or with a starting profile.
The installation procedure is similar to fastening

wall panels
. We trim the edges of the elements and connect them to the locks of the receiving profiles. We remember the 6 mm indentation when installing in warm weather and 9 mm when doing work in winter. We fasten the last element of the gable cladding directly through the panel material - this can only be done here. The cladding is complete.
Find out how, and review the calculations and step by step guide, from our new article.
In order for finishing a house with panels to be as successful as possible, you need to know certain subtleties of performing such work. There is a list

| general recommendations | for any siding, as well as separate tips for panels made from a specific material. | Length x width x thickness, mm | Quantity per package, pcs. |
|---|---|---|---|
| Vinyl Siding "Canada Plus" | 1. Coloring in dark colors is performed using the “Cool Color” method (heat absorption), which involves the use of masterbatches. 2. Excellent appearance remains unchanged even when exposed to high and low temperatures, the range of which ranges from -50°C to +60°C. 3. Retains shock resistance, even if the ambient temperature drops to -20 to 60°C. 4. Not susceptible to microbiological corrosion (fungi, mold). | 3660 x 230 x 1.1 | 20 |
| Acrylic Siding "Canada Plus" | Among other useful qualities of Canada Plus acrylic siding, it is worth highlighting: Increased resistance to direct influences ultraviolet rays; Excellent tolerance to acidic and alkaline solutions, as well as to various fats; Good tolerance to washing with chemical detergents; High degree deformation resistance (excellently tolerates temperatures up to 75°-80° C). | 3660 x 230 x 1.1 | 20 |
| "Alta-Siding" – Vinyl Siding | "Alta siding" is: one of the safest finishing materials on Russian market; frost resistance and the ability to maintain strength even at very low temperatures(from -20 to -60°C); resistance to significant temperature changes and exposure external environment; durability: the service life of Alta-siding is up to 30 years; resistance to aggressive substances (can be used to clean siding detergents); non-susceptibility to infection by mold fungi. | 3660 x 230 x 1.1 | 20 |
| Facade metal siding INSI | Siding "INSI" is made of galvanized steel coated with a layer polymer composition, which means it inherits all the advantages of this material: resistance to temperature changes (-50°C - +80°C) and mechanical damage; long service life with preservation of original properties (about 50 years); environmental friendliness; non-flammability; Possibility of installation both horizontally and vertically; protection of the building from overheating (in a ventilated facade system); and when choosing one of two new colors (alder or rosewood) - a complete imitation of the appearance. | Length up to 6000, width up to 200, thickness 0.5 | - |
Happy work!
Siding prices
Video - Do-it-yourself siding installation
Installation vinyl siding without the use of accessories is possible. Despite the fact that some builders say the opposite. But not all. Typically, installation of vinyl siding is carried out using fittings (window trims, frames, joints, etc.), which are purchased separately from the siding, having previously selected the color and type.
But is it worth buying it? It’s no secret that additional elements for siding are approximately 1.5-2 times more expensive, although they have the same composition, specific gravity, strength, etc., only the shape is different, although this should not be a reason to increase the price. Many believe that without them, installing siding is almost impossible and, spending their hard earned money, they buy them without complaint. But this is not true at all! You can do without them, and installation of siding will cost you much less and without compromising the aesthetic appearance. Can be used instead of these accessories wooden crafts, which you can do yourself, or siding trimmings, which will accumulate a lot during the installation process and it will be a pity to throw them away. For example, corners can be made from thin boards, and window trims can be made from unnecessary siding remnants using special glue. It will be cheaper and no less effective. Some are confused by the fact that the tree is very “painfully” tolerant of unfavorable weather conditions, quickly “ages” and requires constant care. This can be easily corrected if you treat the wood with KHMBB antiseptic and apply a special varnish to the surface to protect it from ultraviolet rays, this way the service life will be increased to 20 years. Installation of siding should begin by marking a single horizontal line around the entire perimeter of the house; it is most convenient to use for this purpose laser level. I have more than once installed vinyl siding myself without using fittings. It is best to do this in cloudy weather or in the evening, when the sun has set, so that the laser beam is clearly visible. All walls are reinforced with a frame made of wooden slats, on which the siding will lie, you can, of course, use special metal bars, but this will cost more. Then install the lower starting panel along the line that was previously marked by level. It is very important here to install it evenly, since all subsequent sheets will exactly copy the horizontal launch pad. Taking into account the fact that vinyl siding can expand and contract depending on temperature, during installation it is necessary to leave a gap between the joints: 10 mm if work is carried out in winter, and 5 mm if in summer. When installing walls, it is more advisable to join the panels “overlapping”, since this way the joints will be almost invisible and the house will look more beautiful from the outside than when joining in any other way. The last, top panel needs to be inserted into finishing bar, which is pre-attached in the upper inner corner between the cornice and the wall of the house and secure it with at least two screws along the entire length, otherwise it may jump out at the first gust of wind. After installing the walls, you can proceed to the windows. Of course, as they say, “there is no friend according to taste,” so there may be different variants: to trim either with wooden planks, or use leftover siding. As you can see, installing vinyl siding without the use of fittings is not that difficult.
Refrigerator repair Automobile plant http://master-nnov.ru.