Cutting from plywood with a jigsaw. Sawing plywood with a jigsaw according to drawings - detailed instructions
Many people have been familiar with the art of sawing with a jigsaw since school. This activity can be mastered by anyone, regardless of artistic abilities, and this is probably its main advantage.
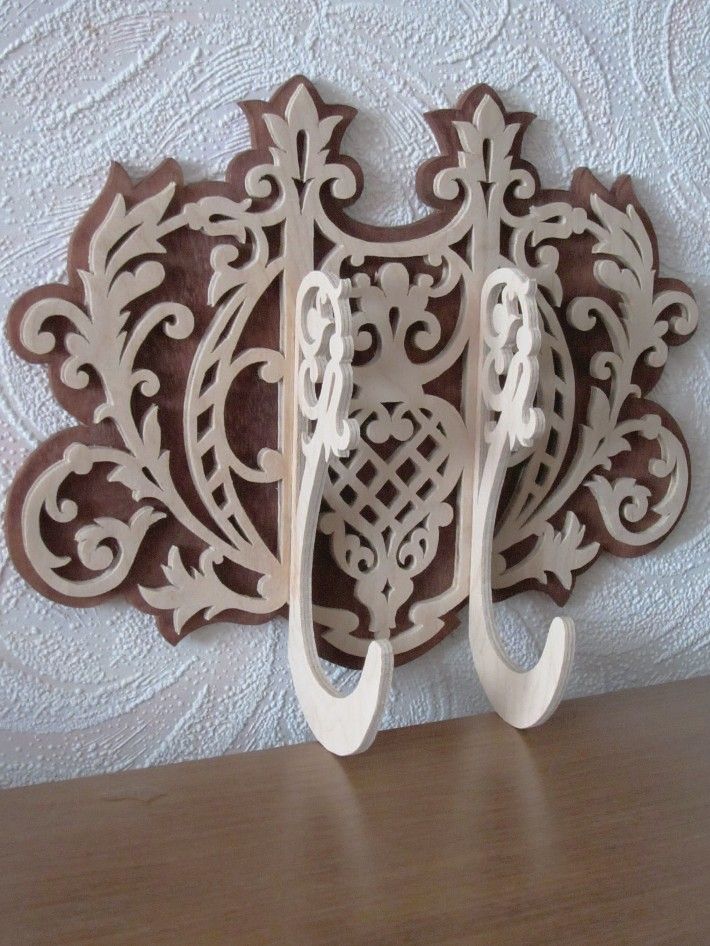
In addition, having mastered some skills with a jigsaw, you can create simply magnificent carved decorations that will serve to decorate the interior of a room or the facade of a house.

Sawing with a jigsaw: tools
The first thing you need to cut out plywood figures with your own hands is a jigsaw.
Such a tool is represented quite extensively on the domestic market and in several main types:
- Manual. A tool familiar to many from labor lessons at school. As the name suggests, all cutting work will need to be done manually. The best choice for creating small things or teaching children the skills of this fascinating process;
- Electric. It works much faster than a manual one, but at the same time, it has a significant mass (1-3 kg), and therefore it is quite inconvenient to hold it “in weight”. Yes, and it will not be possible to create a thin pattern, since the blade of the file is too large for such jewelry work;
Advice. If the choice fell on electric tool, then you need to do all the work very carefully, otherwise you may get an uneven cutting line.
Children should not be trusted to work with such a tool at all, as there is a high risk of injury.

- Stationary. The only drawback of such a tool is its price - it is much higher than that of an electric or hand-held device. Nevertheless, the device is very convenient for the carver; it does not need to be held suspended, and although the cutting line will be rougher than that of a manual “colleague,” the speed of work is still many times higher.
Choosing a particular tool to create various designs made from wood raw materials depends only on the amount of work and personal preferences of the master himself. If, for example, working with a jigsaw on plywood is just a hobby, then a hand tool will be quite enough.
Advice: If such an activity brings in money and is put on stream, then you simply cannot do without an electric or stationary “assistant”.
Preparation of raw materials and stencil
Those people who have skillful hands And great experience working with the tool, cutting out plywood with a jigsaw will not be difficult. First you will need to take a piece of material on which the design will be applied, sand it to a smooth surface with fine sandpaper.
After such preparation, it will be enough to apply the desired drawing and begin the process itself. 
All you need to do after downloading the drawing is to print it, transfer it to a sheet (you first need to prepare it with sandpaper) and start working with the tool along the contour.
The process of sawing wood: features
The creation process itself decorative details made of wood is even simpler than applying a design to a sheet of material. It is enough to simply insert the file into the pre-made hole (for this you can use a hand brace or an electric drill) and start working along the drawn contour. 
Moreover, if the work is carried out hand tools, then all movements must be smooth, without jerking, otherwise you can simply break the fragile jigsaw file.
If everything is done correctly, then in the end you can get a unique beautiful drawing, transferred exactly to the material, a detail that can advantageously decorate any room or facade of a building.
Additional finishing
To make a product created from a sheet of material using a jigsaw look even more beautiful and original, it can be further trimmed. First, you should sand all surfaces with sandpaper, eliminating all small irregularities and roughness.
Afterwards, you can varnish or stain the entire surface of the plywood product, cover it with paint or other finishing materials. 
It should be noted that cutting out plywood with a jigsaw allows you to obtain not only solid, but also prefabricated structures. In the latter case final finishing will also be accompanied by the connection of several elements together using special glue or shingled nails.
The main thing in the process of creating a prefabricated product from several parts, even during the work process, is to pay special attention to the cutting line; it should be positioned so that the notch is somewhat smaller than always.
Advice: After finishing work with the tool, it is important to “fit” several plywood parts cut with a jigsaw and sand them correctly with sandpaper.
Only in this case can we guarantee high quality surfaces and the most attractive appearance of the finished product.

Conclusion
There is nothing complicated in the process of creating figures from plywood - you just need to pick up a jigsaw, prepare the material and start working. In the video presented in this article you will find additional information on this topic.
Similar materials


From carved wood and plywood you can make so many decorative items and useful little things, that it is stupid to limit the scope of work. In fact, it can be absolutely anything that your imagination can handle: boxes, covers for decorative and collectible books, lampshades, panels, shutters, furniture elements, trim, cornices... But the most attractive thing about creating exclusive works is that anyone can do them willing, if he puts in a certain amount of effort.
Wood carving: photographs, drawings and sketches
The main key to success in creating interesting things with slotted carvings is the choice of pattern. It is he who conveys the overall concept and sets the aesthetic tone for the entire product.
The easiest way for beginners is to make geometric patterns, as in the photo.


Carved designs of floral and animal themes are classic ornaments for any field of application.


Inscriptions - modern version application of wood and plywood carving. At the same time, you are unlikely to be able to find drawings and sketches on the Internet - they will have to be compiled purely individually according to personal requirements for sizes, fonts, and words.

Stencils for slotted threads
However, unlike cut-out inscriptions on plywood, drawings with plant, animal and fantasy themes can be found on the Internet. So feel free to choose the stencils you like for your album, and you’ll have plenty of ideas for creativity for a long time!
The simplest sketches are suitable both for training at the very beginning of the process of making products, and can also become separate elements complex design. For example, this is how carved houses are decorated.


More complex templates will require some skill and patience, but the results are worth it. Such pictures can serve as an independent product, even as a gift.


Entire compositions with an idea and meaning usually serve either as a separate work or form the basis of a work.


Tools for slotted carving: jigsaw or router
However, choosing a design is only a third of the success. Another important aspect that must be considered before starting the work itself. Namely, the choice of tool that will be used to carve wood or plywood.
Depends on the equipment:
- how thin the thread will be;
- complexity of pictures;
- cutting speed;
- accuracy of work.
Therefore, it is important to evaluate all the pros, cons, capabilities and limitations of each of the traditional sawing tools:
A jigsaw is a device for shaped cutting of parts. Working with a hand tool is quite labor-intensive, but it allows you to cut very accurately according to the drawing. Power tools allow you to quickly produce shaped plywood products, but require caution.

A milling cutter is a tool thanks to which flat-relief slotted threads acquire a thinner and more complete appearance. It is with its help that you can round edges, remove chips, make valances, and carry out the most complex cutting.

Theoretically, a milling cutter can do the same work as a jigsaw, and even more, but in fact, such handling of the tool is fraught with its rapid failure and frequent replacement of the frieze.
Materials for slotting threads
In most cases, plywood is chosen for this type of work - it is uniformly thin, has a pleasant color and structure, and does not suffer from further use or storage, unlike solid wood. It is the choice of material that becomes the third pillar of successful work.
The modern market is abundant different types materials, so it’s easy to get confused. For this work you should choose:
- FC plywood - harmless to humans and the environment, durable, easy to cut, practical;
- FB plywood is also safe for humans, but resistant to aggressive environments, since it passes special treatment and gets protective covering, because of which it may cost an order of magnitude more.
Note! Do not under any circumstances choose to interior works FSF class plywood - it is treated with carcinogenic preservatives and is permissible for use only in the fresh air - they are excellent for lining a bathhouse or a house outside.
Photos of carved wooden houses
For Russia, slotted carving is of particular importance as a decoration for building facades. Since ancient times, ornaments carved on birch bark and other similar materials have been decorating huts, bathhouses, and churches, as photographs colorfully demonstrate.


Video of wood milling with a hand router
If you have just decided to try your hand at figure skating slotted thread, it would be useful to watch the video with the master class. It will help you better understand how drawings are created and how such home beauty appears.
To start cutting with a jigsaw, diagrams and drawings are prepared in advance. When creating furniture, interior elements (shelves, doors) and performing finishing work, you may need the skill of sawing with a jigsaw. This process requires attentiveness, clarity of movements and accuracy.
Sawing with a jigsaw may be necessary when finishing works, but most often in the process of making furniture with your own hands, shelves and other things.
Preparatory work
First, the master transfers the drawing onto a sheet of plywood. During sawing, it is necessary to hold the tool correctly, observing safety precautions.
The quality of the product depends on how accurately the master performs the work at each stage.
To cut parts with a jigsaw you will need:

Usually, with experience, masters immediately apply drawings to the surface, but for beginners they will need special adhesive paper and tracing paper.
- tracing paper and adhesive paper (necessary for accurately applying the design to the wood);
- a sheet of plywood (moisture-resistant or regular, depending on what product is required);
- a jigsaw, manual or electric (the first is used for cutting out carved elements, patterns, small parts, the second is used if you have to work with a large amount of wood, large parts);
- an awl or a drill (they are used to make holes for cuts; the diameter of the hole should allow a file to be inserted into it; the choice depends on which tool is more convenient for the master to work with);
- files (special sets are sold in stores, with the help of which, if necessary, the ends and edges of the product are cleaned);
- stop board (necessary for fixing plywood and tools);
- pliers;
- compass;
- hammer;
- pencil;
- knife with sharp replaceable blades.
When assembling furniture and creating large parts, straight cuts are made without artistic wood cutting. In this case, experts recommend using an electric jigsaw. When sawing small parts and curly elements use hand tools.

When choosing a tool, care must be taken to ensure that it is suitable for the job being performed.
To cut a high-quality part with your own hands, high-quality raw materials are used. The electric jigsaw must be held vertically, without tilting or loosening, making smooth up and down movements while working.
In this case, the plywood moves towards the tool. The master must ensure that the jigsaw does not vibrate. Otherwise, the wood will split. Improper use of the tool may cause it to get stuck in the wood or cause the file to break.
In the first case, the product will be damaged, and in the second, the master may be injured. Before cutting out the internal contours, you need to make holes with an awl or drill. Then the tool is inserted into the holes and sawing begins. Experts recommend monitoring the position of the saw teeth and making turns without stopping cutting. The blade must be sharp, well tensioned, correctly positioned and firmly fixed to avoid injury.

A pattern carefully applied to the surface of the plywood is half the success when creating a high-quality part.
A pattern carefully applied to the surface of the plywood is half the success when creating a high-quality part. To do this, use pre-prepared sketches and tracing paper. The cost of tracing paper is low, but the process of transferring an image onto plywood will require high concentration and precision of movements.
Transferring patterns onto wood using tracing paper can be replaced by projecting an image. The required pattern is displayed on a sheet of plywood using a projector. The working surface must be firmly fixed so that the pattern does not move. The disadvantages of the method are the need to purchase a projector, the cost of which is an order of magnitude higher than tracing paper. This technique is used to transfer small images. The third way to transfer a picture to work surface– self-adhesive paper. The sheet with the image is glued to the plywood. Using this technique you can get precise lines.
Cutting out simple shapes

Cutting simple shapes from plywood is quite simple, you just need to strictly adhere to the drawn lines.
To cut simple shapes from plywood, it is recommended to correctly transfer the drawing to the surface, following the rules for working with hand tools (taking into account the lines marked on the wood).
Arcs and smooth lines are cut out without turning the tool, but by directing the teeth strictly along the line. You can make neat obtuse and acute angles if you know a few nuances. Obtuse corners are cut using the rotating technique (the craftsman makes a straight cut and then unfolds the plywood sheet).
Loop formation is suitable for creating sharp corners. To do this, you need to cut out one side of the corner, and then a loop is cut along the outer contour, allowing you to immediately create the 2nd side of a sharp outer corner. The following sequence of actions helps to make neat internal cuts:
- make holes for cutting;
- cut the sheet according to the pattern to the top of the corner;
- return the plywood to its original position;
- cut out the 2nd side of the corner.
For creating decorative elements Using a jigsaw, the craftsman will need plywood, tools, good lighting, and an eye. The work is done slowly and carefully. Haste can result in uneven corners and oblique cuts.
Help for beginners step by step instructions, advice from professionals (to create artistic elements you need to know special techniques for working with a jigsaw) and regular practice. Sawing with a jigsaw requires patience and diligence. You can decorate the interior of your home and office with decorative wooden products made by yourself.
Plywood. Friends, do you know what is hidden under this word? So I'll tell you. This is a wooden laminated board. And it turns out as a result of gluing an odd amount of veneer. To make the material different, glue it so that the fibers are perpendicular to the previous layer.
What can be made from plywood?
Beginning craftsmen with “golden hands” are recommended to start their work from this material. This versatile material is famous for its versatility and ease of processing. Photos of plywood crafts for clarity. With the help of this material we have New furniture, children's environmentally friendly toys. After all, what do people value? That's right - health! With such material there is no need to think about the harm to the human body.

How wonderful it is to walk around fresh air, Being in country house. But every owner dreams that the home is much more comfortable and looks more promising than the neighbor’s!

All this is real, don’t be lazy, take the design of the site into your own hands. A little creativity, imagination, patience and your home or cottage will become the center of the universe!


You may already have some ideas beautiful crafts made of plywood that you once read in your favorite magazine. And you are ready now to bring them to life. For such work you don’t need to be a famous master, the main thing is to have your own opinion, different views on some things, and a little imagination.

We decided to make the job easier; in this article we have collected for you the easiest plywood crafts for beginners. At the beginning, I would like to note that once you have decided on the type of work you want to do, you should pay attention to the quality of the purchased material.

So, for a workpiece that will later be painted, varnished or other type of processing, you can take a cheaper variety. After all, all the “jambs” will be hidden under makeup. And if you really want to leave the product its original appearance, you will have to spend a little of your savings.


Having studied in detail this material, you can also find drawings of plywood crafts for making the desired item.

Curly shelf for small items
We are creating an image, and we will then work on it in detail. The next step is to apply this data onto a piece of wood with a simple pencil. If the diagram is very complex, use a carbon copy. Mark the area that we will later delete. We make a hole for the jigsaw to start working.

Shelf manufacturing process
- After inserting the file into the hole, we clamp it with screws for precision work.
- Using light movements, move the sheet to cut the required shapes
- Move away from italics - nothing, just move the jigsaw back a little and start moving from the problem area

How to cut correctly with a jigsaw
Important! To make it easier to work with the tool, it is recommended to choose a surface that is waist-high.

garden snail
This figure is perfect for working together in a family circle. Even a child can do simple elements of the work.

- First you need a sketch of a snail on paper.
- We transfer the drawing to plywood. Or you can immediately draw what you want on the tree.
- We cut out the figure.
- Next we submit it for processing different colors children. They will be happy to complete the task.
- To brighten the colors, you can varnish the top or apply a second coat of paint.

This is what step-by-step instructions look like on how to make a craft with your own hands.

Make only children's figures of the highest category, so that the child does not get hurt or get a splinter on his arm. The finished item must be carefully processed with two different types of sandpaper.

Tree 4 seasons
The work is aimed at the development of children. By collecting everything according to the instructions, you can easily help your heir understand the quirks of our world, understand what time of year it is now, and what will happen tomorrow.

- Draw a tree template for the product in the amount of 2 pieces
- Cutting out a circle for the stand
- We carefully polish the parts
- Make a cut on one template from above, on the other from below
- Connect the parts crosswise and secure them to a round stand using self-tapping screws.

Each side symbolizes the season; we need to creatively decorate our tree with small details. The first side is summer, we glue butterflies, green leaves, sun, apples. The second is autumn, orange and red leaves, pumpkins, birds. Third winter - white snowflakes, cotton wool snow, snow woman. Fourth spring – we attach flowers, bugs, birds.


Make all the details with felt, paper, and decorative figures. It is better to attach it with double-sided tape. The output is very interesting designs your garden plot.

- Interesting curly images
- Flower beds
- Newspaper collections
- House for tits
- A variety of fun fences

I like to update my garden with different figures made from practical wood. I take the moisture-resistant option and go!

The product must be treated with special paint or a moisture-repellent agent, otherwise you won’t be able to admire its beauty for a long time. Impact environment doing their job...

Here is a simple master class on crafts made from plywood.

Such unusual look For some reason, they undeservedly began to forget about the decorations of their garden. YOU will become the unique owner of a fairy-tale courtyard, for example, by decorating a small fantastic corner using this method.

Photos of plywood crafts


An electric jigsaw is used by home craftsmen to create beautiful products made of plywood and wood. Such crafts are used in the most for different purposes. They can be decorative or serve as household items. Every home craftsman who is interested in this activity should know the features of working with the tool.
You should learn more about how to use the “miracle jigsaw” and what can be cut with it.

Subtleties of working with a jigsaw
A jigsaw is a universal device that is used for cutting shaped products from various materials. All you need is to choose the right canvas. It is important to understand how to cut out shapes of complex shapes. Many novice craftsmen need to figure out how bevels on boards and various constituent elements crafts. Electric jigsaws work best when cutting wood coniferous species. However, the thickness of the elements from which cutting is performed should not exceed 3.8 cm.

Blades that will be inserted into a jigsaw quite often bend and leave beveled edges. A straight cut is usually achieved with a well-sharpened blade. However, you should not put too much pressure on the tool while working.

You should first start the saw at the highest speed, and then select the blade angle. This will result in fewer chips. In materials that are highly brittle, it is necessary to drill holes. This will allow you to saw off the workpiece without unnecessary risk. As a result, there is no chipping of the part.
To ensure fast cutting, coarse blades should be used. However, it should be taken into account that when choosing such consumables, it will be more difficult to sand them later. Blades for electric jigsaws are made in such a way that the cut is made when the blade moves upward.

Choosing the Right Blade
Choosing a blade for an electric jigsaw is a major consideration when cutting wood and plywood. Often a jigsaw lies idle in a home craftsman's household. However, when it is necessary to perform complex pattern, this tool is needed more than ever.
Quite often, an electric jigsaw is used as a tool for cutting a hole in a tabletop or during installation. kitchen sink. This tool is also used for cutting metal. When using other saws, it is often impossible to complete the assigned tasks. A jigsaw is a universal device. Both beginners and experienced people can work with it House master. As a result, you can get excellent results using different materials- plastic, wood, plywood.

How to use the tool
A jigsaw is used for a variety of tasks. Its main function is to cut curved shapes into wooden products. Getting smooth curves using this tool is quite easy. The base of the tool should be kept level on the workpiece. When the preparation is completed, you can begin the main work. Then the engine is turned on and the device is slowly moved along a pre-marked line, at a distance of 2 mm from it. Fine sanding is done later.

The saw should be moved at such a pace that the blade cuts the material easily without any deflection. A jigsaw works great when cutting boards crosswise. A stop must be used if a perfect cut is required. Bevel cuts are fairly easy to make using a jigsaw. Before work, it is necessary to firmly secure the workpiece.
If an oblique or vertical cut is performed, the distance between the blade and the fence is set to the same as on circular table. If you need to make a precise and long cut, it is difficult to work with a jigsaw. In this case, first use circular saw. The final cutting of the element is performed with a jigsaw. It must be pressed firmly against inside marked line.

Where to start
First is well organized workplace. Fulfilling this condition is especially important for high-quality cutting. If the space is arranged correctly, work will be convenient and comfortable. This condition is necessary to create a quality product.
The thrust structure is a special machine. People call it “swallowtail”. This table is made from rectangular boards. It has a wedge-shaped incision that goes into work area. Dovetail attached to the edge of the table.

Job electric jigsaw carried out standing or sitting. The workpiece should be located at a distance of 40 cm from the eyes. It is necessary that the lighting lamp be installed in front of the master. It is placed at an angle to the surface.
Tool preparation
The saw blade in a jigsaw must be fixed in a strictly vertical position. The teeth should point down. Before work, you need to stretch the fabric well. The degree of tension must be adjusted by compressing the frame. The device must be rested against the edge of the table. Then you should tighten the lambs with pliers. When straightening the frame, the canvas will stretch.

To cut out parts with a jigsaw small size, or shapes with sharp contours, you need to choose small files. This requires using fabrics with a large number of patterns per inch. When using them, the jigsaw does not jam when making turns. The cut is created neat and thin. If large-sized plywood products are made, it is necessary to use blades with large teeth.

How to cut with a jigsaw
To obtain an accurate cut, a number of conditions must be met:
- The hand holding the jigsaw should only move vertically.
- All movements must be made as smoothly as possible, without jerking. In addition, they must be performed with maximum amplitude. This is necessary to use the entire canvas.
- With the second hand, the workpiece turns smoothly during operation.
- Do not put too much pressure on the workpiece with the saw. No lateral pressure on the blade is allowed.
- Artistic sawing is carried out only when the file moves from top to bottom. For this reason, the reverse movement must be performed without pressure.

When working with a hand jigsaw it must be driven not along the marked line. The canvas should be drawn along the inside of the contour. This is due to the presence of a kerf after sawing. After completing the work, one of the clamps should be loosened. The frame of the device should not lose its elasticity.
Jewelry box
You can make a beautiful and spacious jewelry box for Valentine's Day or International Women's Day. To complete such a craft, you will need to use an accurate drawing. The work is divided into several stages.

Preparing the work area
Before you start cutting out the parts of the box, you should prepare your working space. A special table is installed for this purpose. The craft will be created on it. In this case, the following rules are observed:
- There should be no unnecessary items at the table while working.
- The cutting device should always be at hand. A specific place is reserved for it.
- Crafting table. It is placed in a ventilated area. The room should be light and spacious.

However, it is not always possible to install a table for cutting with a jigsaw in the right place. TO ordinary apartment The workbench is usually placed on the balcony if it is insulated. At the same time, you can work on crafts in any weather.
Plywood selection
For the box you need to use a plywood sheet. When choosing a workpiece, you should pay attention to defects that often appear - cracks or knots. The workpiece is selected with a thickness indicated in the diagram. To transfer the drawing to the material, you should:
- Sand the workpiece with sandpaper. You should start with coarse-grained material. This treatment ends with fine-grain sandpaper.
- The surface must be level. To do this, you need to fix the sandpaper in the sanding device. If you don't have one, you can take a small block and wrap it in sandpaper.
- Grinding is carried out along the layers of wood.
- The workpiece is ground until its surface becomes as smooth as possible.

After such preparation, you should transfer the craft template onto it.
Transferring the template to a plywood sheet
Before starting cutting, you should transfer the prepared drawing to plywood blank. First you will have to print the drawing on paper. To transfer, you must have tracing paper and a pen. First, the template is attached to the workpiece with tape. Having a blank in front of you, you should think about how to cut out the different elements of the box, saving the available material as much as possible.

Sawing out the box
When cutting, you need to adhere to some rules:
- The jigsaw should be positioned perpendicular to the product.
- It is necessary to ensure that all movements are performed as smoothly as possible. You should not rush while cutting - this way you can make a mistake and ruin a piece of material.
- It is necessary to use a sawing table.
- First you need to cut out the internal elements. Only after this they begin cutting the contour.

When leaving the cutting line, it is necessary to correct the line with a needle file while assembling the product.
Advice! During work, your hands will get tired. In this case, productivity drops significantly. Fingers and eyes get seriously tired. All this can lead to hand injuries. This is why it is necessary to take breaks from work.
Assembling the box
Before assembly, you must familiarize yourself with the product drawing. Matching the pieces of a jewelry box does not require any delicate work. Before gluing different elements, you need to make sure that they can be assembled together without problems. After several assemblies of the product without any difficulties, you should begin gluing the parts. Typically, a PVA composition is used for this purpose. During operation, it is necessary to eliminate any glue leaks.

Assembling a steam locomotive model
When the material is prepared and the drawing is printed, you should begin the process of transferring the diagram to the workpiece. In this case, it is necessary to take into account some operating rules. Many home craftsmen tend to transfer a drawing onto plywood using only a copy and a pencil. However, you can also use the “Black Ribbon”. When choosing this tool, the drawing is glued to the workpiece. Then the diagram is washed off the plywood with water, leaving only the marking lines.
Then you can make holes in the parts of the future locomotive. The parts of the locomotive contain parts of grooves cut out from the inside. To make such elements, holes should be made in them hand drill or an awl. The holes must be at least 1 mm in diameter. To avoid damaging the table surface when creating holes, you should place a board under the workpiece.

Now you can cut out the parts. You should not rush when cutting. The basic rule is to hold the jigsaw at right angles to the workpiece. All elements must be performed smoothly, avoiding unevenness.