How to renovate an old apartment. Apartment renovation: step-by-step instructions and stages of work
If you have planned to renovate a room with your own hands, but don’t know where to start, by reading the materials on our website “Remontik” you will solve this problem. Following our advice, renovation work It won’t take too long, and the final result will please you.
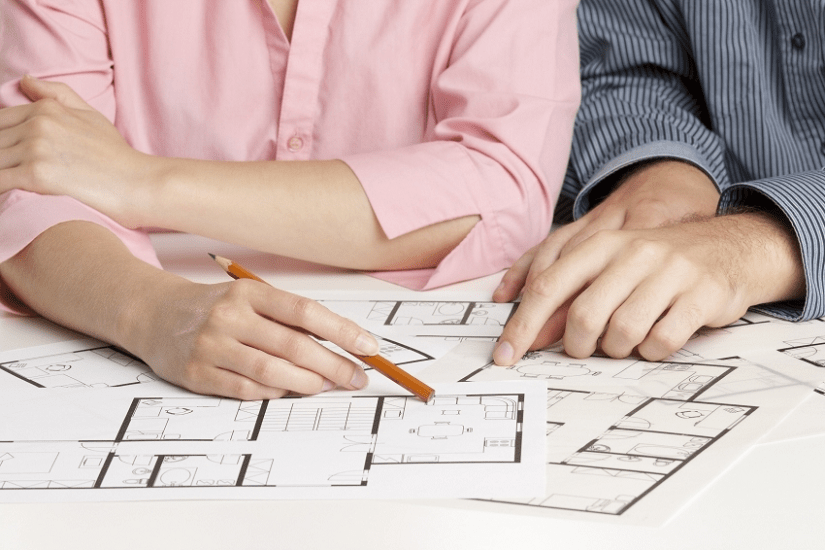
First of all, you must understand that the renovation of the room needs serious preliminary preparation. Most important point is preparation detailed plan repairs taking into account all the nuances. Let's consider tips on organizing repairs from professionals:
- What type of repair to choose: major or cosmetic.
- Preparation of interior design and detailed renovation plan.
- Determine the main stages of room renovation.
- Make a list of necessary tools and materials.
- Plan upcoming expenses.
- Clear the premises.
- Where to start renovating a room with your own hands.
Now let's look at each of the stages in more detail, attaching photos and videos to them.
What kind of room renovation is needed: major or cosmetic?
First of all, you need to decide on the volume and complexity of future repairs. To keep the apartment clean and bright, it is enough to carry out superficial, cosmetic repairs: replacing wallpaper, replacing old linoleum, whitewashing the ceiling, painting the walls, etc.
If you are planning to get rid of everything old and boring, decide on a major renovation with replacing windows, leveling walls, installing new floors, and modern ceilings. Your home will be transformed and become beautiful and new.We do not recommend refusing the help of professionals when carrying out overhaul. First of all, this concerns the creation stylish design premises, including redevelopment, as well as the demolition of some partitions and walls.
When planning repairs, starting from your financial capabilities.
Choose an interior design and decide on a renovation plan
At the very beginning, decide on the design and interior of each individual room that you are going to change in your apartment. You can turn to an experienced designer for help, which will slightly increase your financial costs for repairs.
For the room where you are going to carry out renovations, you need to make detailed drawings of all stages of work, in their clear sequence.
We advise you to complete five repair sketches for everyone separate rooms. We recommend showing the top view of the premises in the first drawing, and each wall in the other four drawings. Complete all drawings detailed description, as well as a plan for sequential repairs, which will avoid inaccuracies and simplifications in work.
- Furniture locations. Those walls that catch your eye the most need to be given maximum attention and the highest quality finishes used.
- Think carefully about where it is best to place chandeliers and lamps so that the light can better illuminate the room.
- Considering the location of household appliances, mark the locations for the outlet. In order to then competently design the installation of electrical wiring in different rooms.
- Consider the location of the main decorative elements: mosaic, paintings, brick wall.
In the repair plan, it is necessary to indicate the required finishing option: painting, wallpapering the walls, etc. To divide the room into separate zones, we recommend painting one of the walls with a different color to focus attention and visually divide the room. Such moments also need to be reflected on the plan.
How to correctly determine the order of renovation of rooms in apartments
According to the advice of experts, in order to avoid excess dust and dirt when performing repairs, we advise you to first carry out repairs in rooms that are located away from front door. The last stage renovation, it is better to choose passage rooms, as well as a corridor through which construction tools and materials will often be carried. In order not to scratch or stain the finish of an already repaired wall, and also not to damage the new floor.
Cellophane film can act as additional protection for the renovated room (it is fixed with outside doors). It provides reliable protection of the premises from construction dust, dirt, plaster, paint and accidental damage.Repairing a room in an apartment: do it yourself or have it done by specialists
You should not carry out all repair work yourself. If necessary, repairs or only particularly complex activities can be entrusted to experienced specialists. Firstly, knowledge and experience will allow them to carry out repairs efficiently and quickly. Secondly, you don’t have to buy expensive tools with which to pour screed or lay tiles.
Even if the process of installing an interior door seems simple to you, the slightest inaccuracy in this regard is unacceptable. Of course, you can hang and arrange furniture in the kitchen, level the walls and do a little painting yourself. However, entrust more complex repair work to specialists so that you do not have to redo them later, which will significantly increase financial costs.
Make a list of necessary tools and materials
- After choosing the design of the room, interior and furniture, you need to make full list building materials. Their total cost and quantity directly depend on the repair work, as well as the methods for carrying it out. If you have the necessary budget, it is worth purchasing building materials with a small margin.
- Prepare a list of decorative elements: shelves, holders, paintings, mirrors, etc. Start shopping with selected decorative elements. If the planned decorative element is not available, you can quickly change it or develop a new design plan for renovating the room.
- Prepare a list of necessary tools to complete the repair. To do this, use the advice of a consultant in construction stores in your city or professional repairmen.
Calculate your expenses
When the preparatory work has been completed: sketches and repair plans have been drawn up, lists of all tools and materials have been prepared, a decision has been made about the possibility of repairing the room on your own or with the help of repair specialists, you will calculate the average total price of the planned repair.
Don't rush to buy all the materials when you first visit the store. In the compiled lists of tools and materials, indicate the cost of various stores, which will allow you to save on purchases. Be careful when choosing the services of a construction team. Special attention should be paid not just to the cost of repair work, but also to reviews from our friends about the quality of repair services.
Clear the premises
To provide reliable protection furniture from damage, construction dust and dirt, collect it in the central part of the room. After this, cover with plastic wrap. Therefore, free up access to the ceiling and walls. We recommend moving expensive equipment and clothing to other rooms.
Do-it-yourself room renovation: where to start and what is the sequence of work
Repair work should start with the most dusty ones: replacing windows, window slopes and installation of new window sills. This way, you can avoid dust and dirt when performing painting work, when opening windows is prohibited to avoid increased humidity and temperature changes. When slopes, windows and window sills are installed, cover them with hardboard or plastic film to prevent accidental contamination and mechanical damage.
Take care to mark out places for installing additional sockets, and do the wiring of electrical appliances. At this stage, do not install sockets or connect them to the panel.Using welding work(for example, when replacing batteries), do them simultaneously in different places in the apartment to quickly complete this difficult and dusty stage of work, which sometimes includes breaking down walls.
Before repairing floors, walls, ceilings, you need to check their condition with water or laser level. Start by applying the thickest layers of mortar. While they dry, you can do other minor work no downtime.
Upon completion of this preparatory stage Proceed with the repair, performing it in the following sequence: repair of the ceiling, walls, floor. First, work is carried out using putty, gypsum, cement mixtures. Then they begin installing the floor, doors and slopes.
The last stages of repair work:
- painting or pasting the ceiling;
- installation of thresholds, baseboards and platbands.
By following the correct order during repairs and having clear plan actions, you can avoid many mistakes, save time and money. This is one of the main components of durable and beautiful renovation, along with compliance with technology and the quality of materials used.
Most happy owners of apartments on the secondary market are concerned about the arrangement of their property. Before you start repairs, you need to decide on its scale. Some secondary housing only needs cosmetic updating.
But it happens that a major overhaul of secondary housing is required with the replacement of all communications. If you do all the work yourself, it will work out good savings. Before you start remodeling, you need to decide what work will be performed and where to start the repair.
Types and types of repairs

Here the following stages usually take place::
- Coordination of premises redevelopment.
- Replacement of electrical wiring, sockets, additional lighting. Replacement of water supply and sewerage pipes, as well as plumbing fixtures. Heating system update.
- Replacement of window frames, interior and entrance doors.
- Product of necessary additional work before finishing walls, floors, ceilings.
- Replacement of old finishing materials.
- Installation of built-in furniture and appliances, if provided.
Redecorating

May be limited only to changing finishing materials on the walls, floor and ceiling, based on ready-made design project. But before such a replacement, it is necessary to carry out thorough preparation surfaces.
There are three reasons for this:
- So that new decorative coatings do not fall off along with the old putty or plaster.
- To make new ones Decoration Materials did not deteriorate while working with them.
- So that the chosen finish looks properly.
Counting expenses

To ensure that the work does not end prematurely due to lack of material support, it is necessary to correctly calculate the upcoming expenses. Depending on what you are going to repair, the necessary measurements of the room are taken.
Knowing the dimensions of the room, you can make any calculation. Then specialized stores monitor the prices of building materials of interest. It is worth making a separate expense column for kitchen renovations if built-in appliances are installed.
Which room to start renovating an apartment from?

It is better to update several rooms in stages, starting with the furthest one. This way you can avoid excess dirt that is formed from construction waste. This sequence will also help solve the problem associated with emptying the room being renovated from furniture.
Where to start renovating a kitchen - by drawing up a design project. He will show you exactly where to place sockets with switches, where to route the pipes, and at what height the apron should be laid out working area. Therefore, it is better to do a kitchen renovation step by step, based on the design.
Sequence of room repairs
In order for the renovation of the apartment to proceed smoothly, it is necessary to follow a certain sequence.

- Dismantling works
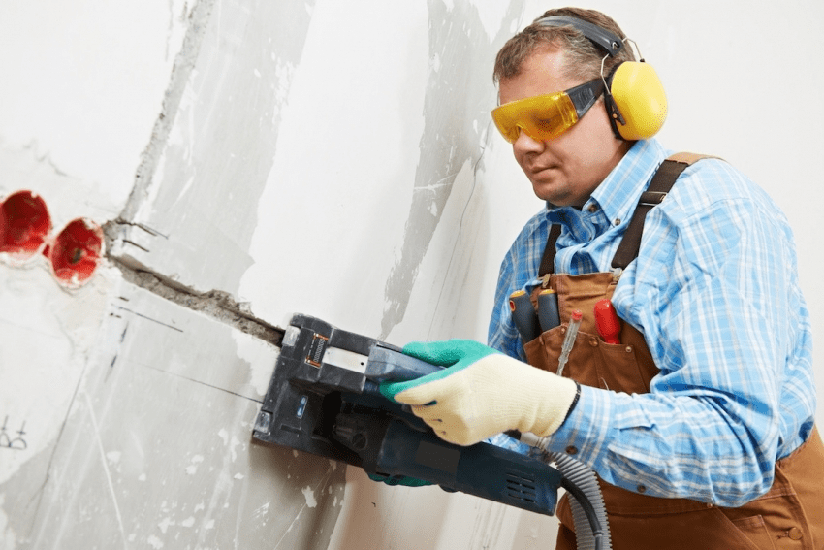
The beginning of a major overhaul begins with dismantling work. Old finishing materials are removed from walls, floors, and ceilings. If necessary, openings are changed and unnecessary partitions are demolished.
Carrying out repairs studio apartment, it is better to dismantle it in all rooms at once - in the room, in the kitchen, in the bathroom with toilet and in the corridor.
This will save you money on garbage disposal. If repair two-room apartment and more, then dismantling can be done one by one, in the order in which rooms will be repaired.

- Surface preparation
After dismantling, the result was an apartment without finishing. In the empty “box” the electrical supply system is replaced, all openings are prepared, new additional partitions are erected and the walls are plastered. Water supply pipes, sewerage pipes, heated towel rails and heating radiators are being replaced.
You need to pay close attention to the water supply and electrical systems when renovating your kitchen and bathroom.

- Alignment of walls and ceiling
As soon as everything electric wires and the pipes will be hidden in special grooves, the walls and ceiling will be aligned by plastering and puttying. It's worth starting from the ceiling. The evenness of surfaces is checked with a level.

- Ceiling repair
The leveled ceiling can be painted, wallpapered, or suspended. It all depends on the design of the room.
The kitchen or bathroom ceiling must be made so that large condensation does not form on it. Otherwise, mold will form in the future.

- Replacement of windows and doors
When replacing windows, all cracks must be carefully insulated or filled polyurethane foam. Then the window sill, slopes, and ebbs are installed outside. During the entire process, it is necessary to ensure that the installation is even. This is necessary to ensure that the window does not warp during operation.
It's better not to shoot from windows protective film until the completion of repair work. Door frames are usually easy to install. The main thing is that everything is level.

- Floor repair
After work on the ceiling and walls is completed, you can begin to work on the floor. Making repairs three-room apartment, furniture and things can be transferred to the new floor only after the baseboards have been installed.
The old covering is removed from the floor and a leveling screed is made. Only after the floor is level over the entire surface can you begin laying decorative materials.

- Bathroom and toilet renovation
When repairing a bathtub with a toilet, you should pay special attention to the tightness installed pipes and water supplies to plumbing fixtures.
Decorative coverings that are not afraid of moisture are chosen for such rooms. A new bath, shower, toilet and bidet are being installed. In rare cases, the bathtub enamel is restored.
Expert advice on how to avoid mistakes during repairs
- When purchasing materials, it is necessary to make a small reserve to avoid shortages during repairs.
- So that work doesn’t get stuck, it’s worth preparing everything necessary tools in advance.
- The dust will settle much faster if you spray water with a spray bottle during dismantling or gating.
- Demolished partitions should not be related to load-bearing walls, since their dismantling is strictly prohibited. Especially if it is a panel house.
How to renovate an apartment
First of all, decide what kind of repair you need: cosmetic or major. Quite often it happens that the desire to re-stick wallpaper entails replacing doors, baseboards, ceiling trim, etc., which leads to much higher costs, disruption correct sequence works and repeated alterations. Major repairs require careful planning, strict adherence to the technological process and large material investments. Decide on the future interior. Based on your financial capabilities, you can do the project yourself, or invite experienced designer. In the first option, you will have to completely focus on your taste in choosing wallpaper, tiles, flooring, etc., and also independently calculate the required volume and quantity of materials. A specialist will help you choose the right ones color solutions, modern finishing materials and stylish accessories in accordance with fashion trends, however, such a project will not be cheap. Be sure to make a rough estimate based on the design project and available financial resources. Then compare the cost of materials in construction stores, markets, home goods hypermarkets and choose the best offers. Based on this data, adjust the estimate and evaluate your material base. You may have to take out a loan or make changes to the project if it turns out to be too expensive. When planning expenses, it is necessary to take into account who will carry out the renovation of the apartment: on their own or with the help of hired workers. Some types of work that do not require special preparation can be done independently, for example, hanging wallpaper, laying tiles, whitewashing the ceiling. But such activities as replacing electrical wiring, installing plumbing, leveling floors and walls, installing doors and windows, etc. are best left to specialists. If you decide to hire a contractor for repairs, study the offers on the market for construction and finishing works and services, read reviews on the Internet and choose a contractor that has proven itself in the best possible way. Don't go for the cheap: low price may indicate appropriate quality. Also, do not trust companies that promise to do repairs in a short time, since it is very likely that the speed in this case speaks of neglect building regulations and norms and violations of technology, and this will entail the need for repeated rework. Relying only on your own strength to carry out repairs, draw up a clear plan and determine the sequence of work. In particular, it is advisable to update the bathroom and toilet first, and the hallway and balcony last. When doing a major renovation, start by replacing electrical wiring and heating radiators, then level the walls and floor, install new doors and windows. Next - finishing the ceiling, laying the floor, wallpapering or painting the walls. Renovating an apartment is a difficult and troublesome task. But if you have a goal, a firm intention and a concrete plan, success is guaranteed. The main thing is not to deviate from the intended path and not to stretch out the renovation of the interior for years.
Before starting renovations in the apartment, it is necessary to carry out preparatory work. The main thing is to carefully plan every step. To begin with, find out the current prices for apartment renovations on the website in order to plan your budget correctly. This will avoid extra costs in time and finances in the future. Now you can move on to the work plan. The entire scope of work is conditionally divided into several stages, which must be performed strictly one by one. Let us consider in detail the stages of repair work and the rules for their implementation.
We are planning renovations
The first thing you need to do before a major renovation of an apartment or house is drawing up detailed plan your home. This diagram should indicate where pieces of furniture, interior, Appliances. This will help you decide where to start renovating your apartment, where to place sockets, switches, and chandeliers.

Thanks to the plan, you will be able to install pipes and wires without complications and the first time. After all, the comfort of the room directly depends on the rational placement of these elements.


If the plans are not only cosmetic work, and turnkey apartment renovation with redevelopment, then initially it is worth starting to demolish or build walls. Next, you need to decide on the style of your future home - will you stick to one style when decorating the entire room, or will you combine the future interior from several styles.

People who do not have sufficient experience in this matter are advised to seek advice from professional designer. A specialist will be able to develop best option interior design, taking into account the specific layout and personal wishes of the client.

After completing the planning, proceed to the financial issue - calculate what materials and in what quantities you will need. It is better to purchase them in specialized stores.

Give preference to well-known and proven brands, the quality of the range of which corresponds to their price. Savings on materials may result in additional financial costs in the future.

Rough work
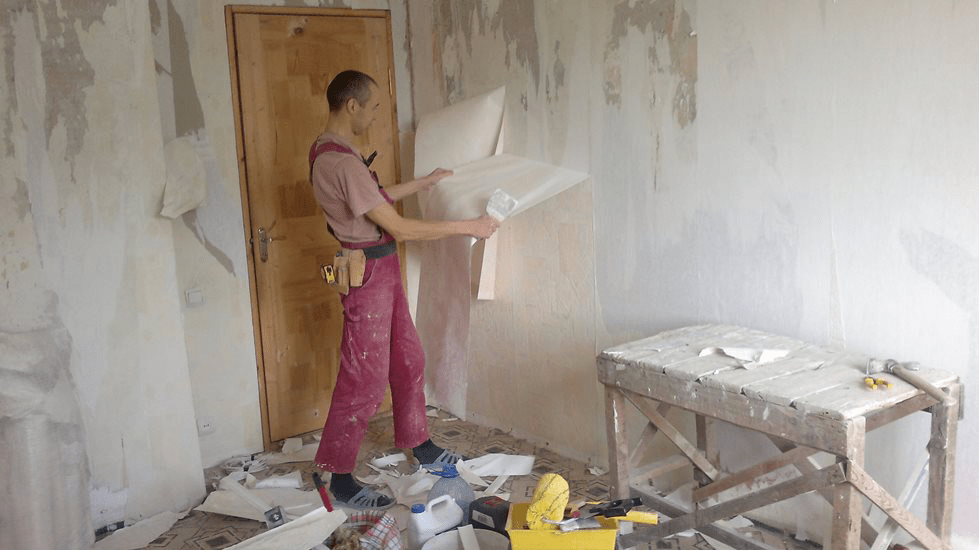
It is necessary to begin transforming the premises by performing rough work. These include dismantling the old coating. To new interior looked attractive and lasted long years, tiles, wallpaper or whitewash must be removed.

If you do not plan to change the floor covering, it must be protected from possible damage in the process. construction work. To do this, use a thick plastic film, the edges of which must be firmly secured with masking tape. In case of planned large-scale work, protect the floor from mechanical damage It’s more convenient to use sheets of cardboard, which are much stronger than film.

It is not recommended to replace windows and interior doors at the first stage of repair. After all, when dismantling and puttying is carried out, a significant layer of dirt will settle on them, which will be difficult to get rid of. Only cash withdrawals are required.

Electrical and plumbing
At the second stage, it is necessary to do the dirtiest, but at the same time the most important part of the work. It's about about electrical and plumbing. These types of work should be treated with the utmost responsibility, because in order to correct the mistakes, you will have to re-do major repairs in the apartment. For this reason, it is not recommended to skimp on the quality of wires and pipes. After all, they can only be repaired after destroying the wall.

Initially, a corrugation scheme for each individual wall is drawn up. It is recommended to keep these diagrams after repairs to avoid erroneous damage to pipes or electrical wiring nails. Lay the wires in the prepared groove with required section, as well as pipes, carefully seal the grooves.


Window replacement
It's time to replace your old windows. But if you are renovating an apartment in a new building, you won’t have to do this part of the work. After all, in modern houses High-quality metal-plastic windows have already been installed.


Anyway window frames and glass should be protected from paint using film or paper curtains pleated. These curtains are quite high quality and their price is not high.

After finishing the work with the windows, you can begin preparing the floor and ceiling. You need to do the following:

- level the walls;
- seal seams and cracks;
- putty.


The building materials used for the rough repair stage do not necessarily have to match the base materials. But they must be of high quality.

Surface priming
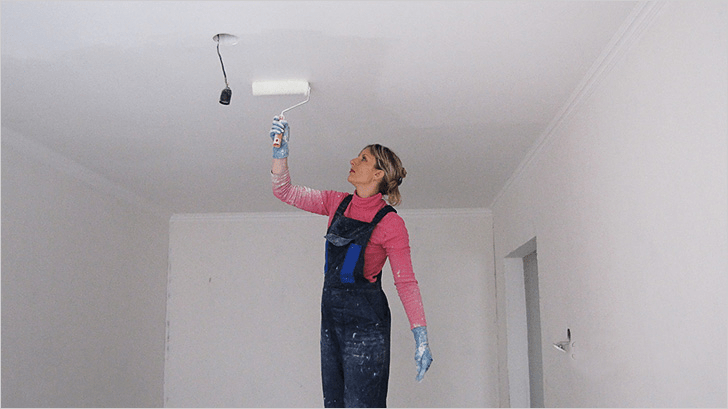
Next, start applying primer to the walls and ceilings. Thanks to this coating, the strength of these surfaces increases. A high-quality primer contains substances that seep into the surface, connecting its small particles. Be sure to wait until the primer is completely dry. Only after this can you start painting the ceilings.


The next step is to level the floor. To do this, screed and fill are done. But it will be much easier and faster to use modern specialized solutions that level themselves. After all, apartment renovations in 2018 should be done using new technologies.

While the floor dries, all work stops. If you break this rule, you will damage its surface and the work will have to be redone.

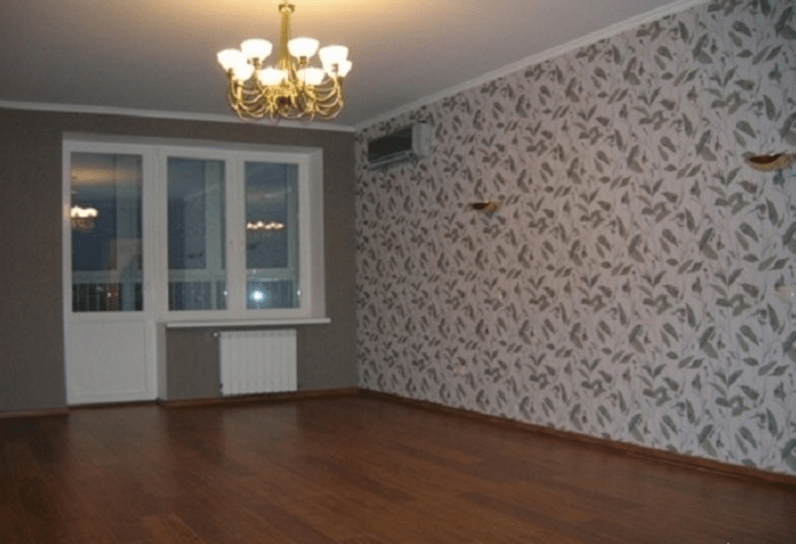
Wall finishing materials
You choose the materials that will be used to decorate the walls solely at your own aesthetic and financial discretion. The most popular finishing method is wallpaper. The range of this material is quite rich in terms of color, size, texture and material. Often they also turn to painting, or decorative plaster walls

For those who like more daring decisions, there are other options. The only limitation is your imagination; the materials must be in harmony with the overall interior.


If you want to save money, you can decorate the walls of the room with leftovers from several types of materials. This solution will emphasize your originality and significantly reduce the cost of repairs.

Floor decoration
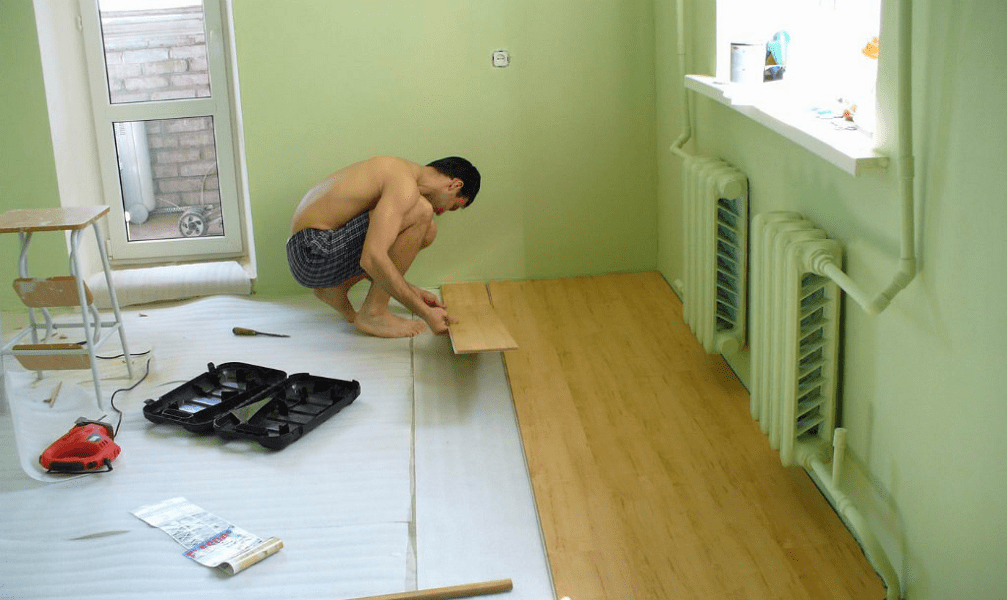
When the walls are already decorated, start covering the floor. The covering can be made from linoleum, laminate, carpet, piece parquet, or parquet boards.


A popular solution in modern interior is the use floor tiles. But you can start laying it only after finishing the ceiling design.

The finishing touches of the renovation
This stage is the final one. Now you can start installing door frames, thresholds, baseboards and more. Assemble and install furniture, appliances, and decorative interior items. After which all that remains is to clean up and admire the new home.


Photos of the main stages of renovation in the apartment


The issue of renovating a room almost always depends on the budget for future work. Most often, the owners of an apartment or house are faced with a choice - to renovate the room with their own hands in a cosmetic way, without postponing the matter, or to plan a major overhaul for the indefinite future with redevelopment and a serious update of the design. Most experts in such a situation recommend carrying out cosmetic repairs rooms, during which the vast majority of problems with the interior of the room can be solved.
How to properly approach the organization of renovation in one room
Starting a room renovation is always inconvenient and even scary, especially if you don’t have enough experience, and the only assistants at hand are a cheat sheet on how to renovate a room with your own hands for beginners. But, as a rule, uncertainty and doubts pass when the scope of future work becomes clear and the question of in what sequence to make repairs in the room is resolved.
Therefore, the first step is to draw up a master plan for cosmetic repairs, and most importantly, before attempting to make repairs in a room, it is necessary to draw up a detailed estimate for the purchased materials and consumables. This required condition, even for renovations in a small room you will need to make a list of several dozen items.
Where to start renovating a room is not important; you can carry out repair work in the sequence that seems more convenient in given specific conditions. Traditionally, renovating a room with your own hands begins with the most “dirty” or rough work and ends with delicate finishing procedures.
A typical list of work or sequence of repairs in a room is as follows:
- The old finish is removed from the walls, ceiling and floor. Removing the floor covering gives the most large percentage dust and dirt, so it is removed first;
- Held rough preparation floors for further installation of new flooring;
- Wiring repairs are carried out, lamps and switches are moved and hung, corrugations are laid out for television and Internet cables;
- The walls and ceiling are cleaned and puttied. If the redecoration plans involve changing the wallpaper to a more modern type finishing, then you will need to level the walls gypsum plaster;
- The ceiling surface is leveled in a similar way. Before whitewashing or painting with water-based emulsion, the ceiling is rubbed down, plastered with a lime-gypsum mixture and a decorative coating is laid;
- Performed decorative finishing walls, glued ceiling skirting boards, the lining of interior doors is changing;
- New is being laid flooring, baseboards are installed, lamps are hung, switches are installed.
Of course, at each stage of room renovation, photo, a large amount of debris and dust will be generated. Not only will you have to regularly clean the room and remove rubbish rubble, you will also need to try to cover areas with already completed repairs with protective plastic film to avoid dust on the surface.
What Shouldn't Be Included in a Room Redecoration
Finishers often call cosmetic repairs a “three-day job”; in order to update the interior of a room, as a rule, no more is required. The list of repair activities does not include the most expensive work:
- Redevelopment of premises with the transfer of interior partitions;
- Replacing the heating system;
- Installation of expensive multi-tiered suspended ceilings;
- Glazing of the balcony and replacement of windows with double-glazed windows;
- Equipment for heated floors in the room.
It is clear that all of the above components of repair require serious financial costs and the involvement of qualified specialists in the work. It will take more than a day or two to carry out such serious events. In addition, such is the specificity of the renovation in the room that, willy-nilly, dust and construction debris spread throughout the apartment. Therefore, the situation is regulated in this way - either cosmetic repairs are made in a single room, or the entire apartment is “stood up” for major repair work.
In general, the redecoration plan includes everything that can be done in a couple of days with my own hands for relatively little money.

The main task of cosmetic repairs
The main goal of renovation work is to refresh the interior of the room, remove minor defects and damage that have accumulated over the years, which are incredibly annoying and interfere with everyday life.
In rare cases, cosmetic repairs become a consequence of force majeure circumstances, for example, flooding of a room by neighbors on the floor above or preparing the premises for renting. There may be many reasons, but the main thing is still maintaining the premises in a comfortable condition for living.

Properly performed cosmetic repairs make it possible to save on the volume of future major repairs. For example, screeding the base of the floor and leveling the walls will at least reduce the time and effort required to prepare for major repairs, of course, provided that the renovation of the room with your own hands (photo) is carried out as conscientiously and efficiently as possible .
The next stage of repair, distribution of costs and load
Budget planning and procurement of materials are rightly considered one of the most difficult stages of redecoration. Especially if you plan to do most of the repair procedures yourself. The reason is simple - amateurs and novice craftsmen have no idea how much specific material will be required for this or that area of work.
In this case, the problem can be solved in two ways:
- Compiled list works and estimates can be shown to an experienced master, which will help calculate the flow rate based on the square footage of the room;
- Calculate consumption based on standard recommendations from building materials manufacturers, increasing the stock of glue, plaster mixtures, wallpaper, flooring by 10% of the calculated figures.
In the latter case, the cost of purchasing materials will increase significantly, but ultimately, the remains of cement, dry plaster and glue can be used for cosmetic repairs of other rooms in the apartment. In addition, having a list often helps to get a bulk discount, so that there are no significant gaps in the budget for a future cosmetic renovation of a room when competent organization there should be no procurement.

Preparatory stages of renovation in a room
The first, most labor-intensive stage has always been and remains the rough stripping of the walls and ceiling. Typically, renovations to a room begin with removing pieces of furniture and sealing the front door with a protective awning. You can use thick plastic wrap or an old blanket. An improvised curtain will protect the rest of the apartment from noise and dust, which, even with very careful work, using a vacuum cleaner and wet cleaning of floors, always accumulates in the room in considerable quantities.
Before repairs, the lamps must be removed; instead of a chandelier, a socket with a light bulb is left in the room. If double-glazed windows are installed in the room, then it would be useful to cover the window opening with film before the repair. It is clear that the film also covers the floor covering; it is easier to roll up the laid polyethylene than to wash the dirt in the room every evening.
Removing old finishes from walls
Preparing for a redecoration takes about a third of the planned time. During this time, you will need to remove the whitewash and wallpaper from the walls of the room. If there are areas with damaged plaster, it will take another day to knock the plaster off the walls.

Old wallpaper is removed either in one sheet or scraped off in small pieces for a long time, it all depends on the glue used. Before removing the wallpaper, moisten the surface with a small amount of water using a spray bottle. After 20-30 minutes, the trellises can be removed in patches. For especially strong adhesives, boiling water and steam are used. In any case, after stripping the old trellises, you will need to use a vacuum cleaner and a stiff brush to remove dust and glue residues.
Peeling and restoration of the ceiling surface
The ceiling is freed from the decorative coating much faster and easier than the walls. If your redecoration plans include sticking polystyrene plates or laying plastic panels, then it will be enough to remove upper layer whitewashing
The situation is more complicated if the ceiling in the room is painted water-based paint or whitewashed with lime. In this case, it will take at least a day to remove the durable layer of old finish.
The most common option for restoring the ceiling during cosmetic repairs involves leveling the plane of the ceiling. In any room of any apartment, the floor slabs lie with a differential of several degrees, which leads to a difference in ceiling height near the opposing walls of the room from 2 to 5 cm.
If time and budget for cosmetic repairs allow, then it is best to level the ceiling using high-quality gypsum plaster.

To do this, plastic slats are sewn onto the ceiling and the plane is tightened with a plaster mesh. Beacon slats are glued with alabaster, guided by pre-tensioned horizontal marking cords. The mesh is sewn on dowels. The total time required to completely level the ceiling in a room is 5-6 hours of work.
In one working day you can complete complete renovation ceiling. The next day you can sand, prime and paint the surface.
Cosmetic repair work to the walls of the room
During cosmetic repairs, walls are leveled and plastered only in exceptional situations, when the situation requires it, for example, the appearance large quantity cracks or chipping of plaster. In addition, the total area of the walls of the room, as a rule, is three times the area of the ceiling, which in itself requires a lot of time and materials.
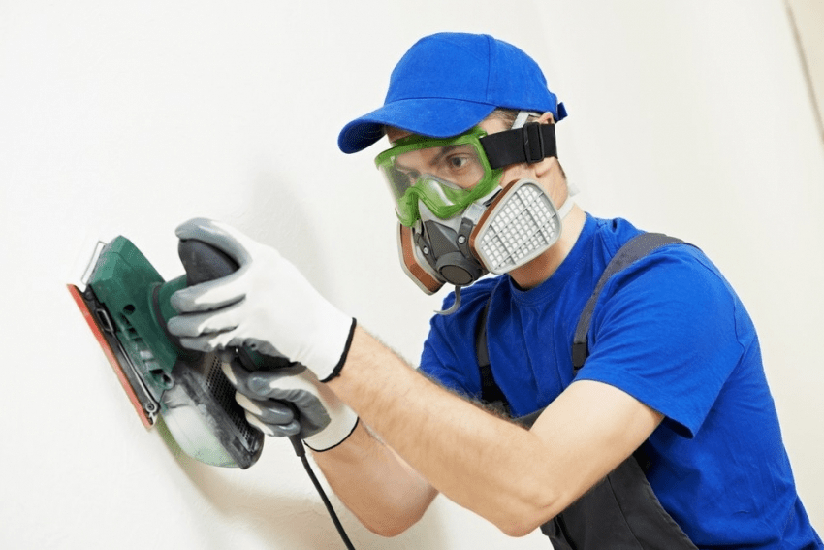
Therefore, during cosmetic repairs, the preparation process is limited to cutting small cracks, followed by puttying and grinding the surface. Sometimes, in order to level the plane of a single wall, particularly problematic areas are sanded with an electric sander.
In addition, at this stage of the renovation work, it is easy to change the profile and configuration of the electrical wiring in the room. It is enough to drill channels in the lower part of the walls to the installation site of new electrical outlets, break through the “glasses” for the trimmers and install the sockets themselves. The corrugations with wiring laid in the channels can be rubbed with plaster or alabaster mass. All work will take a maximum of 2-3 hours. Upon completion of preparation for finishing, the surface is vacuumed and primed.
Rough floor preparation
After finishing the most labor-intensive work with preparing the ceiling and walls, you can move on to cleaning and preparing the floor. If the floors are concrete, with laminate flooring, then cosmetic repairs may be limited to re-laying the laminate slabs, with or without replacing the lining material. Most often, damaged slabs in a room are replaced, after which the coating is polished using wax mastic.
During cosmetic repairs, linoleum coverings are cut out, the base is cleaned down to concrete, primed and covered with a heat-insulating lining based on foamed polyethylene.

If the room has wooden floors, then first of all the floorboards themselves are cleaned and repaired, then the joints are hammered and hammered, after which the surface is sanded and prepared for painting.
Don't forget about garbage and dust
Any repair work, even the simplest and most superficial, is always accompanied by the formation of a large amount of debris and dust. Before repairs, you need to prepare two or three polypropylene bags into which all the garbage from the room will be collected daily. At the end of the day, after each finishing operation, the walls and floor are cleaned of crumbled crumbs and remnants of plaster mortar, and before finishing, the walls are cleaned with a vacuum cleaner or a damp brush.
If the walls of the room are supposed to be leveled with gypsum plaster, then the amount of debris will increase five to six times. It will be necessary to think in advance and find a way to collect and remove 150-200 kg of cement-sand waste screenings from the premises. You cannot send it to the garbage chute or trash cans; you will need to order a special service for the removal of construction waste.
Cleaning redecoration operations in the room
First executed fine finishing ceilings. Usually the repaired and sanded surface is primed and painted. acrylic paint light colors.

If wallpaper is used in the interior of the room, the ceilings can be decorated with non-woven or vinyl wallpaper to match the future wall decoration. A common practice for decorating lamps and chandeliers is to use imitation polystyrene stucco molding and decorative ceiling plinths.

Finishing the walls in a room is considered one of the most important and at the same time time-consuming cosmetic operations. Even taking into account the fact that half the walls in the room will be covered with furniture, a certain part of the walls will still be clearly visible to everyone present in the room. If during cosmetic repairs it was not possible to properly level the surface of the walls, you can hide the imperfections only under the wallpaper. It is best to use trellises on a fabric basis or with a pronounced relief textured surface. Pasting a room will take 7-8 hours or a full working day.

Repairing doors and floors in a small room
The wooden plank floor of the old layout often has to be hidden under linoleum or laminate. In this case, the surface of the floorboards is sanded with a sanding machine, and the joints are sewn together with nails driven at an angle to the board. At the next stage of repair, the floor surface is sewn up OSB boards, after which you can lay linoleum or any other flooring option in the room.

The situation becomes more complicated if the concrete floors are leveled to the level of the screed throughout the apartment. In this case, any floor covering in the room will lead to the appearance of a threshold, so the installation of laminate or parquet must be planned simultaneously in all rooms.
The final stage is the restoration of interior doors. The trap and the door itself, if they are in good condition, you can not change, but undergo restoration with cleaning and polishing of the surface. External cladding door frame during repairs they are traditionally replaced with a new one. The replacement of doors with a supporting frame is planned for a major overhaul, usually so that the entire apartment or house has doors of the same style and design.
