Methods of decorative plastering of walls. Decorative plaster video tutorials
Decorating with woven materials comes from ancient times. The walls of ancient rich houses were decorated in this way. Today, a lot has changed thanks to the introduction of modern technologies. Today's wall coverings are fundamentally different from their predecessors.
Do-it-yourself decorative plaster and its application in various variations allows you to create unique masterpieces and adds sophistication to any interior. Don't be afraid to experiment! It is not difficult!
Types of decorative plaster
Types of decorative plaster are distinguished by the nature of applying the solution to the surface:
- Texture. The formation of textured patterns is achieved by adding various fragments to the mixture. For example, stone chips, fine and coarse sand, mica and others. As a rule, plastic, rubber or metal spatulas are used for work.
- Relief. This type involves initially giving relief to the composition applied to the walls (unevenness and heterogeneity).
- Smooth surface. Only Venetian “decorative” can be included here. However, with its help, imitations of many surfaces are recreated. The mixture may include malachite, marble or other particles of natural materials. Venetian plaster will allow you to decorate walls with silk, marble, granite, cork, metal or leather. This type of decoration can highlight and decorate any room.
- Structure. Homogeneous compositions are used here. The structure is formed with special tools (graters, rollers) using a variety of techniques. But this type of plaster application requires the master to have both practical skills and artistic talent.

How to apply plaster on walls correctly
Application of various types of decorative plaster accordingly requires careful preparation surfaces. It will first be necessary to level out any existing defects. As a rule, gypsum, cement-sand and lime mortars are suitable for these purposes.
Next comes 1-2 layers of primer. The product is applied only after the surface has completely dried. Subsequent activities will depend on the working composition, and besides, there are quite a lot of ways to apply “decorative” materials.
Thin single layer coatings
Imitation with woven materials looks elegant. Such coatings, due to the application of minimal layers, require high-quality surface preparation. It is recommended to work with a brush. The desired effect can be achieved using vertical, horizontal or circular movements.
The composition of the product is dominated by glass, quartz sand and metallized powder.

Fur coat is both an economical finishing material and easy to work with. It gives a rough texture. It is painted with pigment added to the solution, or tinted with a roller at the final stage.
The technology for applying this type of decorative plaster involves preparing a creamy mortar and throwing it on the wall. To level the layer, use special spatulas and steel trowels.
To add texture, use a brush or a piece of artificial fur. It is important to carry out manipulations on a fresh surface. For protection purposes, the wall is treated acrylic varnish or wax.
Venetian plaster
With the help of Venetian plaster it is easy to imitate both polished and untreated stone. Beautifully modeled:
Polished imitation
This technology is often used to recreate granite and marble stones. The task does not require special skills, the main thing is to try to replicate the natural pattern with inclusions and veins.
If you want to bring luxury and nobility to your home, follow the following recommendations on how to apply decorative plaster:
- Preparing the walls. They must be perfectly smooth, dry, and primed.
- We dilute the mixture according to the instructions.
- Tinting. Add the desired pigment to the prepared solution. To imitate, for example, marble, you will need four colors. Shades of gray, white and black are suitable. Each of them should be diluted in separate containers.
- Application. We use two spatulas and transfer the composition from the small one to the large one. The colors are used all at once, light shades should predominate, the main thing is not to mix them. There are other options for applying this type of decorative plaster; they are simpler, but will take more time. We take the primary colors and set the diagonals, then use the rest. In some areas, small inclusions of more saturated shades are made.
- Adjustment. At this stage, the working surface is leveled with a damp trowel and rubbed down.
- Polishing. The dried “work” is treated with primer and varnish. To give the wall the gloss of polished stone, wax is applied to it and polished, without the use of varnish.

Important! Walls coated with wax are not afraid of wet cleaning!
Relief Venetian
For finishing relief Venetian coating, the use of several different techniques and methods is required. The solution should contain solid granules up to 2 mm in size; they create the desired texture. To set the texture, a finishing wax layer is applied, it is bonded to the previous one and glossed.
The weathered effect adds to the roughness of the final layer. The material looks like old marble. This technology involves the use of several layers, where the latter is treated with wax and tinted.
Rough stone relief looks expressive and is easy to work with.
How to apply decorative plaster "Bark beetle"
Decorating with bark beetle imitates wood damaged by insects. This type of decorative plaster is often used for facade and interior decoration and can be easily done with your own hands.
The bark beetle is produced in special mixtures containing marble filler. It is also prepared at home by introducing polished marble granules into the working solution.
The technology comes down to sketching out “decorative elements”. In the process of leveling the surface, stone grains tend to follow the grater, creating distinct grooved marks.
The bark beetle does not need additional waxing!
The interior design and structure of the design will depend only on the direction of the instrument’s movements!

Pebble coverings
Pebble coverings are most popular for facade and interior work.
The tools you will need are a special mesh, a textured roller and a brush.
How to apply decorative plaster with your own hands:
- Apply the first layer and let it dry (4-6 hours).
- Remove excess solution by mixing with the remaining solution in the bucket.
- Apply the second layer and wait 5-10 minutes.
- We proceed to smoothing with a trowel.
- We create veins with a spatula and, as it were, fluff the surface.
- Let it stand for 10–30 minutes and smooth everything with a trowel (we use “iron”).
Make sure that the wall treated with the mixture does not dry out while working, otherwise cracks will appear! The recommended layer thickness should not exceed the size of the pebble filler!
How to apply decorative plaster with marble filler
For this plastering method, special mixtures are used with the addition of marble, where the size of the fractions should not exceed 1–1.5 grains. Thanks to this, leveling surfaces is very easy.
It is important to remember that this “decorative” is intended solely for decoration! Before using it, the walls should be prepared and brought to perfect condition.
What can be used to create a decorative effect
Each method of applying decorative plaster is unique; the imagination of the master also plays a big role here. As a rule, special tools are used for the job, but you can do without them. Using the means at hand, you will also achieve wonderful results.
Using a bath or kitchen sponge, for example, you blot the freshly applied mixture and get a very beautiful textured pattern. It is convenient to make various notches and grooves with some sharp tool, such as cutlery or a pen and pencil. Ordinary dowels, which are driven into the drying solution, can help give the surface a certain antiquity. But first things first…

Brush work
A fine-grained mixture is best for this method. After the starting layer has set, which must be applied to the prepared surface, take a stiff brush, moisten it in water and recreate the patterns described below:
- Woven materials. Using a brush under pressure, we create vertical textured stripes. Then, with less pressure, draw horizontal contours. The next stage will be vertical lines again, which are performed even weaker. Manipulations with the tool should be carried out until the pile begins to barely touch the surface.
- Grooves. The pattern is applied to the wall by forming vertical grooves. Medium brush pressure is required.
- Wave effect. Quite easy to do. Focusing on the vertical, we make zigzag movements and round off the resulting corners.
Using a paint roller
Paint rollers have different attachments, each of which can achieve a specific effect:
- foam rubber ones are designed to recreate abstractions;
- rubber ones are used for drawing three-dimensional elements;
- fur ones are suitable for a textured “fur coat”.
Decorative plasters applied in this way require further painting.
Stencils
Stencils are original solution for decor of any home. Can be used with various mixture compositions.
Starter plaster is applied to the prepared surface. It doesn’t matter what style of “decoration” you choose, it should be painted, and the shade should differ from the previous one by several tones. When the first layer is completely dry, a stencil is applied. Next comes finishing plaster followed by waxing.
Stamps
Stamps for walls are not so easy to apply; the technology requires some skills. Therefore, first you should practice a little!
The base layer is pre-tinted and applied with a thickness not exceeding 3 mm. Coloring can also be done at the final stage. The next layer of plaster should be about 1 mm. For this purpose, it is convenient to use a liquid solution of brighter shades. Upon completion, the desired elements are pressed onto the surface using a special rubber device. When the layers are mixed, a very original texture is obtained.
Is it possible to apply decorative plaster to old plaster?
When choosing one or another method of applying decorative plaster and the corresponding mixture, you should consider whether it is allowed to be applied to old wall, and what is the order of work ahead.
To achieve the desired result, strictly follow the manufacturer's instructions and recommendations!
The method of applying any decorative plaster is not at all difficult to master. Modern technologies will come to the rescue; they greatly simplify any process. The master's work is afraid! Try it! Let it add a unique zest to the interior of your home.
Would you like to know more on similar topics? Stay tuned for new articles.
Step-by-step preparation of walls for decorative plaster: description of technology, features and recommendations
Before applying decorative plaster, it is very important to properly prepare the walls. The final type of coating will depend on the quality of this work. Decorative plaster is a multi-layer coating that is formed on the walls and allows you to obtain an original texture. The latter may have a different appearance. It will depend on the size and shape of the mixture filler, as well as the tools used for application. The method of applying the composition is also important at this stage.
Why choose decorative plaster?

Decorative plaster today is quite popular in the formation original interiors, she is very popular. The mixture is distinguished by an abundance of textures and colors, has a low cost, and allows for simple and quick application. After drying, the resulting surface is not subject to mechanical damage.
The type of finishing described can also be used when decorating exteriors; façade decorative plasters can be found on sale. Among other things, plaster mixtures During operation, it can be cleaned of contaminants. Really beautiful and more practical material for decoration it is quite difficult to find.
Preparation for applying structural and textured plasters

You must prepare the walls for decorative plaster if you plan to use the latter for repairs. Structural and textured mixtures are excellent for application to any materials, including:
Plaster allows you to create a surface that has the ability to breathe. After drying, the surface is not afraid of moisture, and its service life is measured in decades. Walls may not be prepared very carefully before applying these compounds. There is no need to level them to perfection, because the material during the application process will be able to hide small gaps, bulges and other minor flaws.
Step-by-step preparation of walls for decorative plaster involves cleaning the surface of the old finish. Oil stains are removed using a solvent, then the wall should be washed using a soap solution. Deep cracks, if any, should be sealed with cement mortar. The walls must be treated with an antifungal agent. However, if the room is operated at low humidity levels, then this is not necessary.
Work methodology
The next step is to apply a primer. Preparing walls for decorative plaster involves treating the surface with putty. However, this work should be carried out only after the primer composition has completely dried. Putty will help level the surface. It acts as a basis for applying a decorative composition. If the walls will be treated with a thick relief layer, then putty may not be used.
After 24 hours, the walls should be treated with an acrylic-based primer. This composition is necessary to improve grip quality. Afterwards the walls are sanded using fine-grained sandpaper. At this point we can consider that the preliminary work is completed. Preparation should not cause any real difficulties.
Removing the old layer of plaster

Preparing walls for decorative plaster with your own hands necessarily involves removing the old plaster layer. The wall will also need to be cleaned of whitewash, wallpaper and old layers of paint. The surface is well sanded until you reach the base. The walls need to be vacuumed well, especially the cracks. They should be washed using any cleaning solution. This is required for several reasons. Otherwise, adhesion to an untreated surface will be very unreliable. If the wall is covered with paint, the plaster layer will not adhere. In addition, this will reveal defects that were previously hidden under the finishing material.
It is important to highlight one more factor that favors the need to clean the wall of old coatings. It consists of carrying out additional processing, the features of which will depend on the base material. If you have to work with the walls in a newly built house, then this point should be skipped.
Features of preparation before applying Venetian plaster

The preparation of walls for decorative plaster can be carried out using different technologies, which will depend on the final composition. If we are talking about Venetian plaster, then more time and effort must be devoted to preliminary work. This is due to the fact that the decorative material has some features.
The walls should be carefully and efficiently cleaned of dirt. Old whitewash and paint paint are removed. The cleaned walls are then thoroughly sanded. Leveling is carried out with a putty compound. This stage must be approached with great responsibility. If the walls are not smooth, then the attractiveness of Venetian plaster will be invisible, because it has several transparent layers, the number of which can be up to three.

Preparing walls for decorative plaster requires sanding. These works must be carried out manually. The use of a grinding machine should be abandoned, because even the smallest sagging and irregularities need to be processed. A primer is applied to the leveled walls; a deep penetration solution should be selected.
It is necessary to bring the walls to perfect condition. All cracks and gaps must be repaired. Sometimes these works have to be repeated several times, so by and large, the manipulations when carrying out this type of work are quite labor-intensive. However, without them there is no point in applying Venetian plaster; in this case it will not be able to provide a stunning effect.

Preparation for decorative plaster of walls, the technology of which is described in the article, involves the application of primer. It needs to be chosen correctly. In this case, it is necessary to take into account the structure of the coating. On store shelves you can find a wide range of primer mixtures. In order to make the right choice, you need to familiarize yourself with which primer is best for certain surfaces.
For example, alkyd compounds work well on wood that has not been pre-prepared. In this case, you can achieve leveling of the structure and create a flat surface for applying plaster. The advantages of this mixture include fairly rapid drying. You can also use a polystyrene primer; its application is permissible even on plastered surfaces. However, these products contain substances that can be harmful to health.
Before you prepare walls for decorative plaster, the standards must be considered. After reading them, you will be able to understand that a primer is excellent for metal surfaces special purpose. Usually this is a composition with zinc additives. It is possible to use an alkyd primer mixture with the addition of zinc; this composition provides anti-corrosion protection. It is better not to apply glyphthalic mixtures to metal surfaces, as they are characterized by a long drying period.
Secrets of the masters
If you are preparing walls for decorative plaster, then you must follow several rules. There is no need to purchase putty mixtures based on alabaster and oil-adhesive bases. You can prefer any other compositions. The thickness of the primer layer should be 2 mm or more.
It is recommended to apply the putty on serpyanka, which is a self-adhesive mesh. Distribute it along the wall. In this case, surface treatment should be carried out with a large-width spatula. Preparing walls for decorative plaster is carried out using a primer. It is recommended to purchase acrylic mixtures.
Conclusion
Quite often today, home craftsmen independently prepare walls for decorative plaster. The consumption of a given composition will depend on the type of mixture. If we are talking about Venetian plaster, then its consumption varies from 70 to 200 g per square meter. Approximately 3 kg of bark beetle will be consumed per square meter. Everything will depend on the base material and layer thickness.
Due to the fact that plaster is quite expensive, to reduce its consumption it is better to level the surfaces as thoroughly as possible. This is the preparation of walls for decorative plaster. Features of these works may include the application of cement-sand plaster or the installation of an insulating layer of foam plastic. The second option is very practical; if the house is decorated in this way, it will be warm and beautiful.
Methods of applying decorative plaster to walls
 There are several ways correct application decorative plaster to make the apartment look individual, stylish and modern. A wide selection of domestic and imported mixtures with various additives gives the designer room for imagination. You can create surfaces that imitate reptile skin, silk fabrics, finishing stone. It all looks equally interesting in the finished interior.
Stages of the finishing process
The whole process can be divided into main parts, and the technique of applying decorative plaster does not play a big role here. Each stage is very important, without following this sequence at the end of the repair you will not get an ideal result. But if you approach the matter with all responsibility, then The work can be done even without special construction knowledge. When decorating, you must follow the following sequence of actions:
- The walls are leveled. Particular attention should be paid to this stage if you subsequently plan to apply a composition with a fine-grained structure (Venetian plaster, liquid wallpaper). And ordinary finishing gypsum putty will be sufficient in the case of applying textured mixtures with large inclusions (“rain”, “bark beetle”, “travertine”).
- This is followed by the application of a primer coat to strengthen the alignment and increase the adhesion of the decorative composition. The coating will be durable and resistant to external influences.
- Then comes the work with the decorative composition itself, it is performed in one or three steps. It all depends on the chosen method of applying decorative plaster. Sometimes you need to apply two layers to get a volume effect. The simplest option is to apply the plaster solution in one layer.
Materials for work
 Of course, first of all you will need the plaster mixture itself. It may contain small or large inclusions: powder, marble chips, silk fibers, quartz sand of various fractions, gold grains, sparkles. Due to this, the texture can be varied.
Less numerous binders make it possible to form a continuous layer of plaster, holding it on the wall. Most types of mixtures are made on the basis of lime or gypsum; white cement is suitable for external repairs or use in rooms with high humidity. Acrylic is a more modern base material. The composition may contain additional additives to make the solution more plastic.
Simple types of finishing can be done with ordinary gypsum putty. It is worth remembering about necessary materials when choosing decorative plaster. The types of textures and methods of application do not particularly affect the required set of tools, it remains virtually unchanged:
- metal, construction spatula;
- sandpaper;
- trowel;
- paint and texture rollers;
- medium size brush.
If you intend to create a colored coating, then you need to buy a color scheme, since mixtures on sale can only be found without coloring. When applied they turn white. You can immediately buy primer, wax or varnish at a hardware store if necessary. Special stamps may be required if an imitation snake skin is to be created on the wall.
By the way, if the question arises of how to apply decorative plaster on walls, it is worth finding out that improvised materials are also suitable for decorating the surface. They can be polyethylene and a wet cloth, a round plastic sponge, a cord, a thick rope, or a foam sponge. And some people prefer to apply decor simply with their hands, wearing rubber gloves - this also produces a very interesting effect.
Creating a textured coating
 You need to know not only how to apply decorative plaster, but also how to make a textured surface out of it. The application method will depend on the effect you want to achieve. With gypsum putty it is easy to imitate leather and finishing stone and create a relief pattern. Finishing mixtures are best suited, but you can mix them with starting mixtures in equal proportions. The solution is mixed strictly according to the manufacturer's instructions.
To create a base, a thin layer of putty is applied to the primed surface. The thickness of the coating will be no more than five millimeters. The work starts from the bottom, the mortar is spread in long strokes along the wall. Having applied the composition to two square meters, you need to immediately proceed to applying the relief, otherwise it will no longer be possible to remove anything from the set mixture.
The simplest working tool can be called a wad of rag, which is wrapped in plastic film. The created tool is applied to the wall, after which you need to make a rotational movement with your hand to tear the film off the composition. You will get a spiral curl. These prints can be arranged in any order. The wall will be covered with patterns reminiscent of peonies or roses. After treating the entire surface, you need to wait a day.
Then the wall is covered with a layer of water-based or acrylic paint and left for three hours. Next, polishing is done with a metal spatula to smooth out strongly protruding peaks. Some of the paint is also removed, exposing the base light layer. The result is a vibrant floral pattern.
 You can make wavy patterns of lines with your own fingers. A round plastic sponge can be used to leave ring-shaped marks; a sponge with large holes can be used to form a surface that will resemble shagreen leather. . Sometimes reliefs are applied using ordinary with a roller, which is first wrapped with a thick cord - the effect of bamboo stems is obtained.
Special stamps and roller attachments are required to create imitation reptile skin. A snake scale or crocodile skin pattern needs to be painted over twice after drying to highlight the depth of the pattern. The layers of paint will differ slightly in tone, the top layer is applied extremely carefully: you only need to paint over the protruding parts of the “scales”. You can apply glitter or gilding with a soft sponge.
Versailles plaster
Even a novice master can create the luxurious grandeur of Parisian palaces at home. The technology for applying “Versailles” is quite simple You will need gypsum putty, and the finishing and starting marks are mixed in equal quantities. The composition is applied after the primer has dried, the sequence of actions looks like this:

A wall decorated in this way can be easily washed with damp cloths.
The Versailles technique has another variation: imitation limestone slabs. After applying the base, you need to force the wet plaster to form numerous peaks. To do this, the trowel is pressed with its entire plane against the mass, then it is torn off perpendicular to the wall. The peaks are smoothed out, leaving a texture in the depths in the form of recesses and depressions.
Unsuccessful areas can be redone: just smooth out the ugly piece, create new peaks and process their tops. The dried wall is painted by hand, using a sponge to rub in the acrylic paint. To enhance the effect, you can more light shade Apply paint only to convex parts.
Method of application "Grotto"
The “rain” and “bark beetle” techniques are based on the effect of scratching a substance with hard grains of quartz or marble. The fine-grained mixture produces a beautiful texture called “grotto.” You will need plaster paste with dolomite or marble chips and a small amount of Venetian mixture. It is better to glaze the coating with special wax, which will give the decor the shine of polished stone.
If you follow the action algorithm, then a novice master will cope with the task:

The result is a coating reminiscent of granite or polished quartzite - it all depends on the color of the plaster mass.
 Imitation travertine will work, if you choose a larger filler in the paste. This option will differ in that after applying the second layer of model mass, the wall must be ironed with a trowel until it shines. According to builders' standards, the thickness of the decorative coating should not be more than six millimeters. Thin layers of relief mass acquire their charm through polishing and tinting.
There is no doubt that an interior with such finishing material will attract admiring glances. A creative approach to creating a textured coating will definitely bear fruit. The main thing is to carry out the finishing with soul and with utmost care, then the room will always have an atmosphere of comfort and warmth.
Technology of applying decorative plaster
Applying decorative plaster is no more difficult than working with ordinary mortar finishes. Sometimes it's easier. But the price per square meter of their creation reaches several thousand rubles.
This is due to the fears of developers: they believe that this is a complex process that requires significant experience and knowledge. Order work from professional craftsmen, even if you overpay per square meter. m. - seems like the right way out.
But in practice, the complexity of doing it yourself depends on the characteristics of the mixture, the order of work and the type of imitation. You just need to calculate the consumption, buy the ready-made mixture and save up to several times. thousand per m2!
The cost of the textured mixture is high. Therefore, it does not smooth out defects. This is done with ordinary (lime, gypsum, cement-sand) mortar.
After complete drying, it is covered with 1-2 layers of primer.
Further actions depend on the composition of the “decorative”. In addition, there are different methods for applying decorative plaster.
Thin single-layer coatings.
Imitate finishing with fabrics (including silk).
Compositions applied to perfectly smooth prepared surfaces. Their thickness is minimal, and the consistency is comparable to rough paint.
Here it is advisable to apply decorative plaster with a brush, which is used vertically or horizontally, depending on the desired pattern. Sometimes, to obtain a special effect, the brush is turned, acting like a compass.
Solutions consist of a polymer binder and fine filler (quartz sand, glass, metal pigment).
Rough coating of one color. It is painted by adding tinting pastes to the solution or using a roller after thorough drying.
Even if the developer has no idea how to apply decorative plaster with his own hands, he can always decorate the wall with a “fur coat”. The simplest texture.
To create it, throw a solution of a creamy consistency onto the wall. Level with a wide spatula or steel trowel, trying to make the layer as thin as possible.
Then, without waiting for the mass to dry, the working fragment is “blotted” with textured material. For example, in a piece faux fur, brush.
When the surface is dry, it can be coated protective composition– construction wax or acrylic varnish.
Venetian plaster.
Valuable stones are imitated - malachite, lapis lazuli, marble, granite. And also construction - travertine, sandstone, limestone.
Methods for applying decorative Venetian plaster are varied. They allow you to imitate raw and polished stone.
Polished imitation.
Decorative plaster that recreates valuable stone (most often marble). The technology for applying it is simple, although it frightens beginners.
Apply with a spatula. The master’s task is to repeat the natural pattern of the stone, the peculiar “striations” and “sags”, veins. This coating will look noble and expensive. In practice, learning how to make walls to look like granite and marble is not difficult:
- Preparation. The wall is perfectly leveled, dried and coated with primer.
- Preparing the mixture according to instructions.
- Tinting. The plaster mixture is painted at the preparation stage. To do this, dry pigment, liquid or paste colors are added to the solution.
To imitate marble, 3-4 colors are needed. For example, white, gray, t. gray and almost black.
Mixtures different colors and shades are prepared in different containers.
- Application. Use a small spatula to apply the solution onto the large one. All colors are used – more light, less dark. Apply the mixture at the same time, but without mixing.
Since applying decorative plaster in this way is more difficult, another technology has come into use. First, the solution is “spread” in the form of diagonal lines of the primary color, then secondary ones. In some places, minor inserts of the darkest or brightest colors are made. This method of applying decorative plaster is simpler, but slower.
- Alignment. Using a moistened steel trowel, the mortar is leveled and rubbed.
- Polishing. The dried imitation is coated with a primer and varnished. If you want to get the glossy shine of polished stone, the surface is covered with wax, which is polished. In this case, varnishing is not needed.
The wax coating creates a water-repellent film. These walls can be washed.
Relief Venetian.
A wall with a pattern, texture and relief of roughly processed stone. Not masonry, but a solid block of stone, which is found in artificial rock grottoes.
One of the easiest to apply but effective finishes.
How to apply decorative plaster under untreated stone.
Application is carried out as follows:
- Preparation. Imitating rough rock is convenient because it does not require such careful preparation. “Wild” stone is not smooth, rough. Therefore, there is no point in perfectly “smoothing” or leveling the surface. To apply the finish, it is enough to exclude differences of more than 1 cm.
For any finishing, preparation with an acrylic primer is required. This allows you to increase the adhesion of the surface to subsequent layers. It also saturates the pores, preventing them from dehydrating finishing solutions.
- Applying the first layer. Throw the thin mass onto the wall and level it with a float, float or trowel.
Until the mixture has dried, a kind of “fur coat” is created on it using available material (felt, felt, sponge, a piece of fur, fabric, polyethylene).
- Applying the second layer. After the first layer has completely dried, apply the second layer with a spatula. The solution is not laid continuously, but in spots, striving for a harmonious balance between bulges and depressions.
Peculiarities of perception depend on the area of the inserts: their dominance will create the texture of stone with small potholes. If the area of the “visible” first layer is larger, the wall will be “dotted” with convexities.
- Leveling. The second layer is leveled damp to hide tool marks and “ground” the relief, making it flatter.
The nature of the pattern depends on the direction of the tool. To understand which layer of plaster can be applied to the wall for the selected type of imitation and determine the appropriate texture, you need to experiment on a piece of drywall.
- First coloring performed only after the solution has completely dried.
- Second coloring. If the stone is one color, re-painting is not necessary. But it is worth keeping in mind that the second tone significantly enriches the relief, making it more attractive and believable.
The paint is applied with a roller so that only convex surfaces are painted.
The rough surfaces of the first layer remain darker and more saturated. The second layer, its convex, leveled part, is smoother. Such surfaces are easier to wipe clean. Therefore, the paint here will be thinner, more transparent, and lighter.
The use of glaze (very liquid, highly diluted) paint compositions allows you to paint only once. First, it is applied with a construction mitt or a piece of sponge. Then, without allowing it to dry and absorb, wipe it off.
- Protective composition. The plaster is protected with wax, which is polished or with polymer varnish.
It is important to choose the right color combination. They can either complement each other (paints of the same color, but different tones), or contrast.
The “Venetian” looks rich and elegant, the coloring of which uses a metallic color scheme.
"Bark beetle."
Plaster imitating wood destroyed by the larvae of the beetle.
One of the easiest to implement.
How to apply decorative bark beetle plaster.
To create the coating, special mixtures with marble filler are used. You can prepare a similar solution yourself. It is enough to add marble granules to the usual mixture. It is advisable to use polished, round stones.
Decorative plaster is applied using regular casting. When leveling the layer with a grater, the pebbles are carried along with the tool and roll, leaving deep grooves.
When creating a coating, it is important to monitor the direction of movement of the tool. This affects the structure of the drawing and its direction.
“Bark beetle” is a decorative plaster, and the technology for its application is designed for finishing, and not for leveling chips, slopes and cracks.
The bark beetle does not require additional polishing with wax.
"Pebble" coverings.
Polymer plasters are compositions not based on gypsum, lime or cement, but on a polymer binder. Because of their special texture they are called mosaic. The most common are acrylic, less common are silicone (they are more expensive).
The composition of “pebble” coatings includes marble or glass chips. Both shapeless and spherical stones are used. Does not require painting or protection.
How to apply decorative plaster with marble filler.
Plasters with marble filler are applied to a minimum thickness (1-1.5 grains). Therefore, their alignment is not difficult.
“Pebble” plasters – textured finish. They do not line walls. Therefore, the surface must already be prepared - smooth, clean, dry, durable.
Relief prints.
The plane can be given a three-dimensional relief of brick or stone masonry, roughly processed wood.
Since applying embossed decorative plaster with your own hands (using stamps) is an easy way, such coatings are especially popular.
For this purpose, special molds (impressions) are produced.
Decoration is done like this:
- Application of the solution. The plaster mass is thrown onto the wall so that a layer of sufficient thickness is created (depending on the depth of the form).
- Imprint. The stamp is heavily moistened with water and pressed against the plastered area.
The pressure is accompanied by light movements (left and right) of insignificant amplitude, tapping with the edge of the palm.
The form is removed and the design is pressed onto the next adjacent fragment.
One print can be used in two versions if rotated at an angle of 180 degrees.
- Coloring. Paint the plaster only after it has completely dried and primed.
For the first, general layer, apply medium-tone paint. Then the relief is emphasized with darker paint placed in deep depressions and recesses.
The protruding parts of the relief “pass” in the lightest tone.
- Protection. Concrete may not be protected. The gypsum is coated with moisture-resistant varnish.
Molds are quite expensive and only pay for themselves when used by construction teams. Therefore, it is easier to make them yourself, using silicone or polypropylene sealant, silicone compound or granular injection molded polypropylene.
It is worth keeping in mind that cement-sand plaster is better suited for outdoor work; gypsum plaster is not as durable. But for plaster reliefs inside, gypsum is more appropriate, since it has less heat capacity (more pleasant, “warmer” to the touch).
Inexperienced workers do not know what layer of decorative plaster can be applied to the wall at a time, so they are afraid to use deep-relief forms. However, such concerns should not apply to reliefs - here the thick layers are not continuous, and their mass does not affect the strength of the coating.
How to properly apply plaster on walls.
Any mortar finish requires surface preparation: cleaning of old coatings, leveling. The surface must be clean, dry and level.
The most convenient way of application.
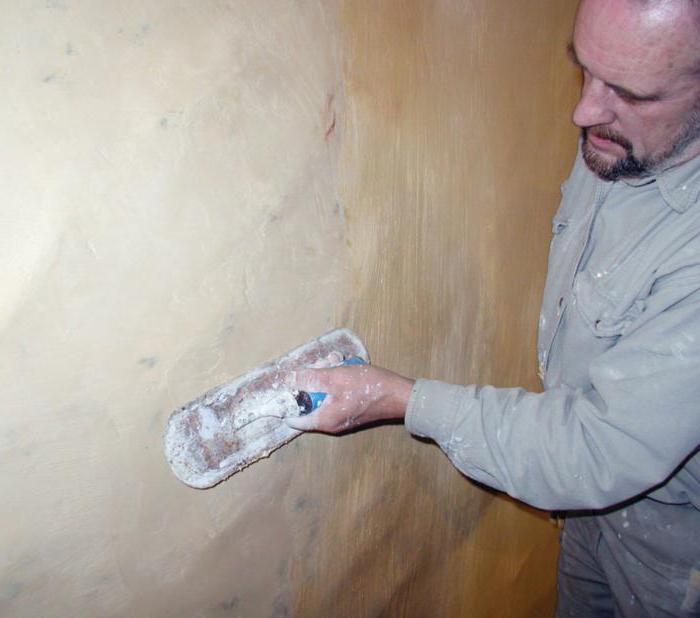
The easiest way to apply decorative plaster for beginners is to spray it. The solution is diluted to a “liquid” consistency. The work is carried out with a medium-width spatula, the mass is placed on the falcon.
Having “sprayed” a small section of the wall (approx. 1 sq. m.), the plaster is leveled with a trowel.
It is better not to use wooden graters and graters, since wood is constantly deformed by water. Traces from screws securing the handles of wooden tools are also common.
Is it possible to apply plaster with a compressor?
Many manufacturers provide for applying plaster with a compressor and produce special mixtures. However, you should not dilute the solution, which is not intended to be applied by mechanized means. This makes him very weak.
Is it possible to apply decorative plaster to old plaster?
The choice of the composition of the plaster mixture, the order and scope of work depend on whether decorative plaster can be applied to old plaster.
- What is possible? Apply plasters to more durable substrates. For example, cement coatings can be plastered with gypsum compounds.
- You can apply polymer compounds to any surface.
- You can plaster drywall with “decorative” materials.
- What's not allowed? Can't sketch cement compositions on plaster - it won’t stick.
- You cannot plaster walls that have not been cleaned (from paint, wallpaper).
- You can't decorate cracks.
The main rule is Do not violate the manufacturer's recommendations. If the instructions are not suitable, it is better to choose another mixture.
How to apply decorative plaster
Liquid wallpaper, flock, and compositions that imitate masonry (wood) are very popular nowadays. All this applies to the fashionable way of outdoor and interior decoration. How to apply decorative plaster, what is this mixture? You will learn the rules for preparing the composition from the presented review. This seamless finishing option is an excellent replacement for wallpaper and other materials.
Types of decorative plaster
Finishing according to manufacturing technology is divided into three types:
- Textured has a coarse structure of high viscosity.
- The structural one contains marble chips, the result of application is a smooth granular surface. Works well on drywall and other mineral surfaces.
- Venetian is a decorative stone-like plaster that has a uniform texture. As a result of application, it forms a perfectly smooth surface, similar to natural marble.
%D0%92%20%D0%B7%D0%B0%D0%B2%D0%B8%D1%81%D0%B8%D0%BC%D0%BE%D1%81%D1%82%D0%B8 %20%D0%BE%D1%82%20%D0%BF%D0%BE%D0%BB%D1%83%D1%87%D0%B0%D0%B5%D0%BC%D0%BE%D0 %B3%D0%BE%20%D1%80%D0%B5%D0%BB%D1%8C%D0%B5%D1%84%D0%B0%20%D0%BF%D0%BE%D0%B2 %D0%B5%D1%80%D1%85%D0%BD%D0%BE%D1%81%D1%82%D0%B8,%20%D1%84%D0%B0%D0%BA%D1% 82%D1%83%D1%80%D0%BD%D0%B0%D1%8F%20%D1%88%D1%82%D1%83%D0%BA%D0%B0%D1%82%D1% 83%D1%80%D0%BA%D0%B0%20%D0%B4%D0%B5%D0%BB%D0%B8%D1%82%D1%81%D1%8F%20%D0%BD% D0%B0%20%D0%BD%D0%B5%D1%81%D0%BA%D0%BE%D0%BB%D1%8C%D0%BA%D0%BE%20%D0%BF%D0% BE%D0%B4%D0%B2%D0%B8%D0%B4%D0%BE%D0%B2:
- %0A
- %D0%91%D0%B0%D1%80%D0%B0%D1%88%D0%B5%D0%BA%20%D0%B4%D0%B5%D0%BB%D0%B0%D0%B5 %D1%82%20%D0%BF%D0%BE%D0%B2%D0%B5%D1%80%D1%85%D0%BD%D0%BE%D1%81%D1%82%D1%8C %20%D1%81%D1%82%D0%B5%D0%BD%D1%8B%20%D1%80%D0%B0%D0%B2%D0%BD%D0%BE%D0%BC%D0 %B5%D1%80%D0%BD%D0%BE-%D0%B7%D0%B5%D1%80%D0%BD%D0%B8%D1%81%D1%82%D0%BE%D0% B9. %0A
- %D0%9A%D0%BE%D1%80%D0%BE%D0%B5%D0%B4.%20%D0%9F%D0%BE%D0%B2%D0%B5%D1%80%D1% 85%D0%BD%D0%BE%D1%81%D1%82%D1%8C,%20%D0%BE%D0%B1%D1%80%D0%B0%D0%B1%D0%BE%D1 %82%D0%B0%D0%BD%D0%BD%D0%B0%D1%8F%20%D1%82%D0%B0%D0%BA%D0%BE%D0%B9%20%D1%88 %D1%82%D1%83%D0%BA%D0%B0%D1%82%D1%83%D1%80%D0%BA%D0%BE%D0%B9,%20%D0%BD%D0% B0%D0%BF%D0%BE%D0%BC%D0%B8%D0%BD%D0%B0%D0%B5%D1%82%20%D0%B8%D0%B7%D1%8A%D0% B5%D0%B4%D0%B5%D0%BD%D0%BD%D1%83%D1%8E%20%D0%B4%D1%80%D0%B5%D0%B2%D0%B5%D1% 81%D0%B8%D0%BD%D1%83. %0A
- %D0%A8%D1%83%D0%B1%D0%B0%20%D0%B4%D0%B5%D0%BB%D0%B0%D0%B5%D1%82%20%D1%81%D1 %82%D0%B5%D0%BD%D1%83%20%D1%88%D0%B5%D1%80%D0%BE%D1%85%D0%BE%D0%B2%D0%B0%D1 %82%D0%BE%D0%B9%20%D0%B8%20%D0%B2%D0%BE%D1%80%D1%81%D0%B8%D1%81%D1%82%D0%BE %D0%B9. %0A
- %D0%A2%D1%80%D0%B0%D0%B2%D0%B5%D1%80%D1%82%D0%B8%D0%BD%D0%BE%20%E2%80%93%20 %D1%8D%D1%82%D0%BE%20%D0%B8%D0%BC%D0%B8%D1%82%D0%B0%D1%86%D0%B8%D1%8F%20%D0 %BA%D0%B8%D1%80%D0%BF%D0%B8%D1%87%D0%BD%D0%BE%D0%B9%20%D0%B8%D0%BB%D0%B8%20 %D0%BA%D0%B0%D0%BC%D0%B5%D0%BD%D0%BD%D0%BE%D0%B9%20%D0%BA%D0%BB%D0%B0%D0%B4 %D0%BA%D0%B8. %0A
- %D0%9F%D0%B0%D0%BD%D0%BD%D0%BE%20%E2%80%93%20%D0%BE%D0%B1%D1%8A%D0%B5%D0%BC %D0%BD%D1%8B%D0%B9%20%D1%80%D0%B8%D1%81%D1%83%D0%BD%D0%BE%D0%BA. %0A
%D0%9A%D0%BB%D0%B0%D1%81%D1%81%D0%B8%D1%84%D0%B8%D0%BA%D0%B0%D1%86%D0%B8%D1 %8F%20%D0%BF%D0%BE%20%D1%81%D0%B2%D1%8F%D0%B7%D1%83%D1%8E%D1%89%D0%B5%D0%BC %D1%83%20%D0%B2%D0%B5%D1%89%D0%B5%D1%81%D1%82%D0%B2%D1%83:
- %0A
- %D0%B0%D0%BA%D1%80%D0%B8%D0%BB%D0%BE%D0%B2%D0%B0%D1%8F%20(%D0%BD%D0%B0%20% D0%BE%D1%81%D0%BD%D0%BE%D0%B2%D0%B5%20%D0%B0%D0%BA%D1%80%D0%B8%D0%BB%D0%BE% D0%B2%D0%BE%D0%B9%20%D1%81%D0%BC%D0%BE%D0%BB%D1%8B); %0A
- %D0%BC%D0%B8%D0%BD%D0%B5%D1%80%D0%B0%D0%BB%D1%8C%D0%BD%D0%B0%D1%8F%20(%D0% BD%D0%B0%20%D0%BE%D1%81%D0%BD%D0%BE%D0%B2%D0%B5%20%D1%86%D0%B5%D0%BC%D0%B5% D0%BD%D1%82%D0%B0); %0A
- %D1%81%D0%B8%D0%BB%D0%B8%D0%BA%D0%BE%D0%BD%D0%BE%D0%B2%D0%B0%D1%8F%20(%D0% BD%D0%B0%20%D0%BE%D1%81%D0%BD%D0%BE%D0%B2%D0%B5%20%D1%81%D0%B8%D0%BD%D1%82% D0%B5%D1%82%D0%B8%D1%87%D0%B5%D1%81%D0%BA%D0%BE%D0%B9%20%D1%81%D0%BC%D0%BE% D0%BB%D1%8B); %0A
- %D1%81%D0%B8%D0%BB%D0%B8%D0%BA%D0%B0%D1%82%D0%BD%D0%B0%D1%8F.%20(%D0%A1%20 %D0%B6%D0%B8%D0%B4%D0%BA%D0%B8%D0%BC%20%D1%81%D1%82%D0%B5%D0%BA%D0%BB%D0%BE %D0%BC). %0A
Additionally, it should be highlighted specific types given finishing material:
- Color is available in 15 shades. Used as interior and façade.
- Roller contains natural filler.
- Latex plastic gives the surface a smooth and glossy appearance.
- “Wet silk” contains pearlescent particles and gives the surface of a wall or shelf the appearance of a shiny fabric.
- “Sea Breeze” contains fine sand and is used only for interior decoration.
How to make decorative plaster
After applying the primer to the walls, you should begin preparing the decorating composition. How is decorative plaster made? There is nothing complicated about this; the material is sold in the form of a dry mixture, which is diluted according to the instructions. If you add solid components (pebbles, pieces of tiles) to the composition, the surface will acquire an unusual pattern. To give the desired color, paint is added in a ratio of 1/10.
Decorative plaster from ordinary putty can be prepared independently at home. This option is relevant for those who would like to save money by renovating their apartment. The plaster is prepared in a bucket: putty from any manufacturer (Ceresit, Dufa) is mixed with grouting agent and water. The composition is supplemented with the selected dye and other decorative elements.
Many novice builders have a question: Is it possible to apply decorative plaster on plaster? It is worth paying attention to this issue, since it is primarily a financial issue, and then a matter of beauty. If you master the technique well, you can save on costs.
You can do this job perfectly yourself without turning to specialists. Worth considering:
- What is decorative plaster?
- How to apply it?
- What tools are needed?
Is it possible to apply decorative plaster to the main surface - features of the material
By decorative plaster we mean mass. It is used to decorate different types of surfaces. Because she has an attractive appearance, then it is called decorative. After all, when it is applied to the wall, it looks quite aesthetically pleasing.
In order to start plastering the walls, you will need two types of materials. It is worth including the first type.
More details about decorative textured plaster look at the video:
Another type of material is structural plaster.
It is worth noting that the material already contains a coloring agent. However, after testing and polymerization has occurred, the wall needs additional painting. And sometimes it’s enough just to tint it.
The surface will look even more beautiful if it is treated with metallics and pearlescent pigments.
Structural putty
What can we say about structural putty? They are less plastic than textured ones; when working, you should also take into account. Thanks to the mineral granules they contain, the texture is formed. Quartz, marble, granite and more play an important role. Relief is achieved due to the fact that the grains are either on the surface itself or inside it.

In specialized stores you can find several other types of materials. Including products made from fibers, plaster, as well as almost transparent mixtures for plaster. They are used less frequently than the previous ones. Therefore, we will not talk about them.
In principle, there are other types of materials on the market - fiber products, translucent plaster mixtures, etc. However, they are used quite rarely, so it would be more advisable to focus on more common finishing techniques. Let's talk about how to apply decorative plaster to plaster.
Necessary tool
First of all, it is important to decide what tool you will need to apply the plaster. Interestingly, in some cases you can use one spatula. However, if we are talking about fast work, then this will not work. This option is only suitable if a specialist has taken up the matter.

You can't do it without a masterful approach. In order for the work to be successful, it is important to use the following tool:
- especially for mixing work - a large capacity container;
- for direct work – a small container;
- a drill with a mixer attachment;
- trowels for plaster;
- trowel;
- plastic and metal graters;
- different spatula sizes;
- having hard bristles, flat-shaped brushes (one of them is a brush);
- sponge of rigid structure;
- a roller with a pattern to create relief on the walls.
As you work, you may need more tools, but these will suffice to get you started. The main thing is to purchase everything in advance, so as not to be distracted from work later. About decorative panels under brick, for interior wall decoration, find out.
Preparing the walls
We are preparing the foundation for a strong future decorative composition. It is worth remembering that it is quite possible to apply decorative plaster on plaster. The only question is how correctly the walls were prepared. Let's talk in more detail about the stages of working with plaster.
The first thing we do is remove everything unnecessary from the base. When you approach the plaster layer, make sure that it does not fall off over time. Each case is individual and you should decide for yourself whether to remove the plaster completely.
How to determine what is best in your case?
Take a heavy hammer and start tapping the entire surface. Determine whether the material begins to crumble or remains in place. Also identify possible voids using a characteristic sound. If all this is missing, then you can safely apply decorative plaster to the old plaster.
Now it is important to determine what condition the surface is in. Find out if it has cracks, crevices or any other defect. Using a cement composition, or, fill all these voids. Once you have applied the curing repair mixture, prime all walls using a penetrating agent.
This will require about two coats of primer, but no less. Before applying another coat, stop and wait about 5 hours for the material to dry completely.
After these steps, the first primer layer is applied to the walls. The thickness of this plaster should be 20 mm. Thanks to this approach, the base will be reliable and the entire surface will be smooth. It is important that any big differences were eliminated. In some cases Instead of basic plastering, putty is applied.
At the same time, when the material dries, do not sand it, because adhesion will decrease. This applies to the processing of gypsum board. What can you say about different types of walls? How is plaster applied to them? Wood and the material that is created with its use are distinguished by hygroscopicity. He will tell you about the price of puttying walls for wallpaper.
During work, the putty may begin to get wet at the base and become deformed. Also, the drying mode of the plaster itself will be disrupted. Therefore, if you decide to treat wooden walls, then use a primer that contains components that protect against moisture.
If the surface is rough (plastic or plywood), then use a coarse abrasive. After all, without this, the plaster will begin to slide off it. What can you say about the metal elements that you will encounter during repairs? If you are using decorative composition for processing, rust stains will appear on them over time.
What to do? Use an anti-corrosion coating and you will avoid unpleasant moments.
Varieties of structural compositions
Let's consider spraying a “fur coat”. We have determined what is suitable for the plaster base for decoration, but now it is important to determine what finishing technology we will use. As for structural coatings, they are quite easier to apply than others. It's worth starting with them.
“Fur coat” is one of the types of decorative coatings. He is quite popular and is based on cement-sand mortar. We mix everything 1 to 3. That is, for 1 part of cement we put about 3 parts of sand. Now we apply everything to the walls using sprays.

There is a special plastering machine that facilitates the process of applying plaster. After all, its work is based on the fact that the resulting pressure begins to eject the solution. In this case, the mixture adheres to the walls and the necessary relief appears on them.
What to do when you don’t have a typewriter and there’s nowhere to get one? Then a simple broom will do. To do this, take it with your right hand and begin to lower it into the solution. Take the amount you need, but not much. When the broom is brought closer to the surface, it must hit the stick (it was held in the other hand). Also read how to make a dry floor screed with your own hands.
Another technique is also interesting. Using a brush. To do this, you need to take it with long pile. Place some solution on it. Now run the board over it. Show some effort and move it towards you. When the bristles straighten, the solution will reach the surface in the required small amount.

Here's something else that can be used - a metal mesh placed on wooden frame. To do this, the structure is placed against the wall and leveled. Pressed down with bricks. Now, using a trowel, the solution is applied to the surface. Remove the mesh and then eliminate any defects.
Use a brush to smooth the wall.
We use mineral granules
Applying such compositions is quite simple. Among them, one of the most popular was the “bark beetle.” This type of plaster looks looks like wood, which is damaged by insects. Applying the composition is easy and not difficult. To do this, it is necessary to prepare and level the walls in advance using a plaster composition.
Apply a decorative mixture to them. In this case, you will need a grater. The angle of its holding is about 60 towards the wall. You should not make the applied layer thicker than the largest grain in the composition. This is important to adhere to. When you have already applied the mixture, dry the wall. Knauf will tell you about the consumption of putty per 1 m2.

And as soon as you notice that your hands have stopped sticking to the surface, you can start decorative plaster. Take a plastic grater and place it completely against the wall. Apply a little pressure and move further.
When movement occurs, the grains begin to move and at the same time leave grooves on the walls. This is how it arises beautiful drawing. The process is not over yet. It is important after the final work (drying and processing) to paint the surface using acrylic pigments.
Features of textured plaster
This type of surface is somewhat different from the previous one. How? It is important that the person who does this has a certain skill in his field. After all, the processing technique does not entirely affect the result. Relief in this case looks like painting or sculpture.
Therefore, if you decide to use this option, then practice in advance to understand how best to behave with the given material. It is important to apply the base coats first. Of course, the work is applied to a leveled surface. The base of the first layer is a couple of millimeters thick.

This will ensure adhesion. This is the background for future design. It is worth paying attention to one detail. Since the material is applied to the base in a small layer, it is important to paint it in advance in the color you need. To do this, pigment is introduced into the plaster for application and mixed.
It is necessary to thoroughly dry the base until the tools no longer leave marks when you press them slightly onto the surface. Now you need to use a spatula to apply several strokes to the surface.
Use only a small amount of the mixture, especially if you are just starting out.
The thickness of the application layer should be thin - about 3 mm. And at the end this thickness is half a millimeter. The way you direct your strokes will influence the type of painting you end up with. If it is a “Venetian” finish, then direct them in a chaotic manner. But if it’s “raining”, then make diagonal movements and apply markings first.
As an alternative to spatulas and graters, you can use brushes. Then we apply greasy plaster to the base and begin to level it with a grater. In the end, you need to process everything with a hard brush. Thanks to the marks left by the bristles, you will get an interesting relief on the wall.
You can use another interesting technique. Using polyethylene film. No special tricks are needed here. Polyethylene is glued onto a pre-applied 2 mm layer. It should have a lot of folds. We wait until the material dries.
After a couple of hours, the film is removed and an unusual relief pattern is obtained. However, there is advice. Do not suddenly remove the film, because in this case the coating will be damaged. But don’t overexpose the film. After all, this way its parts will dry to the base, and the plaster will come off along with it. Find out about finishing putty for exterior and facade work at.
The option of using a roller is suitable for those who are not confident in their abilities. Buy a special roller. Thanks to its protrusions and depressions, a pattern is formed. It is imprinted on the plaster that has not yet hardened. So her appearance will be very beautiful. It is also acceptable to use a regular paint roller.
However, to do this you need to pluck the lint out of it. You can also wrap the working part with a cord or other tool to create folds.
Conclusion
To summarize, we can say that decorative plaster can be freely applied to plaster. The disadvantages include the need for additional treatment of the walls, preparing the surface for applying a new layer of plaster, as well as testing the strength of the old layer of plaster.
The advantages include saving time on removing the old layer of plaster and financial costs for additional work.
Decorative plaster, like, with proper preparation walls and the skill of its application, it is easy to apply and becomes a beautiful part of your interior. At the same time, it will be very durable and practical, but provided that it is applied in compliance with all the described conditions.
Decorative plaster solutions, or decorative textured coatings, do not require further processing or surface finishing. They can be applied to walls and partitions made of any material - be it brick, concrete, plasterboard, wood or ordinary plaster. But the plaster hardens very quickly, so it is quite difficult to carry out finishing work with its help on a large surface.
In addition, the use of decorative plaster to finish a wall requires careful preparation of the surface (treatment with primer, putty, and grouting materials).
Typically, decorative plaster is produced in the form of a dry or ready-to-use thick mixture. The basis of such materials includes a polymer binder, filler (marble or granite chips, sand, lime), on which the texture of the future coating depends, as well as a liquid base - water.
Dry plaster in packages
Decorative plaster often includes other additives that provide additional properties (different surface structure, protective shock-proof properties).
There are also special, separately sold additives for giving decorative plaster a particular color.

Plaster with color additives
If the coating is made in the form of a dry mixture, it must be diluted with water in the required proportion. The plaster is applied quite quickly: first with a brush, and then with a spatula or other tool, or with a special tool immediately (which one should be indicated in the instructions for using decorative plaster). Such a tool can be a roller, brush, trowel, or trowel.

Stretching plaster is always applied using a trowel, working from the bottom up. This plaster is characterized by a denser grain structure. Externally, it is very different from ordinary plasters.
The use of decorative plaster provides many possibilities. For example, using various molding tools, you can additionally create different types of texture.
Plaster consumption is measured in kilograms per square meter of surface and usually ranges from 1.5 to 3 kg.
Decorative synthetic plaster is also used for finishing as interior walls, and facades. Depending on the graining and direction of grouting of such plaster, you can create an individual structure for the walls of the interior. This plaster is usually used as a finishing coat, but can be additionally coated with paint.

Decorative plaster in the room
Grout mineral plaster is characterized by a high content of natural grains and does not contain artificial resin. It has a high ability to transmit water vapor. Used for external and internal work.
Before covering the walls with decorative plaster, apply along the beacons preparatory layer ordinary plaster, consisting of spray and primer. The surface of the preparatory layer is scratched, giving it roughness for better adhesion to the decorative layer. A coating of decorative mortar is applied over a well-seasoned preparatory layer. Moreover, it can consist of two, three or more layers.

First, a spray of decorative mortar is applied to the preparatory layer, then a layer or layers of primer and, if required, a cover of the same mortar.
Creating decorative plaster from ordinary
Decorative plaster “Wave”
A variety of textures for future painting can be “depicted” on ordinary plaster. For example, “waves” look great on lime-sand plaster.
To reproduce them on the surface, apply a second layer of mortar in straight or curved strips to fresh or previously rubbed plaster, notched and moistened with water, and smooth it with a spatula. This way a wavy surface is obtained.

Plaster "Wave"
Plaster "Traverine"
To create travertine (lime tuff) on the wall, a thin layer of colored mortar is applied by throwing to the prepared plaster surface. After this, smooth it with a spatula or steel trowel. The result is raised islands on a smooth, worn-out background - the so-called decorative “stones”.

Plaster "Traverine"
For information on the process of applying this type of paint, watch the video:
Stone plaster
To create a “boulder-like” texture, apply a plastic colored solution to the ground, quickly level it with a trowel and then trim the surface with a hard hair or bristle brush. When trimming, the brush should be held strictly perpendicular to the surface. A hard brush is needed because only it gives clear, sharply defined “boulders”.

Stone plaster
Plaster "Dune"
Under the dunes, the colored solution is also first leveled with a trowel, and then a grater is applied with slight pressure and immediately torn off. The solution sticks to the grater and, together with it, is pulled away from the surface, causing roughness to form on the surface. Externally, these roughnesses are very similar to sand dunes. If you want the dunes to be wavy, you can not tear off the grater directly, but slightly move it to the side. To obtain the texture of small dunes, the solution is first allowed to set a little. After this, it is lightly rubbed, a grater is placed on the surface and it is torn off.

Plaster "Dune"
Watch how to apply Dune to a wall in a short video:
Plaster "Furrows"
The “furrow” texture is obtained using a grinder with semicircular teeth, which is made from a steel strip or wood. It is up to 30 mm wide with gaps between the teeth of 10-15 mm. The teeth of the hammer are sharpened in one direction. Apply a low-flow solution to the prepared soil, quickly level it with a trowel, then take the rule in your left hand and apply it to the solution that has not yet set. Now you need to place the small bit on the rule with your right hand and guide it with the sharpened side of the teeth forward at an angle of 45° to the surface. This way, even furrows are obtained. Their size and shape, naturally, depend on the shape of the teeth of the bait.

Plaster "Furrows"
Plaster “under a fur coat”
By spraying, throwing the solution through a mesh, shaking the solution from a broom or brush.

Methods of applying plaster “under a fur coat”
Spraying through a mesh and from a broom is carried out with any solution (even with coarse aggregate). Only a solution with fine aggregate is suitable for spraying with a brush. To get a dense spray without skipping, repeat it several times until there are no areas left on the surface not covered with the solution. You can also use a special spraying device (it looks like a fan).

Spraying plaster under a fur coat
Spraying on the mesh is done like this. Pull on wooden frame mesh size 100 x 100 or 100 x 50 cm with cells from 2.5 to 10 mm (the specific size depends on the size of the texture). WITH reverse side Stretch the wire diagonally across the frame. It is necessary to ensure that the mesh does not bulge or vibrate during operation. Attach the mesh to the wire and tie it. To ensure that the frame is always at the same distance from the wall, nail strips 10-25 cm thick to it.

Spraying plaster “under a fur coat” through the mesh
The frame is placed against the surface of the soil and the solution is thrown through the mesh with a spatula from a falcon. Passing through the mesh, the solution remains on the surface in the form of tubercles. To ensure that your texture is the same, try to apply the solution with the same force.
When spraying from a birch broom, hold it with your right hand, and in your left take a round stick with a diameter of 4-5 cm and a length of 50-60 cm. Scoop the solution onto the broom and hit it on the stick, shaking it onto the wall surface. The size of the resulting texture will depend on the thickness of the broom rods, the thickness of the solution and the force of shaking. While working, stir the solution from time to time so that it does not separate.

Spraying plaster “under a fur coat” with a broom
To get a finer texture, spray with a brush. It is better to use a stiff hair or ( best option) bristle brush. The brush is held with the left hand and, having been dipped into the solution to half the height of the hair, is brought to the surface with the bristles up. Then they pass along the bristles with a stick or board (it is held in right hand), and the solution flies off the brush onto the surface to be plastered. A thick texture will remain on the wall, similar to the pile of a fur coat.

Brush for applying plaster “under a fur coat”
To obtain a texture similar to snow flakes, spraying is done with flakes of a creamy plastic solution. The wall will be especially impressive if the flakes white solution Apply to colored plaster. In this case, the colored solution is first applied, leveled and rubbed, and then sprayed over it. This must be done without waiting for the plaster to dry.
To create a texture with a sponge, apply a solution of a creamy consistency to the soil, quickly level it and immediately apply end blows to it with a sponge. After this, a relief remains on the surface of the plaster, the appearance of which depends on the shape of the pores of the sponge. To prevent the solution from sticking to the sponge, it must be moistened with soapy water and lightly squeezed.

Instead of a sponge, you can use a relief roller
To obtain relief patterns on an unhardened plastered surface, you can use special stamps or any convex objects: shells, dense leaves, branches, etc. Pieces of stone, brick, multi-colored glass fragments, shells can simply be pressed into the still soft plaster. It will harden and hold the mosaic together.

To give relief to the plaster, you can use a variety of objects.
Sgraffito plaster
Another method of decorative wall decoration using plaster is called “sgraffito” (scratched). This technique involves scraping off thin layers of specially applied colored plaster. If there are several such colored layers, the resulting pattern will be voluminous and multicolored, reminiscent of a fresco.

Wall finishing using the sgraffito method
Now let's move on to considering techniques for decorating walls using terrazite plaster. This type of plaster consists of large quantity fluff lime mixed with white cement, white sand, marble chips, glass, mica and other materials. What makes terrasite plaster special is the addition of mica and anthracite fines (up to 10% of the volume of cement).

A type of terrasite plaster
Plaster-hatching
The “hatched” texture (straight or shifted strokes) with irregularities from 2 to 5 mm is obtained from fine-grained mixtures using a freshly applied solution. The solution (in the interval from 1 to 6 hours after application) must be processed by notching with nail combs or toothed scrapers. The applied cement mixture can be treated with a Troyanka or scarpel. Work on the hardened mortar begins no earlier than 6 days after its application.
Plaster "Rock"
The rock-like texture resembles crushed stone, and is made from hardened mortar with coarse aggregate, hammered with a chisel or tongue. The tongue and groove is driven into the mortar, thereby knocking out pieces and leaving indentations that form a uniformly grained surface. If the processing is carried out with a chisel or a scarpel, cutting off pieces of mortar, the surface will have the appearance of torn or chipped natural stone.
Technology of application and texture of stone plaster
Before processing, the surface of the stone plaster is divided into separate “stones”. To do this, using a chalked cord, lines of rows of “stones” or rusticated “seams” are punched, as well as straps and other straight parts. After this, they begin to finish the plaster to suit one or another texture.
Texture “under a fur coat” performed with different tools. If you perform notching with bush hammers with large teeth, the result will be a coarse-grained texture, with small teeth - a fine-grained texture, and when forging with a tongue and groove, a particularly coarse-grained texture will be obtained. Keep in mind: with large and long spikes of bush hammer teeth, the texture is deeper and larger.

Under shading The work with grooves is done with a bush hammer, only instead of teeth it should have blades. The depth of the grooves will be determined by the size of the teeth. The first forging is carried along the line marked with the cord, and the subsequent ones are parallel to it. To obtain a texture with the entire surface divided into strips, you need to use a trojan or gear.

Bouchard and Trojan
Texture “under the dunes” on stone plaster it is done with a chisel. First, the surface of the wall must be cleaned with steel brushes or rubbed off with stones. And then from a well-compacted and rubbed surface of the plaster, you need to cut off a thin layer so that small depressions are formed.

Types of chisels
Under torn stone or rough sandstone invoice made with tongues, chisels, scarpels. First, apply a solution to the surface in a layer of 4-6 cm, compact it and divide the surface into “stones”. When the solution has set, they cut through or perform rustications, and then treat the surface as necessary to obtain the texture. A chisel or dowel is driven into the applied hardened plaster and pieces of the mortar are broken off in different places to form large irregularities. If you want to get the texture of hewn sandstone, use a chisel to chop off small pieces of plaster.

Fur coat finish and torn stone finish
Coarse-grained and fine-grained textures received in two doses. First, cement mortar is applied - in small or large throws - then a mortar for stone plaster is prepared and applied in a layer up to 10 mm thick over the set layer of soil. The top texture can be fine-grained or coarse-grained, depending on the filler.
Application of Venetian plaster
To achieve the best result, the surface to be covered with Venetian plaster should be as smooth as possible, uniform (white) and non-absorbent. You cannot apply plaster to wood and metal - over time, the coating will crack.

Venetian plaster
Tools for Venetian plaster
To prepare and cover walls with Venetian plaster, you will need the following tools:
- two brushes - maklovitsa and flute,
- roulette,
- long ruler
- level,
- pencil,
- syringe dispenser,
- measuring cups,
- containers for mixing materials,
- mixer,
- ladder,
- bucket with water,
- sanding paper (No. 120 and 220),
- grinding float,
- two stainless steel smoothers 250 and 200 mm wide,
- wide and narrow spatulas made of forged polished stainless steel.
It is advisable to round off the working edges of the tools and polish them with fine-grained sandpaper, completely removing scratches, burrs and other defects.
Before applying Venetian plaster, make sure the base is thoroughly prepared. If the base is not properly prepared, cracks may appear on the surface that cannot be repaired.

Stages of applying Venetian plaster
The depth and transparency of the coating is achieved using a special application technique.
The master applies several thin layers of coating to the wall, consisting of randomly located spots of material. The combination of many such spots and their layers creates the illusion of depth in the pattern of natural material. The number of layers varies from 2 to 10, but the total thickness hardly exceeds 1 mm. Each layer must be smoothed (pressed) manually with a spatula, float, or grater until a completely flat, smooth and glossy surface is obtained. Even an experienced specialist takes almost an hour to work with 1 m² of one layer.
The first layer is usually made of a material that contains finely ground marble chips. It is applied to the surface with a steel trowel or spatula in the same way as putty. After 4-6 hours, covering and glazing layers can be applied to this layer, which will create the texture of the coating pattern.

Applying the first layer of plaster
If you need to get a matte finish, then the second and subsequent layers are made of the same material as the first. The glossy surface is obtained using a finely dispersed material mixed with the selected dye.
When starting work, use a spatula to spread a small amount of material onto the working surface of a long trowel. Now start working from any top corner. Proceed in the same way as when applying finishing putty, applying the mixture in an even layer. Cover areas near the floor using a bottom-up motion. Press the trowel firmly against the wall, holding it at an angle of 10-15° to the surface. Make sure there are no gaps.
When the first layer has dried, begin applying the next one.
First, mix the coating material: add dye to it (if you bought a “semi-finished product”) and mix everything thoroughly again.
Next, apply a small amount of material along the edge of the short trowel with a narrow spatula and spread it in random strokes using short arc-shaped movements. Each movement should be approximately equal to the length of the iron. If a sag forms on the wall at the end of the movement, disperse it with a straight-line movement at an angle to the sag line. Alternate the movements of spreading and accelerating and randomly change their length and direction. Apply the coating near the floor in arc-shaped movements, starting from the bottom. Finish when an area of approximately 0.7 x 0.7 m is covered with the second layer.

Stage of applying Venetian plaster
Now level the coating in this area with long strokes of the trowel in random directions. Every 2-3 strokes, clean the ironer and wipe it with a damp cloth. Increase the pressure force and the tilt of the smoother plane to 20-25°. The result should be a uniform thin layer.
After 10 minutes, begin to smooth the coating with the edge of a wide (200 mm) spatula. Movements with a spatula from top to bottom should be slightly crossing. As gloss appears (this occurs from heating and polymerization of the material), release the pressure on the spatula. If this is not done, the resulting crust may be damaged.
To finally polish the surface, you need to smooth it with a clean trowel. At the same time, it is pressed firmly with both hands and held at an angle of 5-12° to the plane of the wall. When polishing an area near the floor, direct the movements of the trowel from bottom to top and slightly cross them.

The next stage of applying Venetian plaster
When finished, proceed to apply the second layer to the next area, repeating all stages of the operation sequentially.
The pressure on the stroker is released at the beginning and end of the movement (as when scraping). This allows you to change the thickness of the material layer. When smoothing and glossing, the movements of the trowel should cross the boundaries of adjacent areas. To get the desired texture, change the size of the trowel, the length of the strokes, the spaces between them, as well as the force of pressure on the tool.
Working in corners, openings, ledges and others difficult places, direct the spreading movements from the border line into the area. If necessary, use a spatula instead of a smoothing iron.
While the second layer is still wet, begin applying the next layer in randomly placed spots. At the same time, the entire finishing cycle is repeated in sections. Apply as many layers (moleno of different colors) as needed to achieve the desired result.
If you accidentally damage the surface, use a narrow spatula to apply the first layer of material to the area and around it. When it dries, repeat the entire operation of applying the next layer.
After completing all the work, you can use the room within a day, but it’s better not to rush. The walls will dry completely in a week.

Venetian plaster
After all layers have dried, you can cover the walls with natural beeswax. It will enhance the shine of the coating and give the feeling of an optical illusion. Waxing gives the coating additional moisture resistance. There is no need to apply wax to some plasters produced today: all the necessary components are already contained in the material.
Wall decoration with decorative plaster: 10 types of textures with your own hands
Return to contents
Decorative plaster - a modern finishing material
If there is a need to change the interior of an apartment or office, you can use one of the modern environmentally friendly finishing materials - decorative plaster. This finish has a long service life. Some types of decorative plaster do not need to be ripped off or plastered again in case of repair; you can simply apply enamel, paint or wallpaper to the former finish.
The main thing is to understand the secrets of professional skill in doing the work of decorating walls with decorative plaster with your own hands.
Various types of decorative plaster can be used not only to decorate the facades of buildings, but also the interior of premises. These materials are designed to improve the microclimate inside buildings, which are characterized by freezing of interpanel corners and joints. The use of plasters will help make any building more noble and at the same time hide all construction defects. Various types of plasters, which play the role of independent decorative value, do not require final finishing of the wall surface, that is, painting or wallpapering.

Depending on the composition of the plaster base, it is divided into 4 main classes:
- Silicate.
- Acrylic.
- Mineral.
- Silicone.
When choosing a plaster, plan the effect of it in advance. It can be embossed or smooth. Since modern decorative plaster is a paste with the addition of pigment, it is important to decide on its color and shade.
Return to contents
Types of decorative plaster and features of their application
The choice of decorative plaster should be taken responsibly. Right choice It’s not difficult to do if you know how it is classified.
The type of plaster depends on the methods of its application and on general view surfaces.
Decorative plasters according to their composition are classified into the following types:

- Lime-sand (mineral) are based on a mixture of lime with sand or cement, often adding gypsum to the mixture. This type is environmentally friendly, but less wear-resistant. Mineral plaster can be used for interior finishing work. Having a low cost of components in its composition, it is one of the most common. It is best used for finishing walls and ceilings in bathrooms.
- Polymer plasters are resistant to environments with high humidity and aggressiveness. They are strong and durable. A generally recognized disadvantage is the limited vapor permeability characteristics. Therefore, this type of plaster cannot be used in the presence of a thermal insulation system based on mineral wool.
- Silicone plasters are based on the use of silicone resins as part of the finishing material. They can be applied to various surfaces, including old coatings. They are UV resistant and do not attract dust. Plasters of this type have a self-cleaning effect, which is manifested in the fact that they are able to collect water and dirt into drops, which then flow from the surface of the walls, even if it has not been wetted. This type of plaster is suitable for finishing the external walls of buildings located near highways and in smog areas. Silicone plasters have a long service life. They are produced in the form of mixtures, which are easy to use, but have a high cost, so they are not used so often.
- Silicate plasters are based on the use of liquid glass, that is, sodium or potassium silicate. This type of plaster is not only resistant to rot and mold, but also moisture resistant. It is distinguished by fire safety and a variety of shades and tones. With it you can imitate various types of finishing materials. This is the most durable type of plaster and can be used for up to 60 years. If you use it for the facade, it will cost more.
- Structural plasters are a ready-made building mixture containing inclusions of larger particles. If the mixture is applied to the wall with a trowel, an uneven original mark remains, so you can imitate various finishing materials, such as tree bark. This type of plaster is often used for exterior finishing public buildings, since for finishing the interior of the room, it will be rougher.
- Textured plasters are able to recreate a surface reminiscent of natural stone. This type of plaster is most in demand by designers. There is a distinction between graffito - this is printed concrete that has a thin layer that gives the surfaces the appearance of various finishing materials: porcelain stoneware, velvet, wood or moiré silk fabrics, and possibly genuine leather. Before applying such plaster, there is practically no need to perform certain preparatory work. This way you can very easily hide any imperfections, chips and cracks. This material is distinguished by its high environmental friendliness and fire resistance, since it contains natural cellulose and silk fiber, fillers and mineral dyes. The material serves as an excellent sound insulator and allows any surface to breathe, while simultaneously retaining heat in the room.
- Plasters based on marble chips are structural coatings that have high strength. For their production, granite or marble granules of various fractions are used, which allows you to vary and modify the appearance. Additional additives can include quartz particles and special additives that give the effect of golden shimmer. Plaster is able to resist various damages, so it is used for both external and internal walls of a building. Before using it, you should carry out preparatory work related to priming the walls, since the base may be visible.
- Venetian plasters differ from other types in their expressiveness and artistic effect. Particularly popular, they represent a special art of wall painting. By applying such plaster you can convey any slightest vein natural stone. Due to the special wax coating, the walls are given depth and the optical illusion of silky shine. Venetian plaster used to decorate rooms in the Baroque style.
Return to contents
Stages of applying decorative plaster
Return to contents
The preparatory stage before starting to decorate the walls with decorative plaster

At the stage of preparation for finishing work, a number of the following operations are performed:
- Clean all the walls of the room where the renovation will be carried out, removing unnecessary old wallpaper, paint or other covering.
- Thoroughly wash the surface of the walls from dust and old plaster until as pure as possible.
- Be sure to remove any excess dowels attached to the wall, otherwise they may corrode.
- Smooth the wall surface using sandpaper to remove any uneven surfaces.
- Collect all the necessary materials and tools that will be required during the work process.
- Finish cleaning and drying the wall surface by applying an acrylic primer and wait for it to dry completely. This will ensure maximum adhesion between the wall surface and the decorative plaster.
Tools and materials that will be needed during finishing work:

- Special roller - 2 pieces with different pile.
- Spatulas - 2 pieces of different sizes made of plastic or metal.
- A drill equipped with a mixer for stirring the plaster.
- Special ironing iron.
- Sponge.
- Container for mixture and water.
- Decorative plaster.
- Color.
When preparing the wall surface for applying decorative plaster, the temperature should be maintained at the same level. It is very important that the room was neither too hot nor too cold.
Return to contents
The procedure for performing finishing work on applying decorative plaster with your own hands
First you need to decide on the required shade of decorative plaster. For this purpose, part of it is diluted with a small amount of water to determine the optimal composition. It is then applied to a small piece of the wall for practice. This is done using a roller. The applied layer should be 3 mm. It takes two days for the textured mixture to dry. The trowel is used 20 minutes after the plaster has been applied.

After determining the required composition of the plaster, finishing work begins, associated with the following stages:
- Applying texture using a roller or sponge. Take the solution in a small amount, then apply it with quick movements to the surface in a layer whose thickness is 2-3 mm.
- In order to avoid sharp contrasts in shades between layers, it is necessary to work quickly, since the edges of the plaster can dry out quickly and this will be noticeable.
- After applying the texture, wait 15 to 20 minutes and take a trowel moistened with water. The trowel is passed along the wall with light movements to press down all the irregularities.
2 days after plastering the surface, it is completely dry and can be sanded, removing excess plaster particles. Sanded walls can be painted; the color is applied 2 times, the second time after 2 hours.
You can choose the option of incomplete application of plaster, and partial application to create the necessary texture of the wall. In this case, the part where decorative plaster is not planned to be applied must be protected with tape, which is removed while the texture is still wet.
Surface painting is carried out in 3 stages:
- Coloring the textured part.
- Treat a smooth surface after 2 hours.
- Apply color to the plastered surface after 2 hours.
By waiting until the paint has completely dried, you can enjoy the look of the plastered surfaces. After gaining initial experience, they move on to complex plastering patterns.
Finishing the walls is a very troublesome and responsible undertaking. Especially if the corners and walls are uneven. Pasting such surfaces with wallpaper or decorative tiles is a complex problem and it is rarely possible to solve it qualitatively.
In such situations, decorative plaster comes to the rescue.
Currently, dry mixes dominate; this is the same free-flowing composition as the usual mass for interior wall decoration. Its decorative properties are given by various additives specially introduced into the recipe. These can be small pebbles, and even wood fibers, giving the lined surface a completely original pattern and texture.
Even an experienced plasterer, starting to decorate the walls, will not be able to imagine at the beginning of the work what the end result will be. Therefore, before starting work, craftsmen prefer to carry out a test application on a small flat surface, for example, on a piece of drywall. The test allows you to immediately determine the methods and techniques of coating to identify the most advantageous characteristics of the decorative coating.
Costs for decorative plaster
The material presented has many varieties. Depending on the composition, the price of the material in the form of a dry mixture ranges from 200 to 600 rubles per square meter. Consumption rate ready-made composition presented by the manufacturer and indicated on the packaging. And the price of work per m 2 by invited specialists is from 250 rubles.
It should be taken into account that the use of this method of wall finishing eliminates the need to perform a number of preparatory operations on their surfaces, which reduces the cost of the final coating cost. In addition, having minimal skills in performing finishing work, you can do it yourself, eliminating a significant part of the costs.
Types of decorative plaster
Several types of classification of such material for wall decoration are used:
- By type of binder.
- Depending on the type of filler, which determines the texture of the surface.

On the first question, you can get advice from the manager of a building materials store. The choice depends, first of all, on the texture of the surface to be finished and the operating conditions of the coating after application.
Depending on the filler, the classification may be as follows:
- Textured surfaces. As the name suggests, the finishing surface is uneven. The material successfully hides almost any defects on the wall and allows for independent application by a performer even with zero skills in such work. Actually, this determines the high popularity of this particular type of coating. And the price of the material is at a minimum level for this type of coating.
Plasters of this type, in turn, are divided into several varieties:
- "Lamb." When viewed from the side, this design gives the impression of a soft woolen surface. Well compatible with mineral substrates.
- "Fur coat". The surface is similar to the previous one, but looks fleecy.
- "Bark beetle." When applied to the surface, grooves are formed that are surprisingly reminiscent of bark beetle traces; with the correct selection of tone, the texture corresponds to aged wood.
- Structural. This type of coating is characterized by almost absolute unpredictability of the nature of the surface that will be obtained during application. The previous option still allows you to somehow predict the result. In this case, at the beginning of work, you can be sure of only one thing - some kind of structure on the surface will nevertheless appear.
- Venetian. In terms of its decorative capabilities, this plaster is superior to other types. One of the features of such a coating is the need to create an almost perfectly flat surface, which is not always possible even for experienced craftsmen. The application process takes quite a long time. A distinctive characteristic is also the translucency of the material. At correct positioning lighting creates the effect of an internal glow of the surface. This property makes it possible to implement design solutions in which the image on the wall looks as if in haze or fog.

In addition to the types of decorative plaster mentioned here, others are also produced. All of them differ in the nature of the fillers, imitating one or another surface, which is unaffordable. Such characteristics may be imitation wood or silk fabric.
These materials also include colored plaster, produced in a wide range of tones.
Do-it-yourself plastering of walls
With the exception of certain cases (applying Venetian coating), plastering work is performed quite simply and any developer, if he has the time and desire, strives to carry out this work himself. The desire is completely justified and understandable, but a number of circumstances must be taken into account, which are outlined below:
- You need to carefully consider the selection of material. Here, consultation with an experienced specialist is not only desirable, but also mandatory. And it would be better if this was not a store manager responsible for sales volume, but an uninterested person from the outside. Ideally, it is better to see a sample of a particular interior. Calculating the amount of material based on the manufacturer’s recommendations is not always correct. In an effort to assure the buyer of economic efficiency, he shows the minimum consumption, which is not always achievable in real terms. Therefore, it is better to purchase the quantity of material with a small margin.
- If there are no gross defects on the surface to be coated, finishing can be neglected. Only rough chips and cracks should be repaired. The rest will be effectively removed with a layer of plaster, which is what it was originally intended for. But applying a primer is mandatory - it significantly improves the adhesion of the plaster composition to the wall surface. It is generally accepted that the finer the structure of additional inclusions, the higher the surface quality should be.

- After the primer has completely dried, and it needs at least half a day for this, you can begin plastering work. If you have a complete lack of experience, no instructions, including videos, will help. But it won’t take much time to master the profession. You just need to start work from the least critical place, for example, where the furniture will subsequently stand. It is also useful to practice on foreign material from waste construction materials.
- After applying the plaster, you can give it additional charm by adding additional relief, for which you will need additional tools. The unpainted surface can be additionally painted by choosing the paint to your liking. This method is used to ensure uniform tone throughout the entire room, which is often impossible with the inevitable frequent mixing of the plaster composition.
Plaster is generally a waterproof coating. Therefore, it can be washed without fear. In this case, you should refrain from using aggressive detergents. A mild detergent is used with elastic sponges; hard brushes and products containing abrasives are not suitable for caring for such a coating - the surface quickly loses its appearance and becomes dull due to a large number of scratches. As additional protection, the surface is covered with a thin layer of wax, which protects it from moisture, but not from mechanical damage.

If you want to change the interior, the walls can be repainted, and if you plan to use wallpaper, the walls can be additionally plastered.
Plastering tool
Tools and devices for professionals are quite diverse. It must ensure not only the productivity of work, but also its quality.
The range of tools used largely depends on the choice of the nature of the coating. In the simplest version, you can get by with a minimal set of spatulas of different sizes. You will also need a trowel, and for more complex options it is advisable to use textured rollers. If the surface is to be painted, you need to have a painting tool.
Applying plaster to the wall
How to make decorative plaster with your own hands? For independent implementation by a person without experience, we can recommend a bark beetle type coating. It does not require careful preparatory measures. Due to its texture, there is no need to carefully level it during the application process. To work with such material, a few spatulas of different widths and a little skill in plastering are enough. It is almost impossible to spoil the bark beetle. The technology involves manufacturing in various options, which directly depends on the size of the inclusion grains. Larger ones will require a thicker layer of coating.

The construction of a “Venetian” is impossible without solid mastery of skills. When performing it, you need to apply several perfectly even layers of plaster, each with its own properties, to a perfectly prepared surface.
Silicone materials also require special skills. This is a painstaking, delicate work that requires incredible patience and artistic inclinations. But the result corresponds to the invested work.
Decoration can be applied to the wall in the following order:
- In accordance with the instructions on the packaging of the mixture, a solution of the required consistency is prepared. Its quantity should provide for the possibility of production at a time. Additional stirring with the addition of water is not possible - the thickened residue will have to be thrown away.
- A spatula and a grater become universal tools. The applied layer of plaster is evenly distributed over the surface. As soon as the mass shows the first signs of hardening, it needs to be rubbed with a grater, at the same time creating a pattern.
- For beginners in this business, there are several simple techniques that allow you to get a beautiful look with simple operations. decorative design. This can be grouting with wavy movements, beveled or straight lines imitating rain, various closed curves or intersecting stripes. Movements when performing work must be confident, soft, and not subject to correction.

- An interesting surface texture can be obtained by using the most unexpected objects, from crumpled paper to brushes or washcloths. The simplest way is to use textured rollers with various patterns. Given the limited drying time of the plaster, drawings also need to be done as quickly as possible; there will be no opportunity for correction.
- 15 - 20 minutes after applying the pattern, the coating begins to lose its shine, which indicates that crystallization of the solution has begun. You need to not miss this moment, and use a wet trowel to walk over the surface, smoothing out unevenness and removing too much sudden changes relief. The instrument needs to be cleaned and moistened generously more often.
- To separate sections of coating with different textures, it is advisable to use construction tape. It must be removed before the applied solution hardens to ensure a clean, tear-free interface.
- The solution dries completely within 24 hours. After this time, you need to treat the surface with fine sandpaper. In this way, excessively protruding parts and uneven surfaces are removed.
- A protective coating in the form of varnish or wax is applied to the surface approximately three days after the installation of the decorative layer. Before applying it, you need to thoroughly clean the surface of dust using a vacuum cleaner.

- When finishing external walls, a concrete surface using river pebbles. After applying the composition to the wall, when it shows the first signs of hardening, you need to wash off a small part of the outer layer of the solution with a wet paint brush. The exposed pebbles make an excellent decorative wall decoration.
Decor in alternative ways
To impart decorative properties to a putty coating, you can use the following techniques:
- Buy a dry putty mixture and dilute it with water, taking into account the recommendations on the package. The most convenient materials are those based on gypsum or cement. Possessing high strength properties, they allow you to successfully level out unevenness on the base.
- For the base layer, a thickness of 2 mm is sufficient; there is no need to carefully level the surface, since the decor will visually hide almost any unevenness.
- In process textured surface You can use various tools and techniques. A common method is to use a spatula or smoother
- Various stamps and embossed rollers with ready-made patterns are widely used
As a finishing operation, the surface is most often painted. It is done with a paint roller in two passes, the first time with long pile, the second with short pile. This coating best highlights the texture of the finish.
Texture elements are applied to the front layer of the same putty. Its thickness should not exceed 3 mm. Otherwise, cracking may occur during operation.
Drying of the putty layer must be done with doors and windows closed. Drafts are not allowed. Accelerating the process by turning on heaters can lead to cracking and collapse of the finishing layer. The essence of the process is the crystallization of a mass of finishing material, in which air moisture also takes part. Therefore, its premature removal will disrupt the process.
As can be seen from the above data, the process of finishing with decorative plaster can be very simple, even simpler than creating a smooth base surface. But certain materials and methods require special attention and skill, as well as artistic taste. Really evaluate your strengths and capabilities. I wish you success!