DIY shoe rack for the door. DIY shoe rack: photos of shoe shelves, tips for making shoe stands for the hallway
How to save and make original stand under your own shoes - find out here!Ideas, useful tips, manufacturing instructions.
- 1 Let's do stylish stand DIY under shoes
- 2 Types and purpose homemade shelves for the hallway
- 3 Materials and tools for making shelves
- 4 How to make a shelf with your own hands
- 5
Wooden shoe rack
- 5.1 What will you need?
- 5.2 Assembly of the structure
- 5.3 Practical shoe rack from chipboard
- 5.4 Beautiful shelf for laminate shoes
- 6 From profile
- 6.1 Step-by-step instruction
- 6.2 Simple shoe rack made from boxes
- 6.3 Corner stand under shoes
- 6.4 Construction connection
- 6.5 Decorative elements
- 6.6 Making a carousel shelf
- 6.7 How to do
- 7 Interesting ideas
- 8 Photo gallery
A beautiful shoe rack can become not only a place to store shoes, but also a full-fledged element of the hallway interior. The choice of options in stores is extensive, but the prices are often overpriced. To make a roomy and compact shelf For shoes that fit perfectly into the look of the corridor, you need to put in a little effort and imagination. Let's consider options for making shoe racks from available materials with your own hands.

Types and purposes of homemade shelves for the hallway
Before installation, be sure to measure the space where you plan to place the shoe rack. For small hallway ideal option there will be a narrow (20-30 cm) and high shelf; in a more spacious room, a closed cabinet with a width of 60-90 cm will look good.
Should the shelf be closed? If you want the hallway to look more aesthetically pleasing, this is a good option. Do not forget to regularly ventilate closed shoe racks, otherwise you will not avoid unpleasant odors. This problem can also be solved by installing a lamp inside for drying and disinfecting shoes.

Advantages of homemade shoe shelves are obvious:
- you can use eco-friendly materials;
- the cost of a homemade shoe rack is several times less than in a store;
- You can make a shelf for a hallway with a non-standard layout.
The design of a shoe rack directly depends on its purpose and the number of residents. Here are some popular and practical options:
|
Shoe shelf design |
Description |
|
Classical |
Shoe shelves of this type are popular due to their simple and convenient installation. It can have a regular rectangular or asymmetrical design. |
|
Hanging |
The shelf is attached to the wall using slats, straps or cables. Conveniently folds when necessary (for example, if you need to carry furniture into a narrow corridor). |
|
Corner |
Fastening is carried out on adjacent walls. Great space saver. |
|
Floor |
The support in this design is on the floor. Suitable for spacious hallways, but can also have compact dimensions if the sections are distributed not in width, but in height. |
|
Closed |
This option looks more aesthetically pleasing. Doors can be made of plywood or frosted glass. |
|
Cassette |
Shoes will be stored vertically here; there are 2 or more cassette-type drawers on the door, which slide out when opened. Good for small corridor(width 20-25 cm). |
There are many options for making shelves. The interior can be decorated with shelves made of metal, in particular aluminum; processed clay shelves, dense oak, and glossy plastic look very beautiful. The material of manufacture can be anything, as can the configuration of the elements. Based on the type of installation, shoe racks can be divided into several types.
Materials and tools for making shelves
The selected material for making a shoe rack determines its service life and ease of use. For example, it’s easier to make a shelf out of a cardboard box, but it won’t last long. But as a temporary option it will work great.  When choosing wood as a material, you should take care of the final treatment of the wood with varnish or paint to ensure an attractive appearance preserved for a long time. There is no universal set of tools, due to the peculiarities of installation and material. But you will probably need the following tools:
- electric drill;
- glue;
- simple pencil;
- sandpaper;
- mounting hardware;
- screwdriver;
- wood hacksaw;
You will also need varnish or paint, the color of which is selected to match general interior hallway
How to make a shelf with your own hands
Before starting work, it is worth drawing an approximate layout of the future product, where you also need to indicate the dimensions. After this, they begin marking on the material, where they indicate the location of the fasteners (if any), the required length and width. Here are a few useful recommendations:
- When creating a simple shelf for shoes, you can do without using metal fittings - all elements are fastened with self-tapping screws.
- The doors are easy to install if you use awnings.
- Materials should be treated with varnish or painting before assembly. If you do this after, the layer will be uneven, and the procedure itself will be problematic. The process of assembling a shelf for shoes depends not only on the design, but also on the complexity of processing the material, and the features of working with it.

Wooden shoe rack
First of all, a shoe rack should have small dimensions, but at the same time accommodate a sufficient number of pairs of shoes. This is its integral feature. Materials from which you can build this design, many, but the main one is wood. Unlike chipboard and MDF, it will not unstick or swell when exposed to moisture. To do this, the wood should be varnished or painted.

What will you need?
Basic kit for making: wood, glue, screws, glazing beads, varnish or paint. Tools you will need: saw, screwdriver or screwdriver, hammer, sandpaper, drill. Beads, screws, and drills are selected in accordance with the size of the structure. Self-tapping screws need to be small, but capable of being firmly fixed in the structure. Please remember that wood may crack or split if wrong choice screw size.

Assembly of the structure
A depth of 35 centimeters will be sufficient. This distance is enough to accommodate almost any shoe. This will be the length of the sides of the structure. You need to saw off 6 elements of 35 cm each. You can determine who in the family has the most big size shoes, and measure the distance along it, leaving 1 cm in reserve. Then you need to distribute 4 bars on one of the elements and make a cut to the depth of the bars. The bars must be spaced evenly.
Each shelf should be able to accommodate 3 pairs of shoes, so its length must be determined based on the 3 largest pairs of shoes in the family. 4 pieces of this length will go on each shelf. To connect the elements, it is necessary to cut out recesses. These places must be secured with self-tapping screws. For a more aesthetic appearance, you can drill holes and use glazing beads and glue that will hold the shoes without any problems. This operation is similar for each shelf. After this, sand the tops of the side panels with sandpaper.
Any height can be set, but a reasonable limit is no higher than 80 cm. High shoes should fit in one of the compartments of the structure. The distance between the shelves (between the floor and the first shelf) should be 30 cm. All connections are made in the same way.

Practical shoe rack made of chipboard
To make a simple shelf for shoes from chipboard, you need to take two sheets of canvas (the dimensions are determined based on the space in the hallway). Will need fiberboard sheet for the back wall. The assembly algorithm is simple:
- We attach the bottom and the shelves themselves to the two side walls. For the screeds, use a drill (8 mm drill); at the end, use a drill with a diameter of 5 mm.
- The folding element is secured with medium-sized self-tapping screws;
- Top part fastened with 4*30 self-tapping screws;
- The shelves are mounted inside;
- Fasten back wall products.
- This is a budget and uncomplicated option that can be used in any hallway layout.

Beautiful laminate shoe rack
If, after renovating your apartment, there is still unused laminate, you can use it to make a stylish and compact shelf that will fit seamlessly into any design. For production you will need laminate sheets, the number of which depends on the tier and metal pipes with slots. They can be made using a metal grinder. If desired, the structure can be made to any height; for safety, the edges of the tubes are sealed with plugs.
 From profile
An interesting option are shelves for shoes made of profile and tempered glass (or wood). For manufacturing you will need the following tools:
- glass cutter;
- jigsaw;
- Bulgarian;
- level;
- electric drill for metal;
- screwdriver
You can use a regular colored profile or a galvanized one; the second option will be more reliable, as it is resistant to moisture.

Step-by-step instruction
- The profile is attached to the wall with one self-tapping screw;
- Using a level, check the horizontalness of the markings;
- Screw in the remaining screws;
- The frame is assembled;
- Already cut shelves are attached to the frame.
- This option will look good in a Hi-Teck design.
 Simple shoe rack made from boxes
The presented design is able to withstand a lot of weight, despite the fact that cardboard is a fairly flexible material. To make it, it is advisable to use boxes from household appliances. Depending on the height and width, take required amount boxes The structure is attached with glue, tape, a stapler or another method. The finished shelf can be decorated as your imagination dictates. There is one drawback - this shelf is only suitable for summer shoes.
 Corner shoe stand
Most suitable material to create a corner wooden shelf for shoes - larch. It tolerates dampness well and is easy to use.
First, we decide on the size and design of the shelf, draw a diagram and calculate the required amount of material.
For creating corner shelf necessary following materials and tools:
- two boards up to 2 m long (the ends of the boards can be rounded or cut with a wave);
- shelves cut from the same board (the shelves can be cut into different sizes and shapes);
- jigsaw for cutting;
- plane and sandpaper for leveling;
- corners and screws for connecting parts;
- level to check the accuracy of the design;
- antiseptic;
- varnish or paint.
The boards must be sanded and treated with an antiseptic, varnished or painted. Varnish is chosen if you want to emphasize the naturalness and structure of the wood, paint - if preferred rich colors and when deciding to use special design techniques with color play.
 Construction connection
To create a lightweight structure, the two main boards are not attached to each other: they are installed at an angle and connected using shelves. First, the lower shelf is attached, then the upper one, the structure is installed vertically and its evenness and stability are checked. Then the remaining shelves are installed.
The space between the shelves must be sufficient, otherwise there will be a feeling of crampedness and congestion.

Decorative elements
For additional decoration of the shelf, you can use thin decorative slats, cut out yourself. Or purchase a decorative wooden lattice partition, and after sawing it, decorate the shelf by adding carved stops.
Using decoupage or aging techniques in painting will also add a fresh touch to the interior of the hallway. Bright color solutions may be relevant to complement the interior.

Making a carousel shelf
The carousel shelf takes up little space and at the same time can accommodate many pairs of shoes. To make it you will need: fiberboard, metal pins and screws.

How to do
Blanks in the form of circles and quadrangles are cut from fiberboard. Using a compass and a rod, markings are made for the pins.
Discs for stands are fixed with discs smaller diameter, which are located at the required height.
Prepare the bottom, on which quadrangular blanks are installed, attached with a corner. The bottom circle is conventionally divided into 3-4 parts (space for 3-4 pairs of shoes on the “floor”).

Interesting ideas
To make a shoe shelf, you can use your imagination and then the most interesting ideas come to mind. unexpected decisions. Here are a few ideas that will be of interest not only to independent use, but also as a gift for loved ones.

On video: DIY shoe rack from an old closet
For residents small apartments The issue of shoe placement in the hallway is very acute. Families with children know what it means to have shoes scattered throughout the apartment. The problem is no less pressing for those who like to select a variety of accessories to complement their look. To maintain order in your home and conveniently arrange each pair, it is not at all necessary to buy expensive shelves from the assortment of furniture stores. Make convenient devices for storing shoes you can use available materials if you use your imagination. Here are some examples for inspiration.
Simple wooden cabinet
Making such an interior item is quite simple. The four boards are connected to each other using furniture screws. Thin ones are attached to the cabinet facades wooden planks. The best paint for painting is water based. If desired, the upper part can be made contrasting and adapted for sitting.
You can simply hang your shoes on the shelf!
The idea is brilliant in its simplicity. So as not to stain the floor dirty soles boots and sneakers, you just need to keep them suspended. 
Wooden pallet shelf
They make a lot of things out of such an affordable and practical thing as pallets. They are also suitable for making shoe racks. Building such a piece of furniture is quite simple, since parts of the pallets for the hallway can be left untreated.

Ladder instead of a shoe cabinet
For this idea it will work as a ready-made wooden staircase, and made independently from planed boards. The main thing is that the steps are located at an angle so that shoes do not stain the wall.

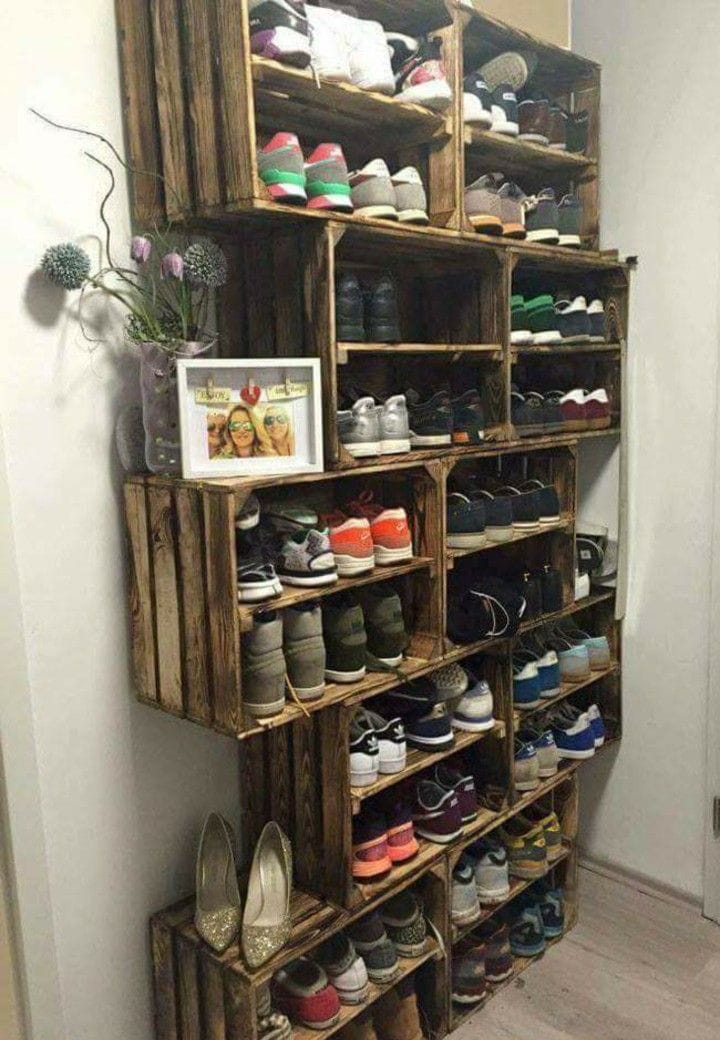
Rack of boxes
Wooden boxes are another universal remedy for lovers original furniture. If you place the boxes vertically, they are suitable for storing high autumn and winter shoes. The side surface can be adapted to store keys, hoopoe accessories behind shoes and other useful little things.

Rack for shoes of different heights
In spring and autumn, the weather is very changeable, and shoes of almost all seasons can be relevant. Such simple design with shelves of different heights allows you to store autumn boots next to sandals and sneakers.

Bee hive
Very original design can be created by combining several wooden hexagons, each of which is suitable for storing one or even several pairs of shoes, depending on their size.

Shelf with French chic
An ordinary piece of furniture can become a real hallway decoration if you glue a special film or paper with text printed on the back of the shelf. With this design, it is better to choose a neutral color for the shelf itself.

Skateboard shelves
True skateboarding fans always have a few old boards that have fallen into disrepair. As a last resort, you can turn to fellow hobbyists for help. Multi-colored shelves are great for storing sports shoes.

Shoe organizer
The design of shelves of different heights allows you to store shoes for different weather conditions. A small mirror in the hallway will allow you to evaluate your image before leaving the apartment.

Farmhouse style bench
It is very convenient to store shoes in closed drawers located on the shelves of the bench in rustic style. This storage method gives the hallway a neater look, since shoes are hidden from view.

Full wall shoe cabinet
So that the design does not seem cumbersome, it is better to choose boxes from thin plywood and arrange them in the form brickwork. The strength of such a locker ensures wide board, to which individual shelves are attached.
Diagonal shelves
By placing the usual wide shelves diagonally, you can significantly save space in the hallway.

Copper pipes
An original piece of furniture can easily be made from pipes left over after a bathroom renovation. To attach the shelf parts together, special adapters from a plumbing store are suitable.

Dynamic design
Bars of the same size are attached to the wall using special movable corners. When folded, the structure is decorative panel, and if necessary turns into space for storing shoes and accessories.
Shelves from furniture stores do not always fit into the required size. Therefore, today we will try to make some original shoe shelves with our own hands.
The simplest shoe rack from old furniture
First you need to cut the boards into blanks. Standard height between shelves - 23 cm. width should be such that it fits both women's and men's footwear– it should be 30-35 cm. Depending on the number of family members, the size of the shoe rack and its height may vary. The shelves in it are installed on different heights: for children's and adult shoes, shoes, boots and sandals, a large shelf for boots.Let's say we need to make a shoe rack measuring 100x35x46 cm. For it we will need three side walls measuring 35x45 cm, a top board 100x35 cm and three shelves 47x46 cm.
Shelf 100x35x46 cm
If the surface is too worn, you should first remove the varnish from the boards using sandpaper or a grinder with a special attachment. Since this creates too much dust, it is better to carry out work on the balcony. Damaged areas are puttied.
The boards are fastened together furniture corners using small self-tapping screws 12 mm long. A thin sheet of HDF is attached to the back of the shelf, which is used to line cabinet furniture.

Fastening the shelves
Advice. So that the shelf can be moved close to the wall, in places adjacent to the baseboards bottom part the side walls need to be cut at an angle of 45°.
Shelf made of wood or wooden slats
The principle of making a shoe rack from wood is similar to the previous one. The only difference is in the fastening. To securely fasten the boards together, holes are drilled into the side walls. holes for inserting screws. The same holes are prepared on the crossbars on the end side.The screws are screwed into the board so that their heads are slightly recessed into the wood by a couple of millimeters. The holes are leveled with sandpaper and puttied. You can also hide the holes using plastic plugs - they are sold at any furniture store.
To strengthen the product, additional fasteners are attached to its rear ends. metal corners. Before starting work, small irregularities are smoothed out with a grinder, grinder or emery cloth.

Connection of bars

Shoe rack made of wood
You can darken wood using water-soluble or alcohol-based stains- a dye that gives wood specific color. You can replace it with a regular one potassium permanganate– it paints excellently wooden surfaces. To ensure an even coating, the wood must be slightly moistened before painting. After painting, the product is varnished and thoroughly dried.

Stain treatment

Another option for a wooden shoe rack
Advice. A shoe rack can be turned into original ottoman, if you cover its upper part with foam rubber and cover it with fabric of a suitable color.

Ottoman-shelf for shoes
Original round shelf
1. To make a rounded shoe rack using a jigsaw, you need to cut out round blanks. Their diameter should be about 600 cm. You can replace the compass with a nail driven into the center, with a pencil attached to it on a cord. After cutting, the edges are carefully sanded with sandpaper or a sander.2. Now let's start manufacturing crossbars. You will need 8 of them (4 for fastening between the lower and middle workpieces and 4 for installing between the middle and upper). The size of each of these parts is 160x200 mm. After cutting, they are also polished.
3. On the bottom side round blanks We mark the places where the partitions are attached. To do this, draw two straight lines with a pencil at an angle of 90° to each other. The intersection should be exactly in the center of the workpiece.
4. On each line we drill 4 holes for inserting screws. We prepare the same holes at the ends of the crossbars.
5. Now all that remains is to fasten the parts together and paint the shelf in any color or cover it with stain or varnish.

Round shelf
6. You can make a shelf like this angular, if you use only 1/4 of the rounded workpiece.

Corner semicircular shelf
Wall mounted shoe rack
To save space in the hallway, shoe shelves can be made hanging. Attaching them to the wall is easy. To do this you will need a hammer drill or drill, anchors (L-shaped hooks), dowels, a screwdriver and the shelves themselves:
Metal suspension (anchor)
To ensure that the shelves are positioned strictly horizontally, we mark the wall using a building level; We place attachment points on the resulting line;
Drill the required holes in the wall;
We prepare the same holes in the shelf itself;
We insert dowels into them and screw the boards to the wall.
Advice. It is better to drill at a slight angle to the ceiling. In this case, the fastening will be more reliable, and the shelves will fit more tightly to the wall.

You can also attach shelves to the wall using metal profiles
Shoe rack made of metal pipes and PVC pipes
Original designer shelf can be made from metal and wood in a matter of minutes. For this you will need:Wooden, stained or painted boards;
Metal pipes;
Angle adapters;
Connecting couplings (when using pipe scraps of insufficient length);
Plastic plugs for legs;
Rust neutralizer.

Flanges for metal pipes
First, the metal must be treated from rust using neutralizer(special liquid). Next, the pipes are cut into pieces, and metal structure assembled using corner adapters. The pipes are attached to the shelves using flanges. To prevent the metal from rusting in the future, finished design Can be painted or treated with clear or colored varnish.

Shelf made of metal pipes and wooden boards
Such a shelf can also be made from water pipes. PVC pipes. To do this, they are cut into pieces of the required length, drilled into them through holes for fastening shelves, and corners, tees or plugs (fitting connections) are put on the ends. All that remains is to cut the boards or fiberboard to the required size and install them on the shelves.
Video: DIY shoe rack (shoe rack)
Find out how to save money and make an original shoe stand with your own hands here!Ideas, useful tips, manufacturing instructions.
Making a stylish shoe stand with your own hands
A beautiful shoe rack can become not only a place to store shoes, but also a full-fledged element of the hallway interior. The choice of options in stores is extensive, but the prices are often overpriced. To make a spacious and compact shoe rack that fits perfectly into the look of the corridor, you need to put in a little effort and imagination. Let's consider options for making shoe racks from available materials with your own hands.

Types and purposes of homemade shelves for the hallway
Before installation, be sure to measure the space where you plan to place the shoe rack. For a small hallway, the ideal option would be a narrow (20-30 cm) and high shelf; in a larger room, a closed cabinet with a width of 60-90 cm would look good.
Should the shelf be closed? If you want your hallway to look more aesthetically pleasing, this is a good option. Do not forget to regularly ventilate closed shoe racks, otherwise you will not avoid unpleasant odors. This problem can also be solved by installing a lamp inside for drying and disinfecting shoes.

The advantages of homemade shoe shelves are obvious:
- you can use eco-friendly materials;
- the cost of a homemade shoe rack is several times less than in a store;
- You can make a shelf for a hallway with a non-standard layout.
The design of a shoe rack directly depends on its purpose and the number of residents. Here are some popular and practical options:
| Shoe shelf design | Description |
| Classical | Shoe shelves of this type are popular due to their simple and convenient installation. It can have a regular rectangular or asymmetrical design. |
| Hanging | The shelf is attached to the wall using slats, straps or cables. Conveniently folds when necessary (for example, if you need to carry furniture into a narrow corridor). |
| Corner | Fastening is carried out on adjacent walls. Great space saver. |
| Floor | The support in this design is on the floor. Suitable for spacious hallways, but can also have compact dimensions if the sections are distributed not in width, but in height. |
| Closed | This option looks more aesthetically pleasing. Doors can be made of plywood or frosted glass. |
| Cassette | Shoes will be stored vertically here; there are 2 or more cassette-type drawers on the door, which slide out when opened. Well suited for a small corridor (width 20-25 cm). |
There are many options for making shelves. The interior can be decorated with shelves made of metal, in particular aluminum; processed clay shelves, dense oak, and glossy plastic look very beautiful. The material of manufacture can be anything, as can the configuration of the elements. Based on the type of installation, shoe racks can be divided into several types.
Materials and tools for making shelves
The selected material for making a shoe rack determines its service life and ease of use. For example, it’s easier to make a shelf out of a cardboard box, but it won’t last long. But as a temporary option it will work great.  When choosing wood as a material, you should take care of the final treatment of the wood with varnish or paint so that the attractive appearance is preserved for a long time. There is no universal set of tools, due to the peculiarities of installation and material. But you will probably need the following tools:
- electric drill;
- glue;
- simple pencil;
- sandpaper;
- fastening fittings;
- screwdriver;
- wood hacksaw;
You will also need varnish or paint, the color of which matches the overall interior of the hallway.
How to make a shelf with your own hands
Before starting work, it is worth drawing an approximate layout of the future product, where you also need to indicate the dimensions. After this, they begin marking on the material, where they indicate the location of the fasteners (if any), the required length and width. Here are some useful tips:
- When creating a simple shelf for shoes, you can do without using metal fittings - all elements are fastened with self-tapping screws.
- The doors are easy to install if you use awnings.
- Materials should be treated with varnish or painting before assembly. If you do this after, the layer will be uneven, and the procedure itself will be problematic. The process of assembling a shelf for shoes depends not only on the design, but also on the complexity of processing the material, and the features of working with it.

Wooden shoe rack
First of all, a shoe rack should have small dimensions, but at the same time accommodate a sufficient number of pairs of shoes. This is its integral feature. There are many materials from which this structure can be constructed, but the main one is wood. Unlike chipboard and MDF, it will not unstick or swell when exposed to moisture. To do this, the wood should be varnished or painted.

What will you need?
Basic kit for making: wood, glue, screws, glazing beads, varnish or paint. Tools you will need: saw, screwdriver or screwdriver, hammer, sandpaper, drill. Beads, screws, and drills are selected in accordance with the size of the structure. Self-tapping screws need to be small, but capable of being firmly fixed in the structure. It must be remembered that wood can crack or split if the size of screws is chosen incorrectly.

Assembly of the structure
A depth of 35 centimeters will be sufficient. This distance is enough to accommodate almost any shoe. This will be the length of the sides of the structure. You need to saw off 6 elements of 35 cm each. You can determine who in the family has the largest shoe size and measure the distance along it, leaving 1 cm in reserve. Then you need to distribute 4 bars on one of the elements and make a cut to the depth of the bars. The bars must be spaced evenly.
Each shelf should be able to accommodate 3 pairs of shoes, so its length must be determined based on the 3 largest pairs of shoes in the family. 4 pieces of this length will go on each shelf. To connect the elements, it is necessary to cut out recesses. These places must be secured with self-tapping screws. For a more aesthetic appearance, you can drill holes and use glazing beads and glue that will hold the shoes without any problems. This operation is similar for each shelf. After this, sand the tops of the side panels with sandpaper.
Any height can be set, but a reasonable limit is no higher than 80 cm. High shoes should fit in one of the compartments of the structure. The distance between the shelves (between the floor and the first shelf) should be 30 cm. All connections are made in the same way.

Practical shoe rack made of chipboard
To make a simple shelf for shoes from chipboard, you need to take two sheets of canvas (the dimensions are determined based on the space in the hallway). You will need a sheet of fiberboard for the back wall. The assembly algorithm is simple:
- We attach the bottom and the shelves themselves to the two side walls. For the screeds, use a drill (8 mm drill); at the end, use a drill with a diameter of 5 mm.
- The folding element is secured with medium-sized self-tapping screws;
- The upper part is attached to 4*30 self-tapping screws;
- The shelves are mounted inside;
- Secure the back wall of the product.
- This is a budget and uncomplicated option that can be used in any hallway layout.

Beautiful laminate shoe rack
If, after renovating your apartment, there is still unused laminate, you can use it to make a stylish and compact shelf that will fit seamlessly into any design. For manufacturing, you will need laminate sheets, the number of which depends on the tiers, and metal pipes with slots. They can be made using a metal grinder. If desired, the structure can be made to any height; for safety, the edges of the tubes are sealed with plugs.
 From profile
An interesting option are shelves for shoes made of profiles and tempered glass (or wood). For manufacturing you will need the following tools:
- glass cutter;
- jigsaw;
- Bulgarian;
- level;
- electric drill for metal;
- screwdriver
You can use a regular colored profile or a galvanized one; the second option will be more reliable, as it is resistant to moisture.

Step-by-step instruction
- The profile is attached to the wall with one self-tapping screw;
- Using a level, check the horizontalness of the markings;
- Screw in the remaining screws;
- The frame is assembled;
- Already cut shelves are attached to the frame.
- This option will look good in a Hi-Teck design.
 Simple shoe rack made from boxes
The presented design is able to withstand a lot of weight, despite the fact that cardboard is a fairly flexible material. To make it, it is advisable to use boxes from household appliances. Depending on the height and width, take the required number of boxes. The structure is attached with glue, tape, a stapler or another method. The finished shelf can be decorated as your imagination dictates. There is one drawback - this shelf is only suitable for summer shoes.
 Corner shoe stand
The most suitable material for creating a corner wooden shoe rack is larch. It tolerates dampness well and is easy to use.
First, we decide on the size and design of the shelf, draw a diagram and calculate the required amount of material.
To create a corner shelf you need the following materials and tools:
- two boards up to 2 m long (the ends of the boards can be rounded or cut with a wave);
- shelves cut from the same board (the shelves can be cut into different sizes and shapes);
- jigsaw for cutting;
- plane and sandpaper for leveling;
- corners and screws for connecting parts;
- level to check the accuracy of the design;
- antiseptic;
- varnish or paint.
The boards must be sanded and treated with an antiseptic, varnished or painted. Varnish is chosen if you want to emphasize the naturalness and structure of the wood, paint - if you prefer rich colors and if you decide to use special design techniques with a play on color.
 Construction connection
To create a lightweight structure, the two main boards are not attached to each other: they are installed at an angle and connected using shelves. First, the lower shelf is attached, then the upper one, the structure is installed vertically and its evenness and stability are checked. Then the remaining shelves are installed.
The space between the shelves must be sufficient, otherwise there will be a feeling of crampedness and congestion.

Decorative elements
For additional decoration of the shelf, you can use thin decorative slats, cut out yourself. Or purchase a decorative wooden lattice partition, and after sawing it, decorate the shelf by adding carved stops.
Using decoupage or aging techniques in painting will also add a fresh touch to the interior of the hallway. Bright colors can be relevant to complement the interior.

Making a carousel shelf
The carousel shelf takes up little space and at the same time can accommodate many pairs of shoes. To make it you will need: fiberboard, metal pins and screws.

How to do
Blanks in the form of circles and quadrangles are cut from fiberboard. Using a compass and a rod, markings are made for the pins.
Discs for stands are fixed with discs of smaller diameter, which are placed at the desired height.
Prepare the bottom, on which quadrangular blanks are installed, attached with a corner. The bottom circle is conventionally divided into 3-4 parts (space for 3-4 pairs of shoes on the “floor”).

To make a shoe shelf, you can use your imagination and then the most unexpected solutions come to mind. Here are a few ideas that will be interesting not only for independent use, but also as a gift for loved ones.

On video: DIY shoe rack from an old closet
Almost every person has at least 4 pairs of shoes - winter boots, spring boots, summer shoes, sports sneakers or sneakers that can be worn in the fall. But as a rule, a woman’s shoe wardrobe is much wider - flip-flops, flip-flops, clogs, ballet flats, flip-flops, ankle boots, Ugg boots, felt boots, shoes with high, medium and small, thin, square heels, with a sharp, round and rectangular toe, open and closed heel or toe... It is estimated that the average Russian family of three uses about 10 pairs of shoes per season! All of it must be stored somewhere. You can, of course, without further ado and place everything on the rug near front door. But sooner or later, a bunch of malas will happen on this very mat. And all this looks, to put it mildly, unaesthetic. In this case, shoe shelves will come to the rescue. You can buy them in a furniture store, spending from 3 to 20 thousand rubles, or you can make them yourself - a product made from ordinary cardboard boxes will cost you pennies.
Let us note in advance that if in the hallway you need space not only to store shoes, but also outerwear, then in this case it is better to immediately purchase a wardrobe. By the way, you can buy a sliding wardrobe in the online store Cult of Furniture at a relatively low price, and quite High Quality. Here you can find a wide variety of models, differing in size, shape and cost.
You can make a shoe rack with your own hands from scrap materials that you can get for free, and legally! Of course, the simplest and cheapest shoe racks will not last for decades.
At proper care and “polite” treatment will last for 3-4 years. But this is quite enough - after a while you can make a new shoe rack.
A shoe rack can be made from any available material, even old cardboard. The main thing is to treat the product with varnish. so that the cardboard does not absorb moisture and does not collapse
“Star Hour”: products from cardboard boxes
Do-it-yourself shoe shelves for the hallway are made from cardboard boxes literally in one evening. To get started, prepare the materials:
- from 5 to 20 cardboard shoe boxes. It is important that the side parts are not too narrow - at least 10-15 centimeters. Where can I get them? Look for houses first. Often such packages are thrown onto a balcony or mezzanine (after all, branded shoes are guaranteed for a month). Not home? Ask your friends and neighbors, call relatives and colleagues. You'll probably collect 10 pieces in a couple of hours. Usually the boxes are made of thick cardboard, with holes on the sides so that the shoes inside can “breathe”. Let there be boxes different sizes(you are unlikely to be able to find the same ones, although nothing is impossible);
- instant glue. You will need 2-3 tubes depending on the size of the shelf.
One costs about 100 rubles. Choose "Moment" or "Second".
They cope better than others with their “professional responsibilities”;
- water-based paint in the color you like.
A five-liter bucket costs about 300 rubles.
You can do without coloring the resulting product. But it will look unattractive and sloppy. Choose products from such manufacturers as: “Paint”, “Dessa Decor”, “Parad”, “Lakra”;
- paint brush. Costs about 100 rubles. Do not choose a wide one; the optimal length of the working part is 5 centimeters.
Take the boxes and remove their lids - you won't need these parts, the storage will be open for ease of use. Place 3-4 boxes in the first row, gluing the side (narrow) parts to each other. Leave for an hour. Next, make the 2nd and even the 3rd row as you wish. Fasten the parts of the system together with glue. Leave the shelf to dry for about 2-3 hours. Paint the resulting product. You can paint the shoe rack outside and inside. You can use it after a day, when the paint has dried well. To make this happen faster, place the shelf in a dry, warm place. And then move it to the hallway. Do not place near a stove to avoid spontaneous combustion.
Shoe rack made of shoe boxes can be original decoration interior, if you decorate it correctly, for example, paint it in a bright color
Shoes are placed on the sides of the boxes; if these parts are quite wide, then there will be no problems.
Important: do not use ordinary cardboard boxes from household appliances or food and drinks for such hand-made items in the hallway. Even after paint treatment, such a system will not be durable and reliable. The slightest moisture will render the structure unusable.
PVC pipes will also come in handy!
If you are thinking about how to make shoe shelves in your hallway with your own hands, one of the most simple options– make them from PVC pipes.
Parts of a shoe rack made of PVC pipe are fastened together with instant glue. This design looks original and unusual
For such a shelf for shoes you will need:
- hard PVC pipes. They can be bought at any hardware store. Diameter - at least 20 centimeters. Length – from 1 meter or more, depending on the number of cells of your design.
1 m costs about 800 rubles.
If you want to save money, then go to the nearest construction site. Today, communications are laid with PVC pipes. Often, trimmings remain and are simply thrown away or taken away for disposal. Agree with the builders - they are unlikely to be against you taking some parts. True, with a size of in this case there may be problems;
- instant glue;
- water-based paint (you can do without it - then the shelf will be white or yellow, depending on the color of the pipe itself).
Take the pipe and cut it into equal parts 15-20 centimeters long. Place 5 cells in the first row, fasten them together with glue. Next, glue the cells on top. Any number of rows is at the discretion of the owner.
For more information on how to make a shoe storage system from PVC pipes in the hallway, see below:
DIY shoe shelves in the hallway made of plywood or OSB board
Plywood or OSB board is an ideal material for making a shoe rack. It is wear-resistant and durable. Will not bend under too heavy boots. Can last 5-7 years. It is stable, unlike, for example, cardboard “colleagues”.
A shoe rack made of plywood is stronger than its counterparts made of cardboard and PVC. This one will last 5 years, no less.
For production, purchase:
- two OSB boards or two sheets of plywood with sides one meter by one meter. Choose sheets at least 5 millimeters thick. They should not have unevenness, defects, cracks, sharp unpleasant odor. A square costs approximately 500-600 rubles;
- a saw or cutter that will cut a sheet or slab;
- self-tapping screws;
- hammer;
- paint for OSB boards or plywood.
Choose products from Sopka companies; "Kaiser" "Parade"; "Tixo."
The paint costs from 150 to 300 rubles for 3 liters.
Take 1 sheet or slab and saw or cut it into 5 strips 20 centimeters wide. Now attach each of the strips to another board or plywood end-to-end. They need to be connected using self-tapping screws. If you want shelves for shoes in the hallway to stand on the floor, then attach the bottom strip of plywood to the very edge of the sheet or slab. The shelf for shoes in the hallway will rest on the lower tier. You can also place shoes on it. The structure is painted and left alone for 12-24 hours, and then used for its intended purpose. It is permissible to decorate the product artificial stone. The shelf can be hung on the wall - then a hammer drill and nails 10 to 15 cm long will come in handy.
To learn how to make shoe stands in the hallway with your own hands from plywood or OSB board, watch the video:
Not like everyone else: original storage systems
What are they used to create shoe shelves in the hallway? As an option:
- old kitchen cabinets. They can be painted in bright colors and placed in the hallway;
Shoe rack even from an old one kitchen cabinet it can be done. will come to the rescue necessary fittings and decor – paint, varnish
- To make a shoe rack in the hallway with your own hands, use metal dish drying racks. They are attached to the walls and shoes, boots, and sandals are placed there;
- Ordinary hooks can become a kind of stand for your own shoes. Although they cannot be called stands in the full sense. Hooks can be attached to the wall at a distance of 20-30 centimeters from the floor and ballet shoes, sneakers, sneakers, etc. can be hung on them. Use only metal fastenings, plastic ones will quickly break off;
- the most popular and easiest to make is a shelf for shoes in the hallway made of wood, or rather, wooden board. The width of the board is usually 15-20 centimeters. You will need about 3 meters of material. Price per meter – 200-300 rubles. Take oak, ash or spruce. Cut 6 strips of 50 cm each from the board. Place two vertically, and secure the rest horizontally between them. The product must be varnished.
Choose products from Alpina, Deluxe, Bosnia. Price - about 500 rubles per liter.
DIY shoe racks made of wood are natural and environmentally friendly.
A shoe rack made of wooden boards is a classic that does not “get old” over the years. To produce such a product, choose oak, ash or spruce - they are considered the most durable
Any idea can be realized - imagination is only welcome. Before you make a shelf for shoes and boots with your own hands in the hallway, look around. Perhaps it can be adapted for this purpose old chest of drawers, a shelf or even... a buffet?!
You will learn about the original shelves from the video:
Finally
Now you know how to make a shoe rack yourself. To do this, you can use available materials. The most popular are wooden shoe racks. Show your imagination and ingenuity, let your shoe rack be the most sophisticated, unusual and non-standard.
Proper care is important for every shoe shelf in the hallway. Do not place wet or dirty shoes on it. Periodically clean the shelf from dust, dirt, sand. Do not move the structure from place to place too often, only if absolutely necessary. From constant such exposure, the product will quickly become unusable.