How to use liquid wallpaper on the ceiling. Liquid wallpaper for the ceiling: silk, cellulose and cellulose-silk types, application technology
Liquid wallpaper - Beautiful design An elegant finishing material that from a distance resembles marble chips, but up close it resembles flock. Wallpaper is applied to vertical and horizontal surfaces, it looks rich and has a lot of advantages. If you look at the photo liquid wallpaper on the ceiling in the interior, they will amaze you with their respectable and impressive appearance.
Advantages of liquid wallpaper
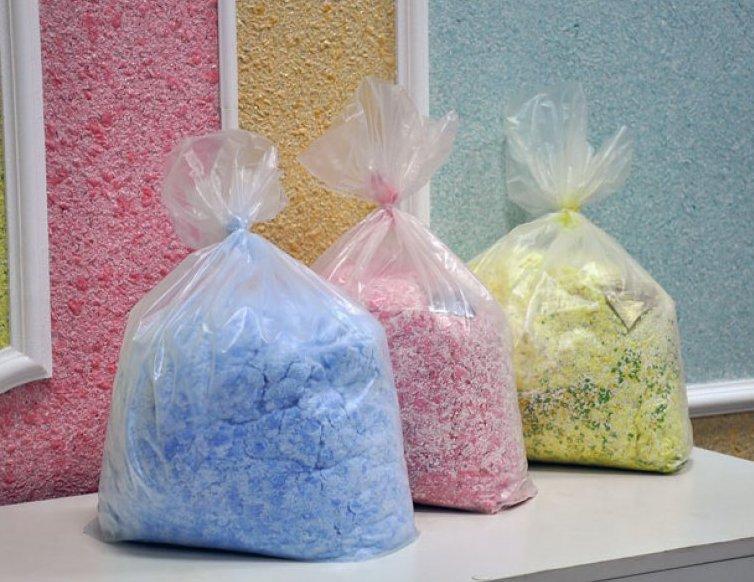
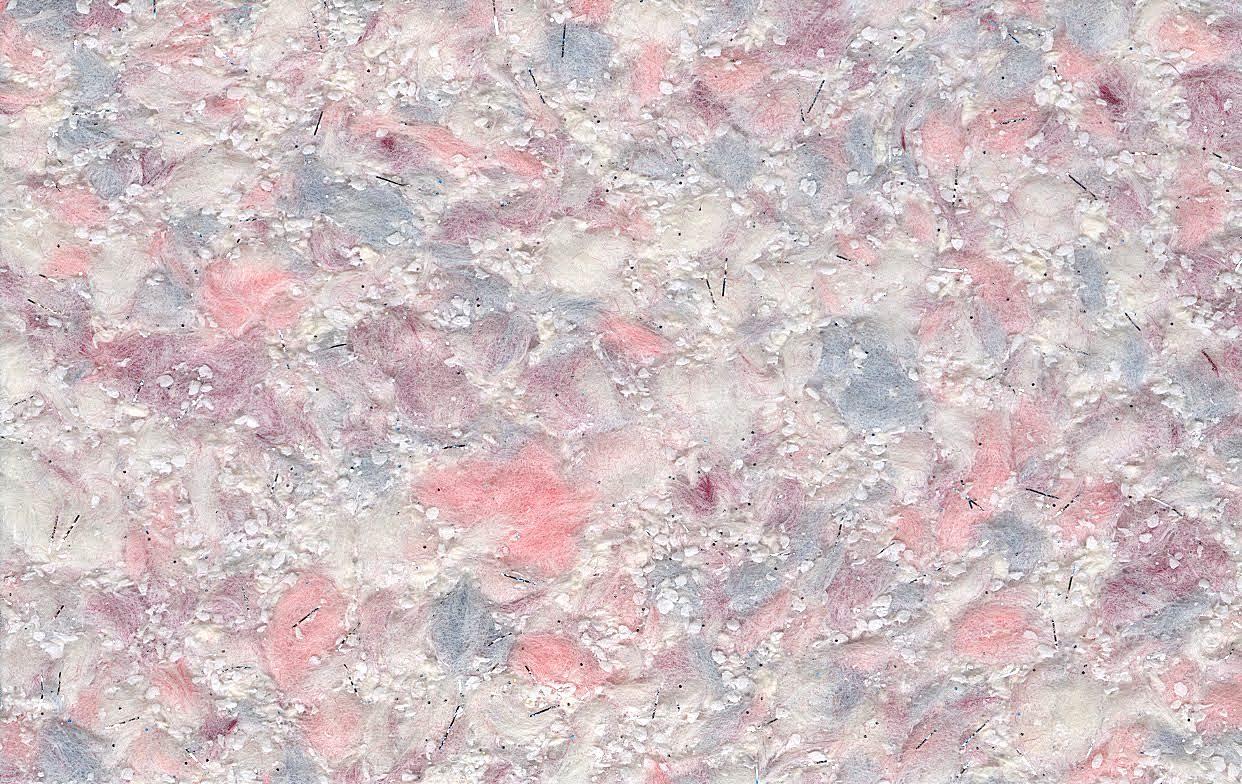
Liquid wallpaper is a finishing material consisting of cellulose, silk or cotton fibers, environmentally friendly dye on water based, binder - acrylic dispersion, CMC wallpaper glue. The composition may contain colored flocks or marble and quartz chips to give the effect. Often the mixture of liquid wallpaper includes mica sparkles, which are sold in a separate bag and are added to the mixture during mixing.
Liquid wallpaper has a number of advantages over conventional wallpaper and decorative plasters:
- Before applying them, you do not need to perfectly level the ceiling, as they have filling properties.
- They don't require much space to prepare. They do not need to be spread, cut or coated with glue.
- They are easy to apply and form a monolithic elastic coating that does not deform as a result of shrinkage of the house. They fill the joints between the ceiling and ceiling plinth or cornice, sockets for chandeliers.
- The microporous structure provides good thermal and sound insulation, forming a breathable surface. does not form under them Greenhouse effect and there is no dampness leading to the appearance of fungus.
- The coating does not absorb odors and does not attract dust, and does not emit toxic gases when burning.
- The coating is characterized by high maintainability. Simply wet the damaged area with water and spread the material over the surface with a spatula.
- If there is excess material left after work, it can be dried and left until next use or in case of repair.
Wallpaper classification
The range of wallpapers is quite diverse. Manufacturers of this material on the market finishing materials not much. The most popular and purchased due to its availability and low price are the products of the Russian company Silk Plaster. The Turkish manufacturer Bayramyx has approximately the same assortment. To decorate premium interiors, they use finishing from French manufacturers Fibres de cotex and Senideco.
Cotton
Cotton wallpapers are made from 100% natural cotton; they are distinguished by softness and high environmental friendliness. The mixture contains 98% cotton, and 2% are natural impurities: cellulose, mica, textile fibers. They are not afraid of drafts and shrinkage, do not bubble, and do not move away from the walls. This is an ideal find for decorating rooms intended for children's pastime. Manufacturers of cotton liquid wallpaper offer up to 240 different shades. You can always mix several colors together.
Pulp
Cellulose wallpaper is in great demand due to its affordable cost. In appearance they look like silk, although they cannot boast of the same durability. Over time they lose color. General recommendation by a specialist - if renovations in the apartment are carried out every 5 years - then this is the best choice in terms of price and quality. If you want to make repairs that will last forever, choose silk ones.

Silk
Silk liquid wallpaper is premium wallpaper. Their high price is more than compensated by their beautiful appearance and durability. The material contains silk fibers. The resulting coating looks great thanks to its silky texture, does not fade in light, does not change color and looks great for many years, as can be seen in the photo.

Mixed
Mixed or combined silk-cellulose wallpaper - best option according to price/quality parameters. The material contains silk fibers with cellulose. Such wallpaper is resistant to ultraviolet radiation and retains its original appearance for a long time.

The procedure for applying wallpaper to the ceiling
Liquid wallpaper tends to draw dirt and rust from insufficiently treated surfaces to the surface. Therefore, before applying wallpaper, the ceiling must be treated. There is no need to particularly level the surface, since liquid wallpaper swells during the cooking process and fills small cracks and unevenness. The cause of stains may be not removed metal objects: staples, screws, nails. If the ceiling was treated before copper sulfate, unsightly stains may also appear. To prevent this from happening, you can wipe the surface with chlorine bleach.
For the same reason, you should not apply the material to brightly colored surfaces. To prevent the appearance of an unexpected shade, it is necessary to prime the pre-painted ceiling and paint it with white paint. To prevent stains, apply two coats of primer. The primer application technology involves coating in two perpendicular directions.
The preparation of the walls also varies depending on the base material:
- Old Khrushchev buildings are made of porous material, so the surface under the wallpaper needs to be painted with oil paint.
- Brick walls should be treated with a gypsum mixture and covered with a primer.
- Metal screws in plasterboard bases must be covered with putty or painted over with oil paint.
- Leak areas are also pre-painted with oil paint.
- Wooden surfaces are pre-treated with water-based emulsion.
Purchased ready-made wallpaper Just stir before application. The process for preparing the dry mixture is different:
- pour the mixture into a plastic bucket;
- add water in accordance with the manufacturer’s instructions;
- mix thoroughly;
- leave the solution for 12 hours;
- add a liter of water and stir again.
Now we can begin the process of applying liquid wallpaper. Typically a spatula is used for these purposes. Liquid wallpaper should be applied with a spatula in a layer 3-5 mm thick. We level the applied material on the ceiling with a plastic float. If desired, after 5 hours you can go over the applied material with a texture roller. After this, the ceiling is dried within 48 hours. During this time you cannot touch it.
If finishing is applied in places:
- with high traffic (in the hallway),
- in places with the possibility of contamination (in the kitchen),
- or in places with high humidity(in the bathroom)
Then the top of the liquid wallpaper can be coated with one or several layers of acrylic varnish. After application, each layer must dry for one hour and only then the next one is applied.
Interior design options
The technology of applying the material allows you to create images and even panels. To make a beautiful ceiling design with liquid wallpaper, you need to perform the following decoration technique:
- Draw a layout on the ceiling with a pencil;
- Apply wallpaper in a layer of 1.5–2 mm, protruding 1–2 mm beyond the contour;
- To highlight the boundaries of the drawing, use a spatula to shift the mass in the opposite direction;
- Wait for the mass to dry;
- Step back 2 mm from the dried layer and apply a different color in a thin strip. Move the new layer towards the old one to highlight the border;
- On the surface you can use beads, silver threads and other decorative details for decoration.
Using the same technology, a three-dimensional pattern is created, with the difference that the mass needs to be formed into a relief that protrudes from the surface. You can work with a mixture of wallpaper like plasticine - sculpt any shape. For convenience, it is better to paste over the outer contour paper tape. There is no need to smooth the material during the drawing process, then you will get a volumetric composition close to a bas-relief. You can mark the boundaries of the colors on the coating with a spatula, carefully pressing the grooves. The remaining background after the drawing has dried is treated with a continuous layer of a different color.
In the photo you can see options for ornaments and patterns and other images and illustrations that are easy to apply with your own hands. Liquid wallpaper combines well with photo wallpaper.
Gallery of liquid wallpaper on the ceiling:
In the kitchen
If you decide to apply liquid wallpaper to the kitchen ceiling, you need to cover it with acrylic varnish to increase the moisture and dirt resistance of the coating. Acrylic lacquer strengthens the ceiling finish, forming hard, vapor-permeable, moisture-resistant coatings that will withstand mechanical cleaning and cleaning detergents. Varnish can be applied in two ways:
- added to the mixture during the last stirring;
- applied to a dry surface.
The varnish consumption is as follows:
- when applied in one layer - 1 liter. for 20 sq.m.;
- when applied in 2 layers - 1 l. for 4 sq.m.
Kitchen gallery:
Liquid wallpaper in Lately are increasingly used in indoor renovations. They do not look like ordinary roll wallpaper; most likely, from a distance they can be confused with a stone coating. Liquid wallpaper feels more like thick felt.
This coating is sold dry and applied to the wall in the same way as plaster. According to experts, they are considered an ideal material that can be easily applied both to the wall and to the ceiling.

Liquid wallpaper appeared in Russia not so long ago and immediately became a popular material. The main component of this coating is natural cellulose. Classic liquid wallpaper is made from cellulose, cotton or silk fibers, safe dye and glue.

In addition, liquid wallpaper may contain marble chips or sparkles to give an even greater effect. Most often, mica glitter is added to liquid wallpaper.

This component is not expensive, and besides, it adds a special sophistication to ordinary liquid wallpaper. Mica glitter can be purchased in a separate bag and added to the dry wallpaper mixture if desired.
Liquid wallpaper is intended only for interior decoration. The material is completely natural, so it will not be able to withstand moisture. According to designers, liquid wallpaper is perfect for the living room, bedroom, and children's room.

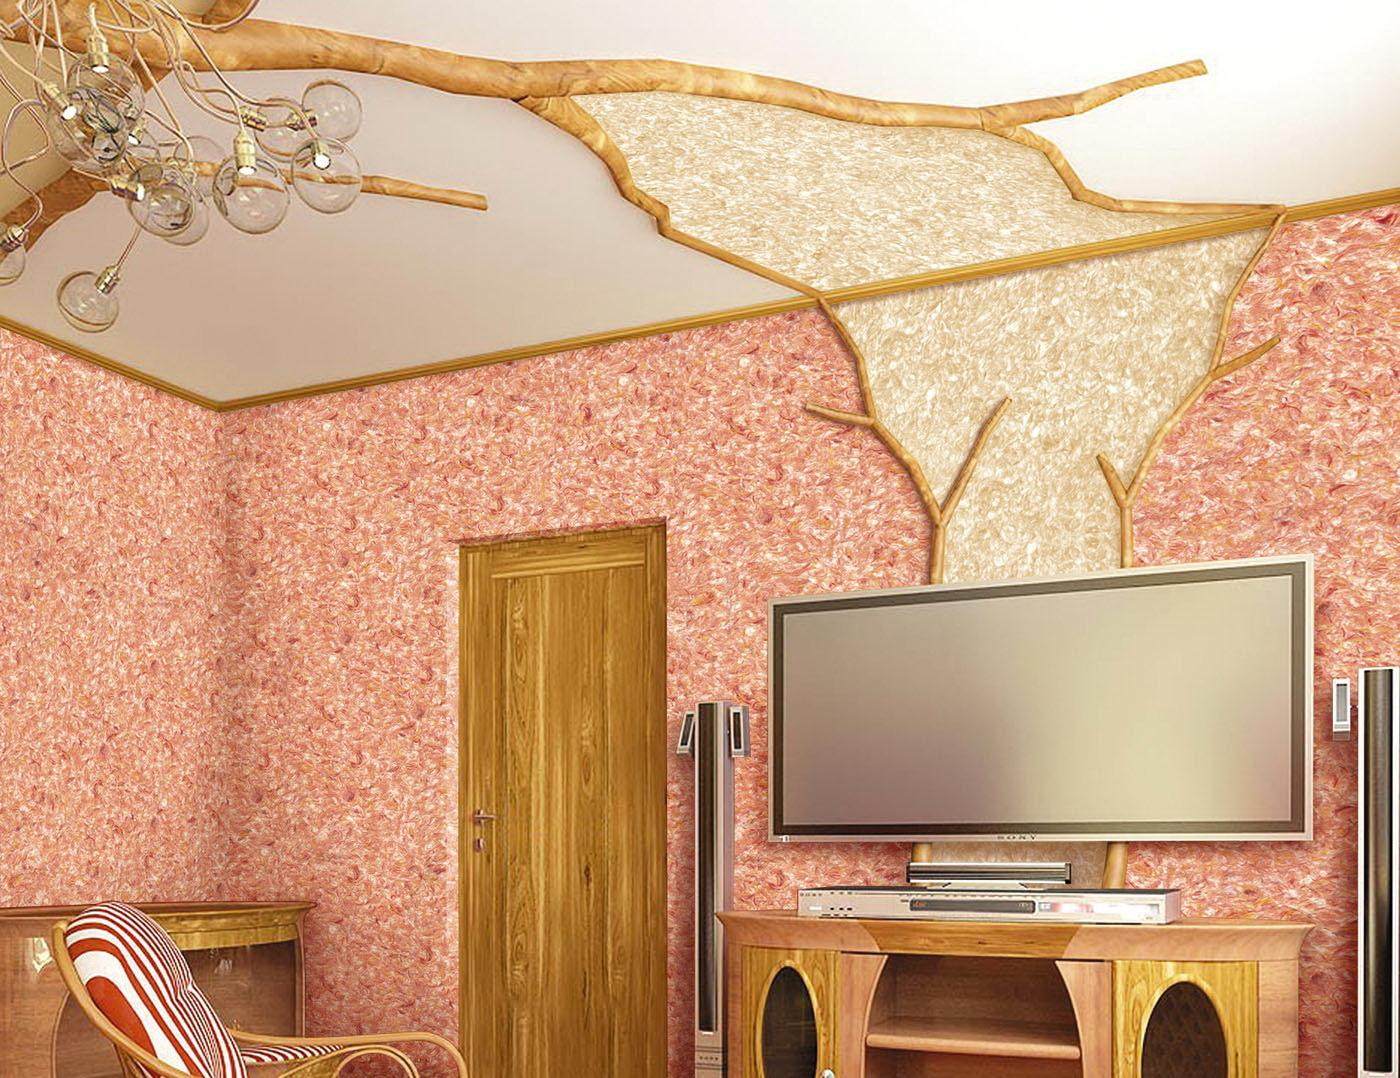
The material gives a special warmth to the room, making it cozy. Liquid wallpaper perfectly absorbs noise, so most often experts recommend applying it in the room where the TV will be placed.

In addition, wallpaper can increase the acoustics in a room. The material is plastic and pliable, so you can create any wallpaper pattern on the ceiling.

Liquid wallpaper is produced in Turkey, Russia, France, Germany, they all differ in their type, composition, and their service life also varies.

Experts advise taking a closer look at photo projects; thanks to the visual representation, as a rule, a beautiful ceiling design with liquid wallpaper is created.

Pros and cons of liquid wallpaper
If we compare such a coating with plaster or with ordinary wallpaper, then liquid wallpaper differs in that it does not require much space at all when used. They are not cut, not measured, and the wall or ceiling is not coated with glue.

When applying such a coating to the ceiling, the remaining material will not fall down, since the mixture is thick and reliably holds its shape. This is how beautiful, original and stylish finished ceilings look in the interior - our photo selection at the end of the article is due confirmation of this.
It is a pleasure to work with the material, it is quite pliable and does not stand out bad smell or dust. Wallpaper is well applied to the ceiling, without creating joints, filling the gaps that arise in the places where the ceiling connects to the wall or baseboards on the ceiling.

Liquid wallpaper is flexible, so you can easily decorate a column, arch or bay window with it. After the coating dries, it will become a little elastic, this is a big plus, since it will not crack when the house shrinks.

Another advantage of liquid wallpaper is its porous structure. This, in turn, allows you to absorb sound well, retain heat in the room, while the material breathes.

In a room where the walls are covered with such wallpaper, mold does not appear on the ceiling or walls, there is no dampness, unlike the use of vinyl-based wallpaper.

The material is not able to absorb foreign odors, and also does not absorb dust. If the wallpaper is somehow dirty or a crack has formed on it, this area must be carefully cut out, dilute the wallpaper mixture again and apply it to this place.


Unfortunately, liquid wallpaper has a main drawback - it is high in price compared to classic wallpaper in rolls or canvas for a stretch ceiling.

Also another drawback is the low selection of shades, while there are regular wallpaper sometimes there is not enough time.

Designers advise in the case of small selection colors, combine liquid wallpaper with other materials, for example, in the case of the ceiling, apply stucco.

How to apply liquid wallpaper to the ceiling?
First you need to properly prepare the surface. The mixture can be applied to concrete, brick, drywall, metal or wood. Liquid wallpaper clings well to any surface, so it does not fall off.

The surface must be smooth and durable, there should be no protruding nails or reinforcement. There should be no moisture in the room where the material will be used.


Possible cracks can be covered with putty or the same liquid wallpaper. Before applying the material, the surface should be primed, this will give strength to the ceiling. By following all the technology for applying such material, you can make beautiful ceiling with your own hands.
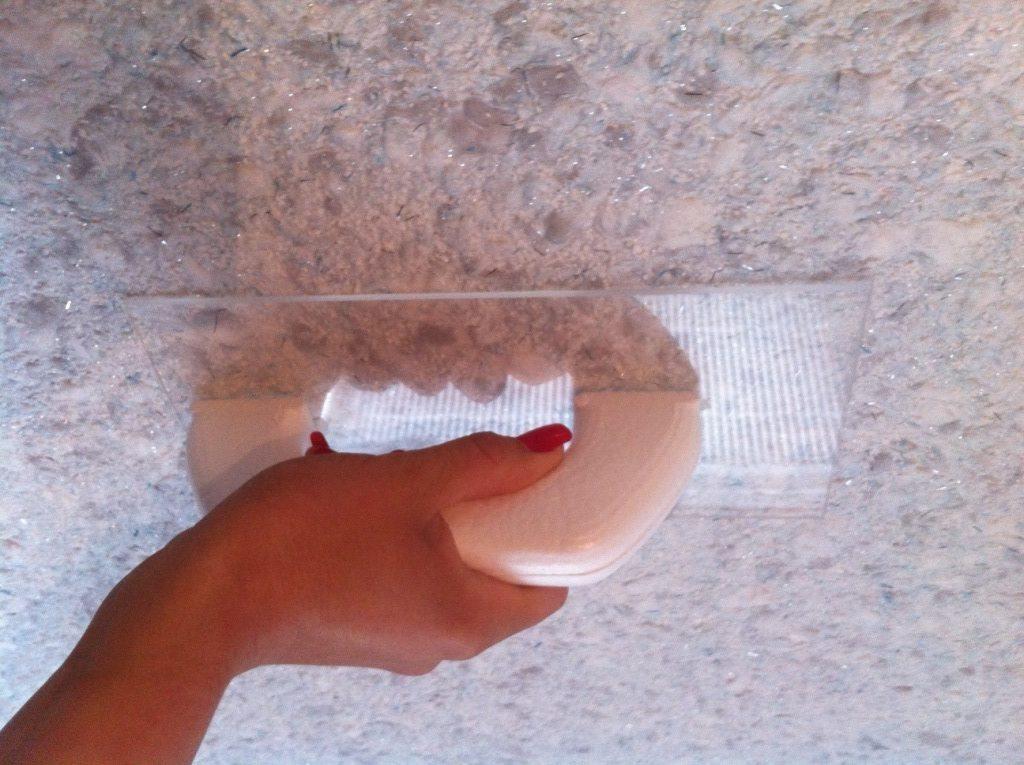
The prepared mixture must be applied to the surface with a plastic or metal spatula with a nasty surface. Hand movements should be light, moving from left to right.

The angle of inclination of the spatula to the surface should be small so that the wallpaper mixture is evenly distributed over the surface.

The coating should remain slightly loose immediately after application; compaction is not allowed. When applying liquid wallpaper, you must not press on the spatula, otherwise the mass will become compacted, you will not get a relief, and the consumption of the mixture will become large.

Below are photos of liquid wallpaper on the ceiling, technology correct application, as well as room finishing options.


Photo of liquid wallpaper on the ceiling


Liquid wallpaper for the ceiling is a unique finishing material that combines putty finishing technology with simultaneous finishing of surfaces. With their help, you can hide cracks and defects in one step, and even out small differences in block slabs. They help create a beautiful relief pattern on any horizontal, vertical and curved surfaces.
Is it possible to apply liquid wallpaper to the ceiling?
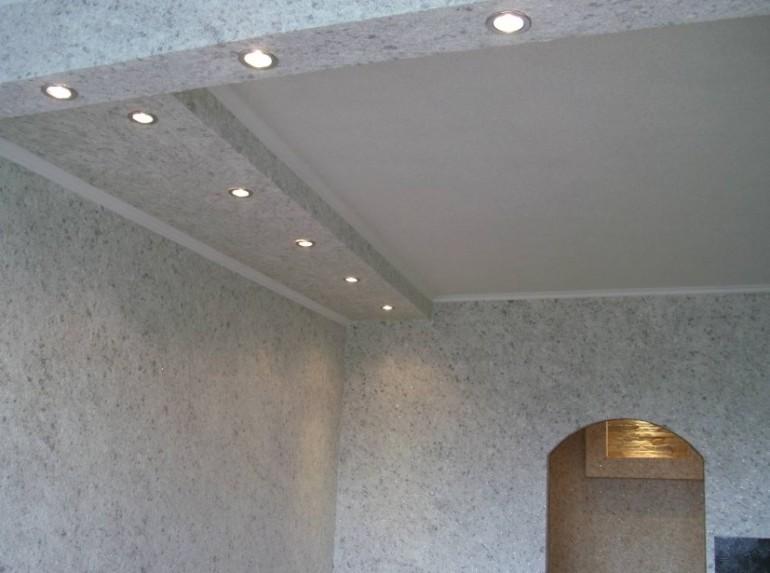
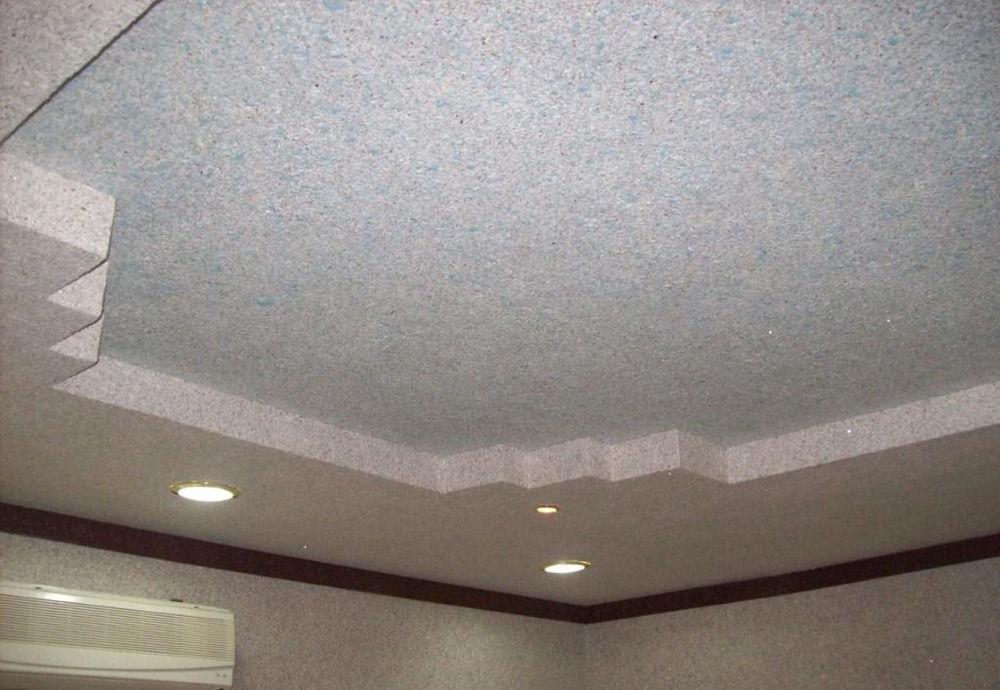
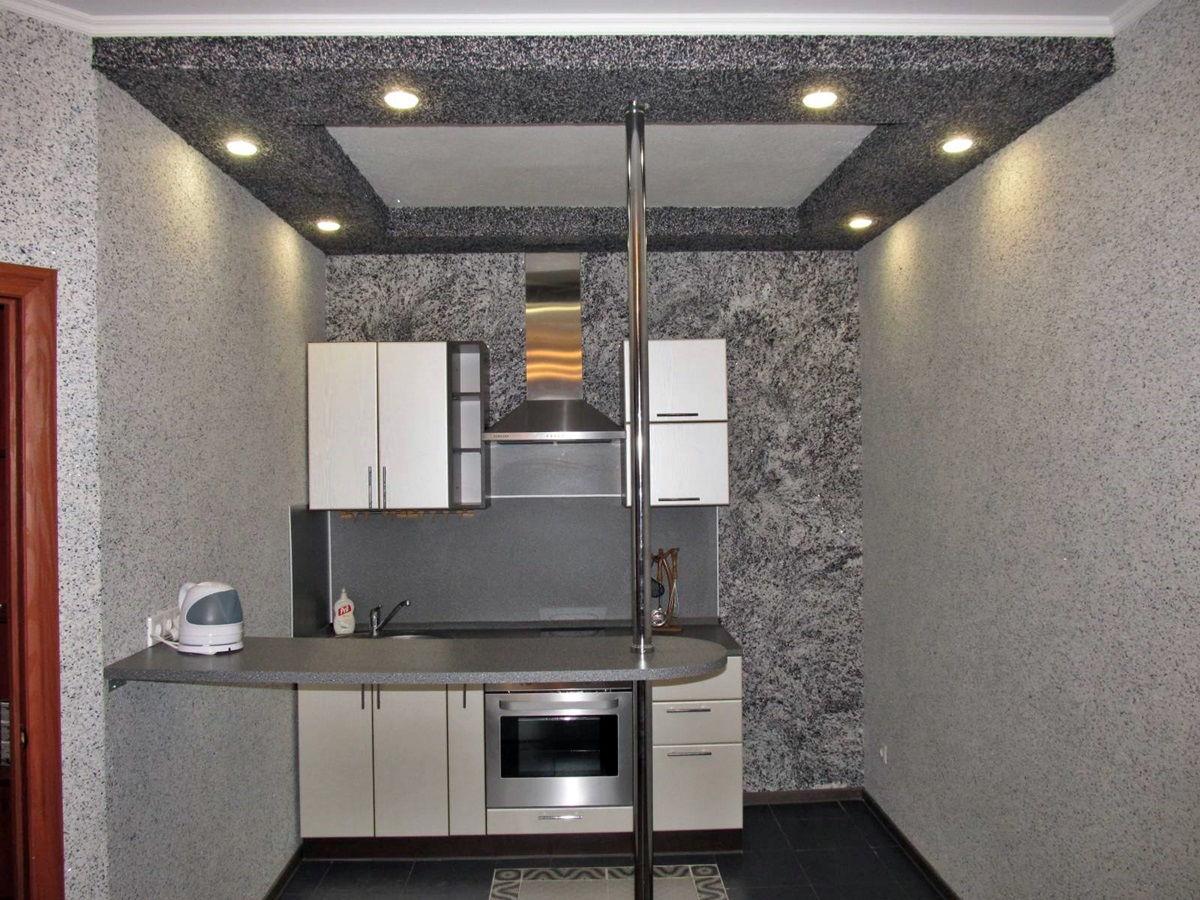
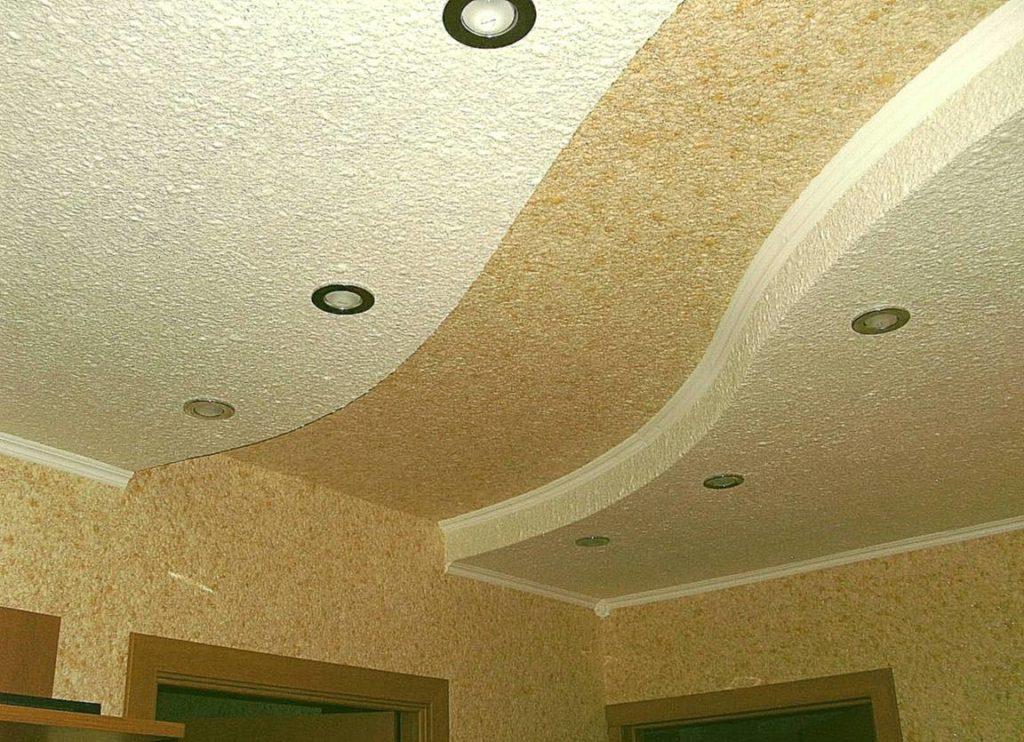
Since liquid wallpaper is a universal construction finishing, they can be used on any type of ceiling with different basis and geometry. The finish looks great on smooth and flat surfaces, creating the effect of depth and embossing. Liquid wallpaper can be used to decorate multi-level ceilings, boxes and niches.
They go well with other types of decoration and are harmoniously combined in color and texture with traditional decor. Wallpaper can be used simultaneously on the ceiling and wall (zonally or with total area), creating a visually smoothly flowing homogeneous surface from top to bottom or vice versa. Additionally, this finish can be used to cover complex oval shapes of pendant levels, highlighting key design accents.
Types of liquid wallpaper for the ceiling: photo
Liquid wallpaper is a loose, heterogeneous mixture of textile, cellulose or combined fibers. They come with a variety of additives that can be purchased separately to suit your planned finishing project.
In construction supermarkets, this finish is offered in the form of a dry mixture, which is diluted with regular warm water. The wallpapering process is reminiscent of dry-mix plaster, which is why this finish is sometimes referred to as “silk plaster.”
Wallpapers are:
- smooth;
- embossed;
- white (colorless);
- from a homogeneous mixture;
- from different mixtures (combined);
- with texture additives;
- by type of fiber - cotton, cellulose, silk, mixed.
Important! The larger the fibers in the dry building mixture, the more prominent the result. finished coating on the ceiling.
Cellulose wallpaper
Cellulose is the most inexpensive of all types of liquid wallpaper, since the main raw material, cellulose, has a relatively low cost. The composition of the cellulose mixture also includes special adhesives, polymer dyes, plasticizers and, in some versions, decorative fillers and additives.
Liquid wallpaper made from cellulose has its pros and cons. Undoubted advantages include their good adhesion to almost all types of surfaces, and significant disadvantages include low color stability to light and ultraviolet rays.
Cotton wallpaper
Cotton wallpaper consists of cotton fiber with different types grinding (this gives a different texture). The cotton finish has a matte sheen, it is pleasant and soft to the touch, and has increased sound and heat insulation. This type of finishing is often used in bedrooms and children's rooms.
Silk fiber wallpaper
Silk wallpaper is the most expensive type of decoration of this type. This is due to the high cost of natural raw materials, high aesthetic and technological indicators of the finishing material. Silk wallpapers practically do not fade and have a very decent appearance and are produced by manufacturers in a wide range of texture and color options.
Wallpapers mixed and combined
Mixed compositions contain Various types fibers and in different proportions. They are inexpensive, but their composition can have high aesthetic values in combination with the necessary technological properties. The cost of mixed wallpaper depends on the presence of natural silk fibers, cotton and the type of additional elements.
Liquid wallpaper on the ceiling: photos in the interior
Photo good options Interior decorations with liquid wallpaper on the ceiling are presented below.

Advice! Additives in the form of sparkles, stone chips, fibers of different sizes create a completely original and unexpected effect in the finishing.
How to apply liquid wallpaper to the ceiling
The finishing application process should be approached in 3 steps:
- ceiling preparation stage;
- preparing the mixture;
- direct application of the prepared mixture.
Warning! It must be remembered that the wet mixture on the ceiling looks 1-2 tones darker and more intense than when dried.
Preparing the ceiling before applying liquid wallpaper
Preparing the ceiling for a new finish depends entirely on the previous version of the finish of this surface. In this regard, a number of specific preparatory activities that require mandatory implementation. This can be either complete removal of the previous layer of finishing, or redecorating and alignment.
Preparing the ceiling on a plastered concrete slab
If the ceiling is carefully plastered and leveled, then it should only be primed. Here you will need a primer from the “Betonkontakt” series with deep penetration. Using a construction roller, you need to apply 2-3 layers of primer mixture to the ceiling surface, with the obligatory drying of each of them.
The direction of the strokes in each subsequent layer should be changed. After it is completely dry last layer primer, you can dilute the dry mixture and start applying it.
Preparing a ceiling with rust stains, large irregularities and seams
Traces of rust may appear from metal fittings inside the floor block. Such marks cannot be ignored, as over time they will certainly appear on new wallpaper. To remove them, you need to apply acid (phosphoric, hydrochloric, acetic) to the ceiling with a brush. When the stains are completely dissolved, rinse with water. After drying, these places should be painted with moisture-resistant paint.
Small and large cracks should be sealed with fine-grained putty using a plastic or metal spatula. Since the ceiling is wetted during the application of liquid wallpaper, mixtures with cement or polymers should be used to seal defects.
After the surface has been cleaned and dried, it is coated with 2-3 layers of primer. deep penetration with mandatory drying of each layer. Now you can prepare the mixture and start gluing it.

Preparing the ceiling from gypsum plasterboard and wood board
Ceilings made of these materials, as well as multi-level systems, do not require special alignment for liquid wallpaper, since they are initially installed strictly at a vertical or horizontal level. The plasterboard surface needs to be primed once, but not with a too wet roller or brush, as the plasterboard gets wet from water and delaminates. Therefore, the surface of plasterboard or wood needs to be primed and dried well, and then proceed to diluting the wallpaper in water and applying it.
Preparing the ceiling with whitewash, acrylic paint, paper or liquid wallpaper
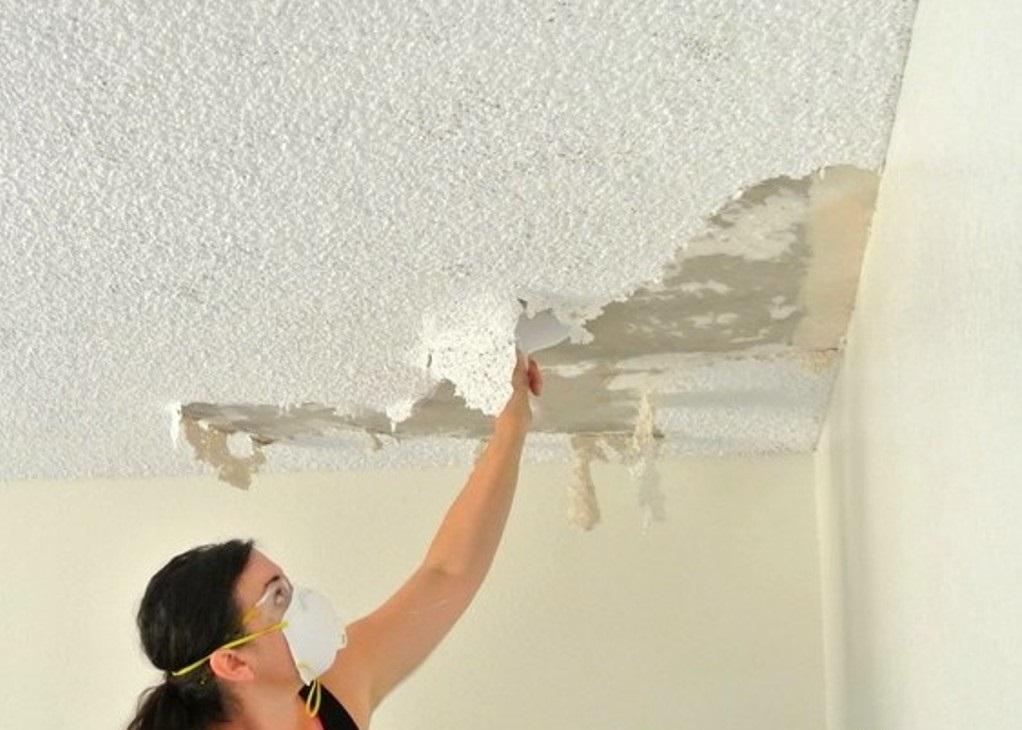
Ceilings with such coatings must be cleaned and washed. The whitewash needs to be moistened with a special solution or water, the whitewash layer must be removed with a spatula, and then washed off completely. Remove paper and liquid wallpaper in pieces, prying off the layers with a spatula. Clean the painted surface grinder or a rigid metal spatula to the very base of the floor slab. Then the cleaned ceiling should be primed 2 times and dried. Now it is ready for a new finish.
How to properly prepare the mixture
In construction supermarkets, liquid wallpaper is sold in plastic buckets, ready for use or in plastic bags in a dry mixture that needs to be properly prepared.
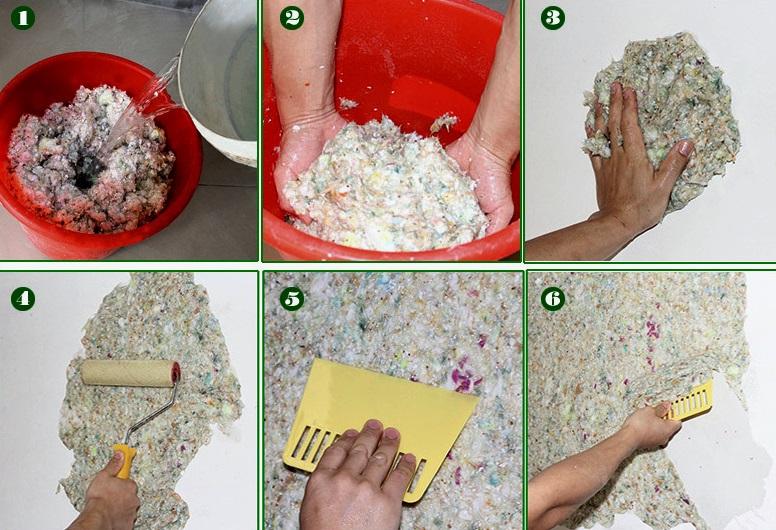
The dry mixture must be diluted with warm (but not hot) water and left to swell for the time indicated in the instructions. Typically it ranges from 15-20 minutes to 2-4 hours. If you plan to add color to the mixture (in the case of white wallpaper) or decorative additives, then this must be done immediately after adding water. Then mix all components thoroughly with your hands.
It is preferable to knead the mixture with your hands, since with such delicate mixing the fibers do not tear or deform, and the mixture receives a sufficient amount of air. The construction mixer should be used only at low speeds, otherwise the mixture will become oversaturated with air bubbles, and this will significantly complicate its application.
How to glue liquid wallpaper to the ceiling
Each master finisher has his own optimal option for working with this finish. Beginners and “amateurs” are advised to adhere to useful rules:
- For finishing, use a construction trowel, a roller and a wide grater.
- First, everything is specially finished difficult places and ceiling shapes.
- Wallpaper application always starts from the window.
- First of all, the mixture must be applied to the joints of the ceiling and walls.
- The mixture is applied in a piece, which is then stretched and leveled over the surface. The next piece is placed next to the aligned one and pulled out evenly and gradually.
- When applied, the construction float and trowel should be at an angle to the plane (approximately 15-20°). Do not put too much pressure on the tool, otherwise the surface will become uneven.
- To control the application of the finish, you can use a flashlight or a carrying lamp, which must be directed along the plane of the ceiling - this way all irregularities will be clearly visible.
The movement of the grater (roller) during leveling must be carried out in a certain direction.

Advice! If you use a special texture roller when applying, you can achieve an interesting pattern. This technology is often used to create a “fur coat” effect.
Wallpaper is glued manually and mechanically. For manual application, use a construction spatula, roller, or grater. The mixture is applied with a spatula or by hand, and then leveled over the surface with a layer thickness of 1-5 mm. When applying wallpaper mechanically, a construction spray gun or pump is used. In this case, the mixture is applied to the surface in thin layers several times.
Test application of liquid wallpaper on the ceiling
In order to apply the finish evenly, you need to practice the technique of working with a spatula. With different directions and pressure, the drawing turns out special. Therefore, before starting the main work, you need to “check your hand” for small area and decide on your technique.
Installation of ceiling decor, molding and plinth
Before applying wallpaper, all decorative elements must be mounted. This fact is distinctive feature between gluing paper and liquid wallpaper. Therefore, before starting work, baseboards, moldings and all decorative elements must be glued. In addition, if the ceiling is designed with a pattern, then before applying the finishing, a sketch must be outlined in pencil.
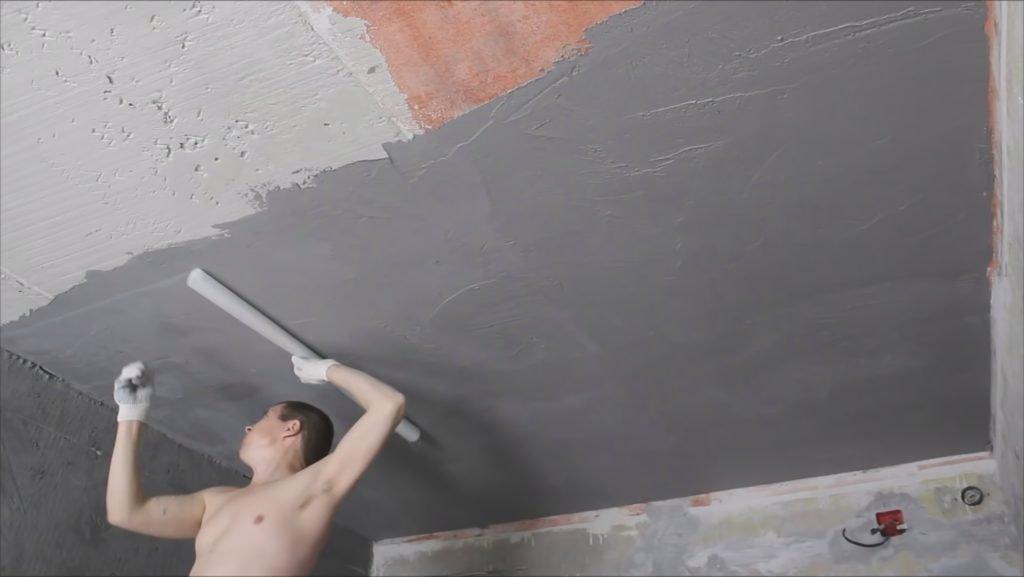
Direct application of liquid wallpaper
The prepared mixture must be applied to the ceiling using a trowel, a wide construction spatula, or simply with your hands. Then level the surface with a roller or grater so that the layer thickness is approximately 1.5-2 mm. When leveling, be sure to ensure that the wallpaper has an even layer and the desired texture.
Each new section of the ceiling should be done in a new place, close to the already leveled one, and when leveling the latter, bring both into a single layer. The entire surface should be treated in this way, section by section. It is advisable to apply the finish to the entire ceiling area of one room in one go, so that when it dries, the application boundary is not visible.
Drying and finishing the ceiling
The time for complete drying of liquid wallpaper is 20-70 hours. During this period, there should be no drafts or operating heating devices in the room. In this case, they will dry naturally and evenly. After complete drying, the wallpaper is covered with a layer of moisture-resistant varnish to preserve the color and protect the finish from external negative factors.
How to make a drawing from liquid wallpaper
Using liquid wallpaper on the ceiling you can reproduce any pattern or fresco. Of course, this painstaking work will take more time to finish, but it is worth the expense.
You can create a pattern from liquid wallpaper in two ways - using a stencil (can be purchased at a construction market) or your own sketch.
Everything is simple with a stencil. The main layer of the mixture must be applied to the ceiling in the usual way. Then, after drying this layer, use masking tape to attach the stencil to the ceiling. You need to apply an “artistic” layer of liquid mixture into it.
To make your own design on the ceiling, you first need to apply your own sketch to it. Then cover the main area in the usual way, going slightly beyond the boundaries of the drawing. Using a narrow spatula, move the wet layer to the exact border of the pattern and allow the wallpaper to dry completely.
When the first base layer has dried, apply a layer of the mixture within the boundaries of the sketch (without reaching them), as in a stencil, observing all the colors and texture. Next, very carefully use a narrow spatula to connect both layers, making this line the silhouette of a drawing or pattern.
DIY liquid wallpaper for the ceiling: video
Video with a master class on applying liquid wallpaper to the ceiling:
Conclusion
Liquid wallpaper on the ceiling is another original way decorate your home with my own hands and to your liking. Of course, at first you will have to get better at it, but after a short time experience will come. Then your imagination will suggest thousands of wonderful ideas and images, which will not be difficult to implement.
Reviews: liquid wallpaper for the ceiling
Valentina Sidorenko, 29 years old, Sergiev Posad.
Applying liquid wallpaper to the ceiling is not as difficult as I thought. I allowed myself to ruin part of the ceiling in the room, but in fact I didn’t spoil it at all, but gained experience. It turned out well, my husband trusted me to do all the ceilings myself.
Evgenia Akinshina, 32 years old, Olonets.
I watched a video on the Internet on how to properly glue liquid wallpaper to the ceiling. It turns out beautifully and is not difficult at all. I especially liked when the walls and ceiling flow into each other in the interior. A great idea for the bedroom, in the bed headrest area. I’ll definitely do this, and maybe I’ll also try a drawing.
Liquid wallpaper for the ceiling is one of the most economical options finishing. Unlike other more expensive types, liquid wallpaper can be hung with your own hands without the involvement of specialists. In addition, they hide minor ceiling defects. How to glue them correctly and what are their pros and cons? This is exactly what we will look at in the article below.
Liquid wallpaper is not yet so widespread due to its relatively recent appearance on the market. Although they are called wallpaper, this is not an entirely accurate name. This is not the usual roll, but rather plaster. Those who have not encountered this type doubt the possibility of applying the material to the ceiling. And in vain - liquid wallpaper will become an excellent covering for the ceiling. They have heat and sound insulation properties, which is very important in modern buildings.
One of the most important advantages of this type of ceiling decoration is safety. Liquid wallpaper is made from natural materials: cotton, silk and cellulose. They do not emit any toxic substances. They can be used in a children's room without fear for the child's health. If you have allergies in your home, then liquid wallpaper will not cause discomfort, since dust does not collect on it, due to the presence of antistatic substances in its composition.
Using liquid wallpaper you can create any pattern and design. You don’t have to spend much money on wallpaper, since they belong to budget coverage. In addition, they do not require an additional layer of putty in the presence of small cracks.

If it's on your ceiling big holes, then it will not be possible to bypass the putty. To get more rich color The ceilings are pre-coated with white water-based paint.
They can be painted at any time. This will appeal to those who often change some interior details. The technique of applying the material is no different from putty; this will save you from the labor-intensive work that is necessary when gluing roll wallpaper. In addition, the adhesion of liquid wallpaper is much higher.

The mixture can be removed and applied several times. If you have damage to a specific area, there is no need to replace the entire coating, just remove the old wallpaper with water and then apply new wallpaper.
Such wallpaper is a reusable material: they can be removed, stored, and then reapplied in any room. Do not throw away the remaining mixture, leave it. It will dry and then it can be used again, for example, to repair damage.
They are sold in powder form, to which you just need to add water for application. Some manufacturers produce raw materials without adding dye and glue, then you will have to add it all yourself. This is easy to do if you follow the instructions on the box. Colorless material suitable for those who don't like it available colors- just buy the color and add in the required quantity for the required color saturation.

Caring for the material is simple, the wallpaper is not afraid of wet cleaning. Liquid wallpaper will look good on any surface; it easily comes into contact with other types of materials. After drying, they do not leave seams, so they can be used to finish complex designs, for example, from plasterboard.
Their service life reaches 20 years. They are not afraid of the sun and high temperatures.
Disadvantages include their sensitivity to water. If it gets in large quantities, they again become a liquid mixture that comes off the ceiling. If you want to use them in the kitchen, you need to apply an additional layer of varnish.
Types of liquid wallpaper
Liquid wallpaper is divided into three types according to its composition:
- Cellulose. The cheapest and therefore do not have high performance. One of the disadvantages is that they burn out. Therefore, they are best used in rooms without windows or with little incoming sunlight.
- Silk. The most expensive due to the silk it contains. Such wallpapers do not fade or fade. Their service life is very long, and they will not be deformed.
- Silk-cellulose. They combine the qualities of both types. They are not afraid of the sun, they will not last as long as silk ones, but for sure 10 years.

Required Tools
Before you start working with the surface, you need to prepare everything you need.
- Container for composition. The powder will swell, so a small container will not work.
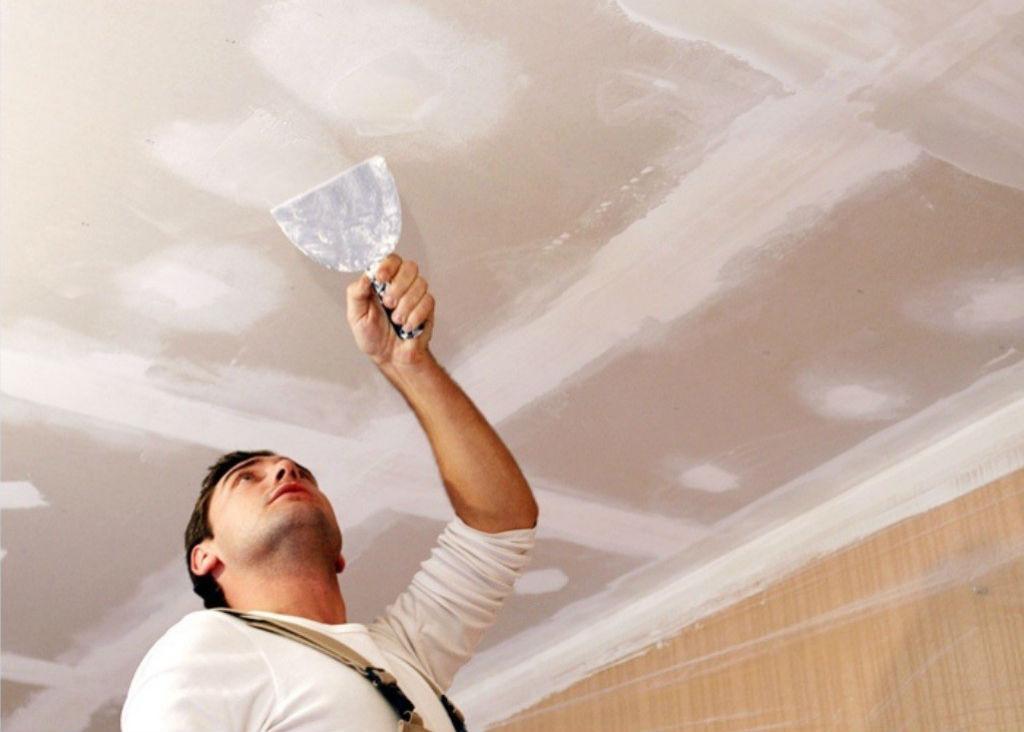
- Putty knife.
- Roller.
- Spray.
- Drill.
- Plastic grater

Preparing the ceiling for liquid wallpaper
Finishing the ceiling with liquid wallpaper is impossible without preliminary preparation surfaces. Remove all old coating: whitewash, old wallpaper, all roughness. If your ceiling was previously painted with water-based paint, then it is not necessary to remove it. Look at the condition.
If it does not peel off, there are no tubercles, then liquid wallpaper can be glued to it.
If there is fungus or mold on the ceiling, they must be removed and the ceiling treated with an antifungal compound in several layers. Even if there is no mold, a layer of primer must be applied. Or better yet, two. If the base of the ceiling absorbs well, then so do all three layers.
Fill large cracks with putty to level the surface. To do this, check the ceiling using a level. Remove all irregularities. If you do not have large cracks in the ceiling, then it is not necessary to repair small ones. The wallpaper itself can handle them.

If you have dark ceiling, then you can use a white primer as the second layer water-based paint. Or use primer paint. This is a special paint with primer properties.
If you are planning to create a pattern from liquid wallpaper, then preparatory work will include one more point: put a sketch of the future drawing on paper. Then the ceiling is measured and a design marking is applied to it. It can be applied not only by hand; there are special stencils in stores, which greatly simplifies the process.
How to apply liquid wallpaper to the ceiling
Sold in stores ready-made compositions for application. Diluted in buckets. There is no need to add anything to this mixture; you can apply it immediately. And there are dry mixtures that you need to prepare yourself. Choose better than the second one option, then you can choose the color yourself, adding it to the desired shade. Filler to create texture is also added separately.

To dilute the composition, pour the powder into a large container and add water, stirring constantly, adding powder. Then, stirring, add the dye and decorative elements. You can knead the wallpaper with your hands like dough, or you can use construction mixer. The color is added in accordance with the table on the packaging. Don't pour hot water. This reduces the adhesion of the composition. The water should be slightly warm to make it comfortable to work with. Waiting for the mixture to infuse can take from 15 minutes to 15 hours. Will have to wait.
There are two application methods: mechanical and manual.

How to properly apply wallpaper by hand. Wallpaper is applied with a roller or spatula. To work, you will need a stepladder or, in extreme cases, a chair. You should be able to see the surface very well for an even application. The work must be done immediately. There is no need to leave the piece for the next day: stripes will be visible, as when painting. After treating a certain area, inspect it for any defects.
The application layer should be 1-4 mm. The mixture is leveled with a smooth grater, while using hand movements you shape the position of the fibers. How you arrange them will depend decorative effect. After applying the mixture, you need to give it 1 day for complete fixation. If there is a need to ensure moisture resistance, coat the ceiling with several layers of varnish.

When applied mechanically a spray bottle is used. A thin layer of the mixture is applied to the ceiling, and after drying, the procedure is repeated to add thickness.
How to make a drawing. Liquid wallpaper allows you to create any pattern. There are no restrictions. However, this will take much longer than just coating. The fact is that when applying a pattern you have to wait until each individual layer dries. There are two types of application: handmade and on a stencil. Various stencils can be purchased at any hardware store.

To begin with, the surface is completely covered with the base layer. After drying, the stencil is secured with masking tape and a design is applied to it.
At manual way Draw a sketch of the drawing on the ceiling with a simple pencil. Apply a layer of wallpaper 1.5 mm thick, extending beyond the contours. Using a spatula, carefully move the material back, this will be the border. Wait until the material dries. Step back from the dry area and apply the next layer, moving it towards the already dry one, but make sure that they do not mix.
To apply the design, it is best to use a silk-based composition.

Rich color palette makes it possible to implement any design plan, as well as your own ideas.
White
Visually increases the space and makes the ceiling higher. Versatile and suitable for various styles interiors, improves room illumination and does not cause irritation. An excellent alternative to whitewashing, as this option is much simpler and cleaner.
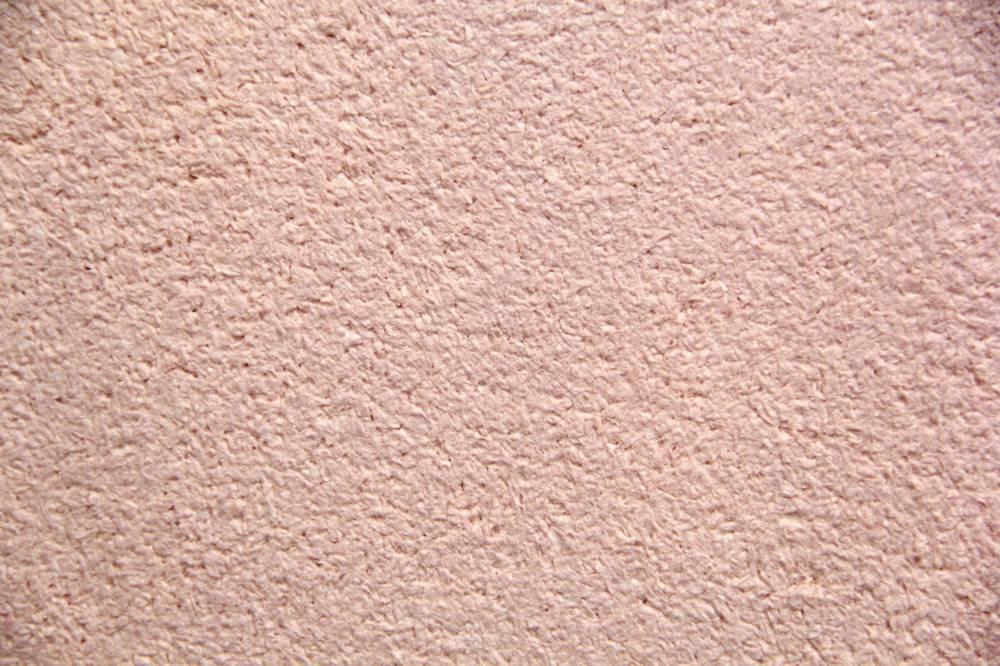
Beige
The most natural and natural, like the color of skin or sand on the beach. Although beige will not become a bright detail, it will certainly act as a noble background for any experiments. The beauty of this coating is its perfect compatibility with almost any tones, both bright and pastel.


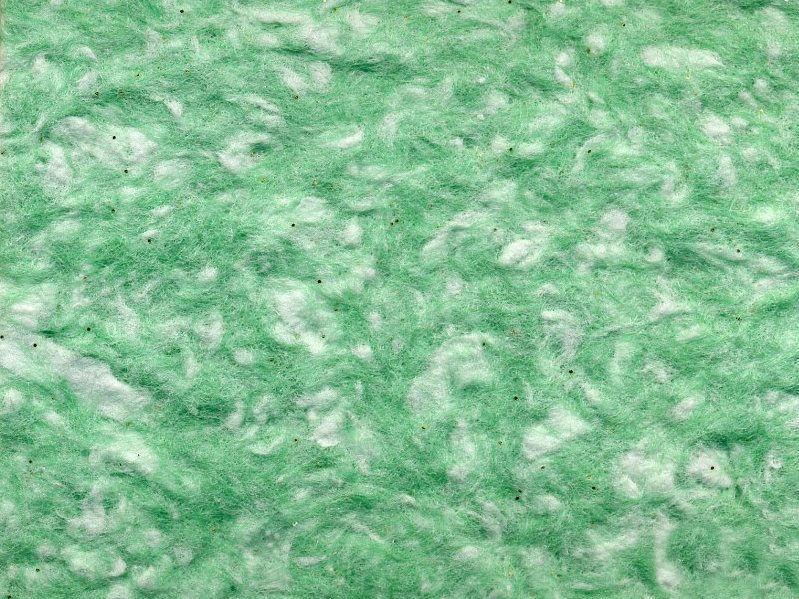
Greens
Green looks especially beautiful in the interior, and although such a solution is rare, it is a great opportunity to create a unique uniqueness for the room.

The photo shows a ceiling made with liquid green wallpaper.


Gray
This is a classic shade. Great choice for a calm and unobtrusive design. Gray will breathe stability and harmony into the room.


Blue
They bring sea freshness to the room, making it spacious and bright. Blue will give you the feeling of the limitless sky above your head.

The photo shows a living room with blue liquid wallpaper on the ceiling.


Photo ideas in the interior of rooms
You can decorate any room in your apartment with liquid wallpaper, doing the renovation yourself or turning to professionals.
In the kitchen
This coating fits here in all respects. After all, it is resistant to moisture and steam evaporation, and also retains sound and heat. This material is non-flammable, does not absorb odors and is non-toxic, which is important for the kitchen.


In the living room
It is interesting to use silk wallpaper as a basis; they will add a touch of luxury to the living room with their softness. The area around the chandelier can be played with a different color or a pattern can be applied to create a bright accent.

The photo shows a living room with liquid wallpaper on the walls and ceiling.


In bathroom
The interior will immediately be transformed, even if there are ordinary tiles on the floor. If you properly coat the dried base with varnish, this will allow you to make the ceiling waterproof.

In the toilet
Even in this small room it's possible to come up with a large number of design options. If you correctly combine liquid wallpaper with flooring, plumbing and lighting you can create a stylish interior.

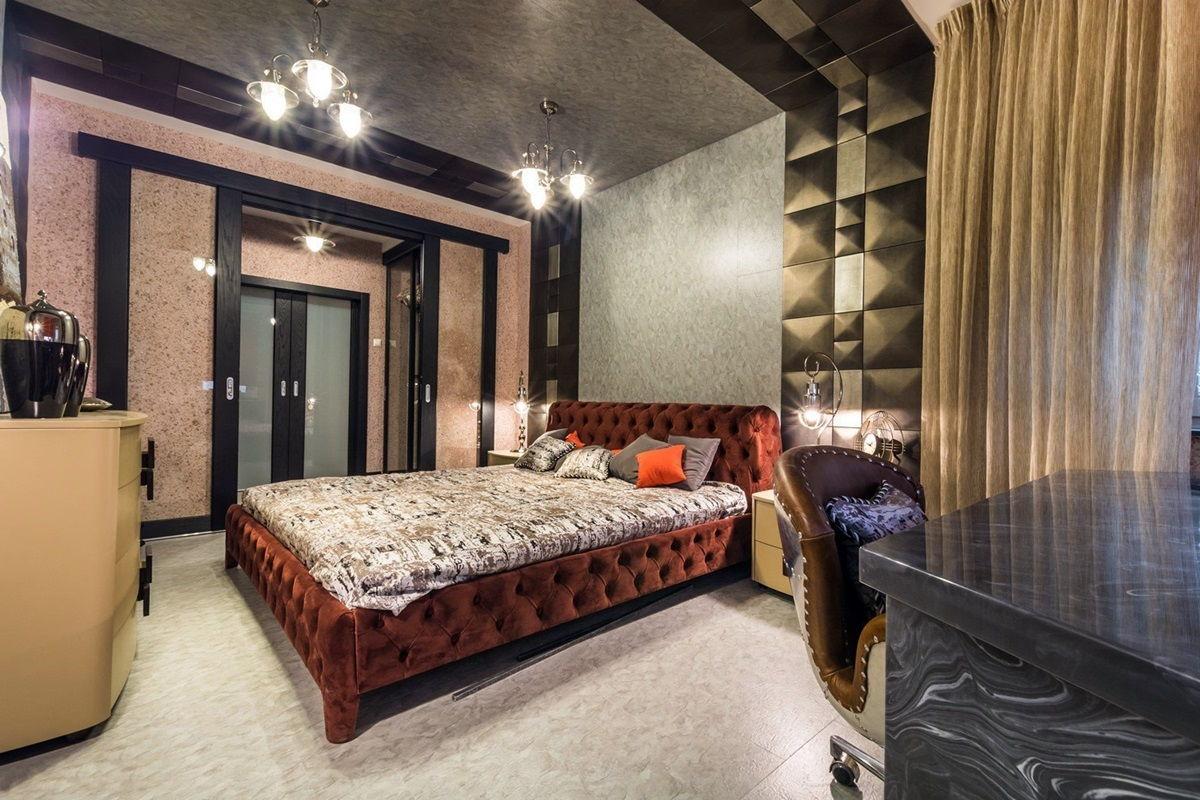
In the bedroom
In this room you can relax your body and soul. Liquid wallpaper is perfect for this room, as it is hypoallergenic and does not collect dust. And let this ceiling covering not be a strong departure from the rules and allow you to make the ordinary more modern.

The photo shows a bedroom decorated with liquid wallpaper.


Design examples
With imagination and inventiveness, you can successfully add bright and interesting accents to your interior.
Drawings and patterns
A pattern can express the character of a room. Favorite cartoon characters or animals will suit your child's room. For a low-key living room, this could be a geometric composition. The bedroom will be complemented by delicate floral designs or stars in the night sky.


With glitter
They will give the ceiling covering an even greater effect and make the decoration of the apartment original.


Combination of several colors
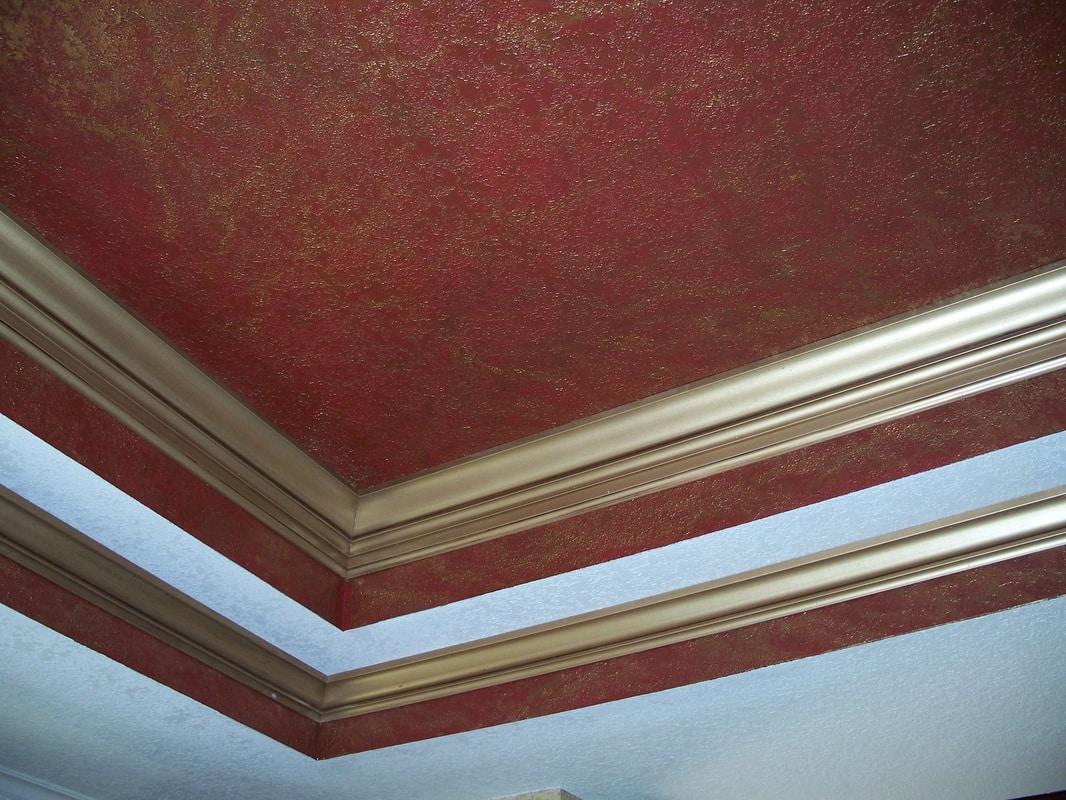
Allows you to create not only simple compositions, but also entire paintings. Visually enlarges the space and moves the ceiling back, as if lifting it up. Using shades of color, you can apply a mosaic pattern to individual areas of the surface.

The photo shows a bedroom with a combination of several colors on the ceiling.


Glowing
In the dark they emit soft light, creating cozy atmosphere. This unusual decoration the room will become its real highlight.

The photo shows a bedroom with glowing liquid wallpaper on the ceiling.
With rustics
They can be wide or thin, colorless or colored. All this together will create the effect of a cracked ceiling. Relevant in shabby chic or shabby chic style.


How to apply to the ceiling?
Many people classify liquid wallpaper as an exotic finishing material. However, they are great for finishing ceilings.
What is the best way to apply it?
For application, it is best to use tools such as a spatula, rollers, a brush and a drill with pads.

Ceiling preparation
Liquid wallpaper is compatible with drywall, fiberboard, concrete, wood, plaster, plywood, paint and even metal. First you need to get rid of the old ceiling covering. Using a spatula, remove any looseness and clean the damaged areas. Gaps and cracks should be covered with putty. To firmly bond the layer of liquid wallpaper, the ceiling must first be primed. And only after this should you proceed to the next stage.

Step-by-step application instructions
Applying the finished mixture to the ceiling will provide a continuous coating without seams or joints.

Video
Photo gallery
New trends in construction and renovation never stand still; more and more interesting and unusual materials are created every day. This type of design has become a new and simple procedure that anyone can handle.