Plasterboard on walls without a frame - easy installation, excellent results. Walls and partitions made of plasterboard: we do it ourselves Scheme for installing plasterboard on walls
More and more builders are choosing to use drywall instead of other materials. After all, this material is easy to work with and can be used to perform a wide range of tasks. Thanks to gypsum plasterboard, even the crooked walls can become perfectly smooth without cracks or differences. And create one or multi-level ceiling will not amount to a lot of work. Many designers turn to plasterboard to create unique interiors with decorative niches and arches.
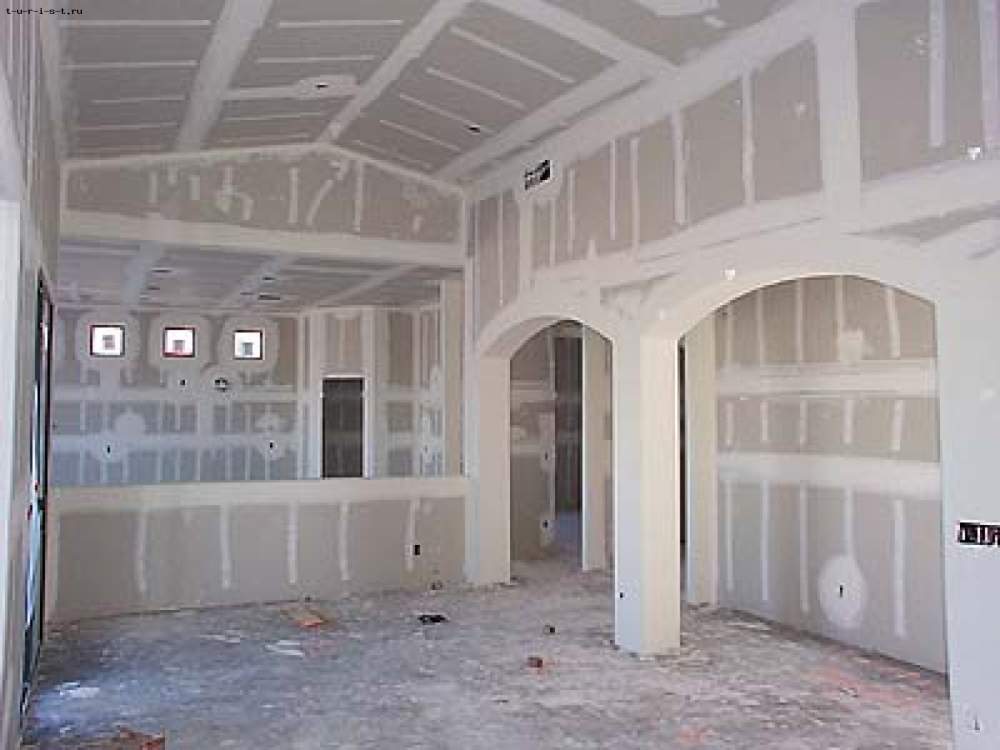
Installation of drywall on the wall frame method
An undeniable advantage of gypsum board is its versatility, which was mentioned above. In addition, drywall does not crumble over time, when correct operation There are no cracks or irregularities.
 Drywall sheets will help bring any design idea
 Another important argument is that drywall is suitable for carrying pipes, cables and wires into the voids of the structure. Even when we're talking about about plating water pipes or about rooms with high humidity, then gypsum plasterboards with moisture-resistant properties can help here.
Let us also note the environmental friendliness of this material. Neither plaster nor cardboard emit harmful substances during operation.
Tool preparation
When planning to install gypsum boards on walls, first prepare all the components. Remember that only the right technology installation will allow you to create high-quality walls.
Choose drywall based on the location of application. In places with high humidity, GKLV will do an excellent job. And in rooms where flammable products are stored, fire-resistant gypsum plasterboard is suitable. The more properties a gypsum board has, the more expensive it is. But the use of standard sheets in conditions not intended for it is fraught with damage to the coatings.
In addition to the gypsum board sheets themselves, you will need several types of profiles and components - dowels, screws, etc. List of tools:
- Laser level or a regular analogue with threads;
- Tape measure, markers, construction knife;
- Metal scissors;
- Hammer or drill (professionals use a gas gun to quick installation all guides to the walls);
- Screwdriver;
- Cutter;
- Spatula for sealing seams.
 This is what the main set of tools looks like
 The most labor-intensive process is the installation of a wall frame for gypsum boards. What is important here is the correct technology for laying the profile according to the markings made.
If you are faced with the question of choosing a frame made of galvanized steel or wood, then we will immediately note that using wood involves risks. They are that the tree itself is very unpredictable construction material. It does not have durability and is susceptible to rotting and deterioration when exposed to high humidity.
When working with surfaces made of concrete and brick, dowels 40 millimeters long are used. In cases where the frame is attached to softer materials, it is recommended to use long dowels (80 millimeters). When covering walls made of wood, you can safely use self-tapping screws.
Making the markings
Marking technology requires concentration and correct use tool. The best helper is here - laser level. But to buy something like this expensive equipment It is irrational for a one-time installation of gypsum boards on the wall. Therefore, marking more often occurs using a regular level and additional components.
 Thanks to the laser level, professionals make markings in minutes
 Having measured the required distance for carrying out communications and laying insulation, a plumb line is fixed on the ceiling, closer to the corner of the wall. At the point where it touches the floor, make a mark (screw in a self-tapping screw). This procedure is done in every corner of the room. Then, to facilitate the marking process, stretch the thread between the horizontal points. Having transferred the lines to the ceiling and floor, the threads are removed. Now you can start installing the profile.
When marking, remember that the wider the indentation from the base of the wall, the more area of the room is “eaten up”. The profile is mounted along this line, and the gypsum board, putty and final coating will increase the thickness by another 1.5-2 centimeters. But the minimum indentation should still be at least four centimeters. Draw the drawing so that it does not get erased after several careless movements along the lines.
 Surface marking
 Installing the frame
The profile installation technology is simple and only requires correct execution all steps. The guides are attached with dowels to the ceiling and floor, and it is recommended to use sealing tape. Galvanized steel is cut using tin snips.
Next, mark the places where the rack profiles will be installed. They are attached at a distance of 40-60 centimeters (measured from the center of the previous profile). This will allow installation of drywall joints directly in the center of the profile.
If you plan to mount it on the wall heavy objects(kitchen cabinets, shelves, plasma TV), then it is recommended to install the profile at intervals of 40 centimeters with the installation of horizontal jumpers in places of future fastening. This will simplify further installation attachments and will prevent fastening materials from being pulled out of the walls.
The rack profiles are carefully inserted first into the lower guides, and then into the upper ones according to the given markings. After this, the racks are attached to the wall using hangers.
 Build process metal frame under the cladding
 Horizontal profiles are needed to secure drywall joints and provide greater rigidity in areas where attachments will be installed. After securing all the elements, the frame is ready for the final stage of wall installation.
Further technology involves carrying out communications and laying insulation. You can do without wall insulation, but as practice shows, this helps not only to retain heat, but also to create better sound insulation of the room.
Wall covering and preparation for finishing
The final stage involves installing drywall on the wall. When starting to cut gypsum plasterboard, remember the fragility of the material. Cutting upper layer cardboard on one side and not completely cut on the other, the sheet is placed on the edge of the support and smoothly split. After this, the sheet is turned over, the cardboard is cut and broken to the end. To process such edges, a plasterboard plane is used, but you can do without it, working with a construction knife.
 Processing of joints
 The sheets are fastened with self-tapping screws at the junctions with the vertical and transverse slats. The sheets are arranged in a checkerboard pattern, placing a short sheet of drywall in each row, either top or bottom. The sheets are joined strictly in the center of the guide, avoiding sagging. Each gypsum board is screwed to the frame along the edges and in the center at a distance of 40-60 cm. If the sheets have a straight edge, then it is recommended to chamfer the vertical joints. This will allow you to better fill the joints.
More details in the video:
If sockets or switches are supposed to be placed on such a wall, then they need to be taken care of in advance. The terminals for sockets and lamps are marked and cut out before mounting on the wall. Then it will be difficult to do this, you can ruin the sheet.
 The metal corner will protect the walls from dents after impacts
 Having completed the wall covering, they begin to prepare the surface for application. finishing coating. All joints are carefully puttied and glued with a special reinforced mesh. This mesh will bind the putty material and securely fasten the joints.
External and internal corners the walls are reinforced with corners to provide rigidity and prevent the gypsum board from crumbling.
Before you start puttingty for painting or wallpapering, it makes sense to prime the new walls. The primer will help even out the absorbent properties of the surface, prevent the appearance of microflora and improve adhesion to wallpaper or paint.
In contact with
Often there is a need to level the walls in an apartment. One of the simplest and available funds is the installation of drywall, and by doing it yourself you can significantly save your family budget.
Material selection
Types and purpose of drywall
Before you start working directly, you need to decide on the required material.
In any good hardware store you will be offered a choice of 4 types of drywall, this
- GKL - regular plasterboard sheet gray with black or blue marking lines, which is suitable for normal dry heated rooms. It is used for both walls and ceilings. The thickness is 6 mm, 9 mm, 12.5 mm. For walls, ceilings and partitions, it is recommended to use sheets with a thickness of 12.5 mm. The remaining sizes are intended for arched, curved structures and radius surfaces.
- GKLV — moisture resistant plasterboard sheet green with black or blue markings. The manufacturer adds antifungal impurities to the plaster itself, and the cardboard covering is made moisture resistant. This type of drywall is used for finishing rooms with high humidity ( ex: bathroom).
- GKLO — fire resistant plasterboard sheet red with black or blue markings. It contains reinforcing components in gypsum that increase resistance open flame. It is used for finishing industrial premises, ventilation, attics, electrical panels.
- GKLVO — plasterboard sheet is moisture-resistant and fire-resistant green with red markings. It combines the properties of GKLV and GKLO. It is used for finishing industrial premises with high humidity and having increased requirements for compliance with fire safety standards.
Types of drywall edges:
- PC, SK – transverse cutting edge of gypsum boards not covered with cardboard;
- PC, VK – rectangular longitudinal edge for dry installation without joint putty;
- ZK – rounded edge. It is used when using dry plaster without serpyanka;
- FK – transverse cutting edge, intended for puttying joints without reinforcing tapes with an open gypsum core;
- UK, AK - beveled (crimped), thinned edge, intended for pasting sickle and puttying seams;
- PLUK, НRAK – semicircular, beveled along the length (thinned) edge, for pasting sickle and puttying seams;
- PLC, HRK – semicircular longitudinal edge, designed for puttying seams without serpyanka.
Advice: choose drywall marked UK and PLUK to avoid the formation of protrusions due to which the layer of putty increases when finishing!
What to look for when buying drywall:
- Drywall is supplied to the store in packs, bottom sheets in which they are packaging and most often have a thickness of 12 mm. They are necessary to prevent damage to the main product sheets. Careless sellers, trying to make money, sell them, although they are defective and must be disposed of;
- all corners must be intact, without signs of crumbling, the cardboard must not be damaged;
- sheets should be stored in dry warehouses in a horizontal position;
Selecting profiles for the frame
For the installation of walls or the construction of plasterboard partitions, the following types of profiles are used:
- PS (CD) - rack profile. Used as vertical frame posts. Size range for this profile:
- 50/50-a*b=48.8mm*48.5mm;
- 65/50-a*b=63.8mm*48.5mm;
- 75/50-a*b=73.8mm*48.5mm;
- 100/50-a*b=98.8mm*48.5mm.
Installation of the rack profile is carried out in a guide profile of the appropriate size;
- Mon (UD) — guide profile. Mainly used around the perimeter of the wall. Size range for this profile:
- 50/40-48.8*38.5 mm;
- 65/40-63.8*38.5 mm;
- 75/40-73.8*38.5 mm;
- 100/40-98.8*38.5 mm;
- 28/27-28*27 mm;
- 28/18-28*18 mm.
- Very often used as a rack profile ceiling profile PP, it is available in only one size - 60x27 mm, so PN 28/27 is used with it. The PS profile is used mainly for the construction of partitions.
Advice: When purchasing a profile, you should pay attention to its quality. The profile should be chosen rigid, this will improve the quality of the work performed 
U-shaped hangers are used to attach rack profiles to the wall.


Calculation of required material
Before going to a hardware store, you need to decide on the amount of material you will need.
Drywall calculation
To buy drywall, you need to calculate how many sheets we need, to do this we do the following:
- calculate the area of the wall or walls that you are going to sew up by multiplying the height and width of the walls;
- if there are door or window openings, calculate their area and subtract from total area walls;
- Since during work there are always unusable pieces left from trimming, it is necessary to add another 10-15% to the resulting final area;
- When covering a wall in two layers, multiply the resulting number by two.
Profile calculation
To calculate the number of profiles, you can use the following sequence:
- Measure the height and length of the wall on which we will mount the frame.
- The number of guides (UD) is calculated using the formula: (wall height * 2 + length * 2) * 1.2 (correction factor) / 3 (length of one UD) = sum of profiles, which is rounded up.
- We calculate the number of rack-mount (CD) profiles using the formula: (length of the room in centimeters/60 centimeters) * 1.2 (correction factor) -1 = number of CDs, which is also rounded up.
- We calculate the amount of U-shaped suspensions using the formula: number CD *5.
Calculation of fasteners
 Calculation of the number of screws for drywall is carried out as follows:
- if the wall is sewn up in one layer, then the sheets are screwed in increments of no more than 25 cm with self-tapping screws 28 mm long;
- if the wall is sewn up in two layers, then the first layer is rotated in increments of 60 cm with screws 28 mm long, and the second layer in increments of 25 cm with screws 35 mm long so that they reach the profiles;
- Based on the size of a standard sheet of drywall (1200mm by 2500mm), we get the approximate number of screws (don’t forget to add 10-15%) - 1st layer - 16 pcs. per sheet, 2nd layer - 35 pcs. per sheet.
 The number of dowels for fastening the guide profile and U-shaped hangers is calculated as follows:
- divide the length of one guide profile in centimeters (300cm) by the recommended fastening step of 40cm, not forgetting to add 10-15% to the resulting number for the reserve and multiply the final number by the quantity of the purchased PN profile;
- There are 2 dowels for each U-shaped suspension.
Dowels measuring 6x40 mm with a mushroom cap are used as standard.
Quantity calculation  screws (press washers) for attaching the rack profile is carried out as follows:
- if the rack profiles are not spliced (wall height<3 метров), то количество прессшайб около 4 шт. на профиль, без учета крепления к П-образному подвесу на который приходится ещё по 2 прессшайбы на 1 подвес;
- if rack profiles are spliced (wall height >3 meters), then the number of press washers increases to 8 pcs.
Required Tools

You can read more about all the tools in the article
Marking and installation of the frame
Before marking and installing the frame, you need to prepare workplace. If there was wallpaper on the walls before, then it is advisable to peel them off and soak the wall with an antifungal primer, but if the room is dry and without variable humidity, this step can be skipped.
Sequence of work:
- find the most protruding part of the wall and project it onto the floor, set the width of the guide profile from this point and use a laser or string to make markings along the entire wall.
Advice: It is rare to find perfectly right angles between walls in rooms. Especially in old buildings. The distance between them at different ends may differ by several centimeters. When marking the future frame, you should take this into account and tie it not to one wall, but to two parallel ones. In this case, the distances are averaged. This way you will avoid visual curvature of the resulting room.
Having made the first line on the floor, you can transfer it to the ceiling and walls. To do this, you can use a plumb line or a laser level, this will greatly simplify the task.
If you have an assistant, then by inserting a rack profile, cut to the height of the wall, into the guide, using a building level, you can move the point from the floor to the ceiling.
When all the lines have been drawn, you can begin installing the guide profile. All profiles that are attached to existing structures, are mounted using a sealing tape between it and the supporting surface. The profile guides are attached first to the floor and ceiling. They are secured with dowel nails every 40-50 cm and along the edges. 
After installing the guide profile, the rack profiles are set at a distance of 60 cm from each other, measured from the centers of the profiles. The length of the rack profile should be 1-1.5 cm shorter than the height of the wall, otherwise it will be under tension and give an uneven wall surface.
Advice: craftsmen do not recommend leaving strips of drywall less than 10 cm in length, so if the length of the wall is not a multiple of the number of sheets of drywall and there is just a strip of 10 centimeters or less left, then you should move the first and subsequent profiles so that sheets of width are laid from the edges of the wall more than 10 cm (preferably 30-40 cm).
When all the rack profiles are exposed, it is necessary to strengthen the structure with U-shaped hangers, making sure that all the profiles remain in the same plane.

After fixing the hangers, we place jumpers between the rack profiles in increments of 60 cm.

In order to save material, sometimes not all jumpers are installed, but only at the level of possible future loads according to the knee-belt-shoulder rule.
The lintels are made from the same profile as the frame posts. I use crabs to attach them to the posts, but most often they use self-tapping screws. To do this, the rack profile is cut into 60 cm sections and the side walls are cut off at 4-5 cm lengths along each edge with scissors to form an ear that is attached to the rack profile with press washers.

If you plan to insulate or soundproof the wall, as well as all the wiring is done before attaching the plasterboard sheets to the frame.
After installing all the jumpers and all additional operations, you can proceed to attaching the drywall to the frame.
Installation of drywall on the frame
Fastening the drywall should be done in a checkerboard pattern so that there is no joining line along the entire wall, along which a crack could occur during the operation of the room. If the wall is sheathed in two layers, then the seams of the first layer should also not coincide with the seams of the second layer. 
You should start attaching the sheet to the profile from the middle, gradually moving to the edges or from one corner to another, in order to avoid loose contact of the sheets to the frame. The recommended fastening step with self-tapping screws is no more than 25 cm.
The gap between the sheets and the floor should be within 10 mm to avoid warping of the sheets floor covering during its free movement when walking.
The sheets should not fit tightly to each other; there should be a gap between them within 5 mm. 
At first, you can only roll whole sheets, and leave the trimming for later, this way you will save yourself time by not constantly switching to different operations.
Self-tapping screws should be screwed into the drywall at right angles. The heads of the screws must be completely recessed into the sheet; this is necessary for trouble-free further puttying of the walls.

After the entire wall is covered with sheets of plasterboard, we cut the chamfer at all non-factory joints at an angle of approximately 45′ (on each side of the joint we cut the plaster at an angle of approximately 20-22′). This is necessary so that after plastering the walls the joints are not noticeable.

You can watch approximate work on installing plasterboard walls in the following video:
Finishing the wall
After completing the installation of drywall on the frame, you can begin finishing the wall, which consists of puttingtying the surface of the entire wall.
Before puttying, it is necessary to prime the entire wall, special attention should be paid to the joints of plasterboard sheets.
First of all, fill all the seams of the head of the self-tapping screws on the wall with putty, after it dries a little, cover the seams with sickle or fiberglass. After this, we putty the seams over the serpyanka, and then move on to the entire plane of the wall. After the putty has completely dried, it must be primed again to complete the next works, be it painting or wallpapering. You can see how to putty a wall in this video:
You can learn more about puttying plasterboard walls from our articles on the website.
If you still have questions about working with drywall, you can ask them in the comments.
Did you decide on our own make repairs in your apartment or country house. It's time to think about materials. GCR is very suitable for finishing. But the question arises - how to install drywall on the wall? And in general, is it advisable to choose this material in your case? First, let's look at the advantages and disadvantages of plasterboard sheets.
Advantages and disadvantages of covering walls with plasterboard
The very first thing worth mentioning is versatility and ease of installation. Even if you have never had experience working with drywall, you can easily install drywall on a wall with your own hands. This material can even be bent, which will delight those who want not just to decorate the walls, but to create graceful shapes and stunning room design.
Gypsorcatone has many more advantages:
- Price. Repairs will not be expensive, since drywall is quite cheap material. It also does not require special expensive tools. The exception is, which will significantly speed up the progress of work and will allow you to create an ideal edge for joining. But it won’t cost more than 1000 rubles.
- Convenience not only in installation, but also in transportation (low weight allows it to be transported even by one person without assistance)
- Sheets can not only be bent by wetting them with water, but also cut lengthwise or crosswise. Both of these qualities allow you to give drywall almost any shape.
- The components of the sheet are gypsum and cardboard. Therefore for environment because it is completely natural
- Using this material, you get excellent sound and heat insulation. This quality is invaluable in multi-story buildings with thin walls and noisy neighbors.
- You can install it on a wall with little curvature by simply placing it on glue. If the wall has serious unevenness, then a frame made of a metal profile or wood is used
Data-lazy-type="image" data-src="https://remontcap.ru/wp-content/uploads/2017/09/gvl-1024x581..jpg 1024w, https://remontcap.ru/wp- content/uploads/2017/09/gvl-300x170..jpg 1418w" sizes="(max-width: 620px) 100vw, 620px"> 
What disadvantages can drywall have? The only serious one is the fear of moisture. But there are many types of drywall on sale, which should be chosen based on where the installation will take place, including moisture resistant drywall. A special water-repellent primer will also help combat moisture.
Which gypsum board sheet should you choose? When decorating bedrooms or living rooms, don’t bother buying regular sheets, and you’ll save money. If you are going to install sheathing in the kitchen or bathroom, you will need more expensive moisture-resistant plasterboard sheets.
How to lay drywall on wood and metal frames
Which frame is better?
If you want to correct defects and curvatures of the walls, making them perfectly smooth, then, in addition to the drywall itself, you should take care of the frame. There are two options - metal and wood. Previously, everything was done only on a wooden frame, wooden beams were affordable, and this played an important role. Later they were replaced by metal profiles, mainly galvanized, which, despite the higher price category, gained popularity due to their greater reliability.
Among the disadvantages of wood, we also note the fear of moisture and an unpredictable reaction after final drying.
Installation of a wooden frame
If you have extra well-dried bars on hand, you can assemble the frame from them. It's much cheaper.
Such a frame can be erected on both wood and concrete wall. Fastening to wood is done using ordinary nails or self-tapping screws with large pitches, to concrete - using dowels.
Let's figure it out in order how to install it correctly wooden frame and drywall on the walls. First you need to thoroughly prepare the wall surface. Having cleared it of wallpaper residues and other things, we treat it with a primer with antiseptic properties. Having received a clean and dry surface, we proceed to the installation process itself.
To carry out the work you will need:
- Fastening elements
- Wooden bars
- Level
- Hacksaw
- Roulette
The working process:
- Let's start with the markings. On all surfaces of the room (walls, ceiling, floor, as well as corners), using a tape measure we mark the attachment points for the guide rails. The space between the fasteners should be 200 mm;
- We saw off the bars of the required size, fasten them at the marked points, control correct position carried out by level;
- First, you should fasten the beams to the ceiling, then to the floor, and finally, after making sure that everything fits together, fasten the elements to the wall. Since the entire main load is distributed on the vertical guide rails, the fastening must be of high quality and reliable. Instead of self-tapping screws, you can also use screws and metal corners.
Important! The distance from one rack to another cannot exceed 600 mm.
Electrical wiring should be hidden in special corrugated protective shells.
Jpg" alt="how to install drywall on a wall" width="700" height="573" srcset="" data-srcset="https://remontcap.ru/wp-content/uploads/2017/09/otdelka_sten_laminatom_svoimi_rukami_C29B2E90..jpg 300w" sizes="(max-width: 700px) 100vw, 700px">!} 
Installation of a metal frame
Now let's figure out how to properly lay drywall on the wall using a metal frame. For this purpose, galvanized profiles are most often used. Compared to wood, it has much greater strength and reliability, is not afraid of moisture and speeds up installation.
As with wood, the whole process begins with markings. First, we check the height difference on the wall with a level. These irregularities must be eliminated if possible and taken into account when marking.
- We attach the profile. You will need two for each wall. The first is mounted on top along the wall, retreating from the ceiling by 800-100 mm. The second is parallel to the first on the floor;
- If you need to level out unevenness, place an element of the required thickness under the profile, which will add rigidity;
- In order to be able to mount rack elements, we install the profile on the floor so that the groove is directed upward, and the groove of the profile under the ceiling, on the contrary, is directed downward;
- Vertical guides are attached to the wall at the corners with self-tapping screws or dowels, the indentation does not exceed 400 mm;
- In places where vertical posts will pass, hangers are attached to the wall every 400-500 mm;
- Then the vertical posts are inserted into the grooves of the upper and lower horizontal profiles and must be secured;
- At the same time, the vertical profile is attached to the hangers, having first checked everything for level.
Data-lazy-type="image" data-src="https://remontcap.ru/wp-content/uploads/2017/09/montazh-pp-profiley.jpg" alt="how to install drywall on the wall" width="640" height="479" srcset="" data-srcset="https://remontcap.ru/wp-content/uploads/2017/09/montazh-pp-profiley..jpg 300w, https://remontcap.ru/wp-content/uploads/2017/09/montazh-pp-profiley-174x131..jpg 70w" sizes="(max-width: 640px) 100vw, 640px">!} 
Thermal insulation of walls when laying plasterboard
Drywall has good heat-insulating properties, but it cannot cope on its own. Before you start laying gypsum boards on the frame, you need to take care of the thermal insulation materials.
The most commonly used are polystyrene foam boards and mineral wool. The thickness of the thermal insulation depends on the width of the profile ribs or frame bars.
In between vertical posts lay segments of material for thermal insulation. When all the voids are closed, a vapor barrier membrane is attached over the thermal insulation. A special tape is glued to the joints of the film.
Installation of drywall on the frame
Having assembled the frame and laid the thermal insulation, we come to the final stage. Now is the time to figure out how to properly lay drywall on the walls.
First, we calculate how many sheets of plasterboard will be needed, based on the area of the walls. But it costs about 10-20% more; material consumption largely depends on the experience of the installer.
Before starting work, transfer everything onto paper; this stage will allow you to quickly navigate and cut the sheets into the necessary parts in advance. Then the drywall is attached to the frame, while the seams between the sheets should be located in the middle of the vertical profile, and the horizontal strip located at the back should be in the middle of the sheet. This will ensure the strongest and most durable structure.
Jpg" alt="how to install drywall on a wall" width="620" height="349" srcset="" data-srcset="https://remontcap.ru/wp-content/uploads/2017/09/maxresdefault-1024x576..jpg 300w, https://remontcap.ru/wp-content/uploads/2017/09/maxresdefault.jpg 1600w" sizes="(max-width: 620px) 100vw, 620px">!} 
Gluing drywall to walls
Usually plasterboard sheets They are mounted on a frame, but this reduces the area of the room, since the gap between the real and false wall is quite large. It has great importance in rooms with a small area, where every centimeter is important. Then they use the technique of frameless wall covering, in other words, placing drywall on glue.
Jpg" alt="how to install drywall on a wall" width="860" height="500" srcset="" data-srcset="https://remontcap.ru/wp-content/uploads/2017/09/gipsokarton_na_klej_k_stene..jpg 300w" sizes="(max-width: 860px) 100vw, 860px">!} 
Depending on the amount of curvature of the wall surface, different techniques. If it does not exceed 20 mm, then use Perflix glue, applying it in small slides, and press the drywall against the wall with your hands.
If the unevenness is more than 50 mm, only narrow strips of plasterboard are placed on the glue, onto which, after drying, the sheets themselves are attached using a special gypsum-based putty. Everything happens in the following order:
- We clean the wall from the remnants of previous repairs. We make markings, the level and plumb line will help you with this;
- We treat the surface with a primer, which must be selected based on the characteristics of a given wall;
- After drying, glue is applied to the drywall in slides, the distance between the slides is approximately 20-30 cm;
- We press the sheet against the wall and tap it with a rubberized mallet.
That's all, you glued the drywall to the wall with your own hands, all you have to do is wait for it to dry completely.

One of the methods of rough finishing is the formation of the surface when installing drywall on walls without a frame. In the article we will consider effective technologies that involve installing gypsum board directly on the wall surface, and also outline the list of materials necessary for this.
Frameless installation of gypsum boards - what are the pros and cons?
The main method of forming a wall structure from plasterboard sheets is their installation on a pre-constructed frame. This technology is a priority, as it allows you to quickly create an ideal surface, regardless of the quality of the base wall. The space between the profile and the wall is convenient to use for hidden installation of various communications: electrical wires in a protective corrugation, water and heating pipes.
But the frame method of installing gypsum boards has several disadvantages:
- hiding the useful space of the room ( minimum distance from the base surface to the back of the profile – 5 cm, thickness of the plasterboard sheet – 12.5-15 mm);
- to obtain a rigid structure that is resistant to possible mechanical influences, you have to sheathe the sheathing in two sheets or significantly tighten the pitch of the load-bearing elements of the frame;
- problems with reliable fastening of heavy hanging furniture;
- complexity of design load-bearing frame, which requires professional skills and an impressive set of tools;
- the relative high cost of the process of creating a false wall from gypsum plasterboard.
If you need to level the walls in small room(bathroom, toilet, corridor), “stealing” up to 7 cm of usable space on the lining of each wall is an unaffordable luxury, especially when there is no hidden installation of complex communications or additional insulation or soundproofing. In this situation, it is more reasonable to create a surface for subsequent finishing by attaching drywall to the wall without profiles. The sheets are attached directly to the wall using adhesive solutions, mounting foam or dowel screws.
Sometimes these materials are used in combination, for example foam plus dowels, or assembly adhesive plus foam. This does not mean that one method of attaching drywall excludes the use of another. In addition to compactness, the frameless method of installing drywall on the wall has several more advantages:
- relative ease of installation at high speed;
- lower material costs for a set of installation activities;
- the ability to make a durable structure using single sheet cladding.
The disadvantage of rough finishing of walls without frames and profiles with plasterboard is the impossibility of high-quality installation in case of large longitudinal or vertical curvature of the base wall (more than 6 cm within one sheet). Another feature - high requirements to the gypsum board itself. Sheets of sheathing material should be minimally deformed. If the slight curvature of plasterboard sheets does not matter when installed on a frame to which they are rigidly attached, then the frameless method involves a floating installation, so it is important to properly store and transport the material, preventing its deformation. GCRs purchased in advance cannot be stored in wet areas, especially in a standing position, leaning them against the wall. The sheets should be laid out on a flat floor or shelf.
How do you fix drywall - glue, foam or dowels?
To attach plasterboard to the base surface, several materials are used, which are specialized and universal. The first group includes special compositions designed for installing drywall to a wall without profiles. These are dry packaged mixtures on a polymer cement or gypsum base. The most popular representative of specialized compounds is gypsum glue Knauf Perlfix, which most professionals prefer to use. It is packaged dry in 30 kg bags.

Advantages of this glue:
- sufficient time for installation and correction of the sheet position (30-40 minutes);
- high strength and reliability of the wall/gypsum plasterboard connection;
- high elasticity of the prepared solution, allowing installation on surfaces with a curvature of up to 3 cm without gluing additional stops;
- there is no need to wait for the glue to dry - immediately after it sets, the plasterboard surface is suitable for subsequent finishing (processing);
- sticks even to materials with increased moisture absorption (wood, porous building materials).
The second most commonly used material is polyurethane foam, referring to universal fasteners used not only to secure drywall. Polyurethane foam is more often used for fixing small fragments of gypsum boards when refining door and window slopes, or in combination with gypsum adhesive to fill large voids and better reliability gluing sheets on walls with large curvature.

Less commonly used are polymer adhesives - liquid nails. The use of such glue is justified only in cases of mounting small fragments on a reliable and even base. Liquid nails do not allow you to adjust the position of the sheet relative to the base surface. Dowel screws are sometimes used as auxiliary fastening elements. They additionally attract gypsum boards with the main use of the adhesive materials listed above. Instead of dowels, you can take black self-tapping screws of the required length if the base surface is made of wood or loose porous building materials (shell rock, aerated concrete, foam blocks).
Sheathing walls with plasterboard without a frame - pre-installation preparation
The use of glue allows you to create a plasterboard surface that is practically not inferior in quality to that when installing gypsum plasterboard on the sheathing. For work you will need the following tools and materials:
- aluminum rule;
- bubble level;
- thread (line);
- set of spatulas;
- drill equipped with a mixer;
- container for preparing glue;
- wide paint brush;
- flat wall (12.5 mm thick) plasterboard sheets (regular or moisture resistant);
- gypsum adhesive for gypsum boards;
- primer.
When you have stocked up with everything you need, we move on to preparing the surface. Gypsum glue adheres perfectly to any construction and finishing materials (various bricks, classic and porous concrete, cement-sand and lime plaster). The main requirement for high-quality adhesion of the glue to the base is the absence of dust and many unreliably held areas. The latter are removed, after which the wall is primed. Before priming, we recommend using a hammer or hammer to knock down areas of masonry material or plaster that sharply protrude above the general surface (if any). This will make the work easier and significantly reduce glue consumption.

For cooking adhesive solution Pour water into a container (plastic bucket) at the rate of 1 liter per 1.6-1.7 kg of dry mixture (this is according to the instructions). It’s easier to do this: pour a little more than a third of the bucket with water, gradually pour the dry mixture into it. When a pile of dry glue appears above the surface of the water, mix with a mixer. If the resulting mass does not leave a depression after removing the rotating mixer, add the dry mixture. If, after thorough mixing, areas of unwetted solution remain and the mixer rotates under load, add water.
How to attach plasterboard to gypsum glue - step-by-step algorithm
Having selected and prepared one of the walls for work, first “probe” its relief and deviation from the vertical with a rule and level, during which a “picture” will be formed that gives an idea of where a larger and where a minimum layer of glue will be needed. Then you need to decide on the general direction of the future drywall surface. To do this, it is convenient to stretch a thread along the bottom (5-7 cm above the floor) along the wall, which will serve as a guide for installing the outer surface of the sheets.
The thread is tensioned taking into account the surface topography so that the installed sheet does not rest against the existing protrusions of the base wall.
If the wall is not very crooked (it “walks” no more than 3 cm within the area of the sheet being fixed), installation is carried out without preliminary installation of additional supports. If there are significant concavities, strips or squares of gypsum plasterboard scraps that remain after cutting the sheets are pre-glued. If there are none or few, you will have to sacrifice a whole sheet for this, cutting it into the necessary substrates. When the glue holding the pads that trim the wall has hardened, we proceed to gluing whole (or cut according to the right size) sheets.

Gypsum adhesive is applied to the base surface over the entire area of the gypsum board being installed. Applying the solution to drywall is inconvenient. Firstly, it greatly increases its mass, making it difficult to move. Secondly, by forming slides of glue on the wall, it is easier to control their required size and the degree of protrusion above the general surface. The glue is applied randomly, but evenly and in such a way that the fourth or fifth part of the sheet is glued. In the area of the baseboard and the intended fastening of hanging objects, it is more advisable to make the adhesive pad continuous. Now that the adhesive mass is already on the wall, do the following:
- 1. Under the area where the plasterboard is installed on the floor, we place stops up to 10 mm thick (after the glue hardens, the linings are pulled out and a deformation gap is formed between the plasterboard and the floor).
- 2. We hold the sheet tilted upward from the wall by the stretched guide thread and gradually completely lean the drywall against the wall.
- 3. If the sheet being installed is even slightly stuck to the glue, it will not fall, so you can release it and analyze the position and possible actions to correct it.
- 4. We begin to gradually press the drywall into the glue. First, we align the bottom along the thread, then, under constant control of the level and rules, we place the entire sheet in the intended place. The drywall is moved to the base surface by hitting it with the palm of your hand or with a rubber hammer.
- 5. Pressing drywall? It's important not to overdo it. It is problematic to return areas planted deeper than intended. Often, to do this, you have to “tear off” the entire sheet and re-install it.
- 6. In the same sequence, the next gypsum board is installed nearby. Here it is important to control the formation of a beautiful seam between the sheets and their location in the same plane.
The remaining walls are also covered, after which further finishing is carried out on the surface, no different from that on plasterboard that is fixed to a frame made of profiles.
Installation on polyurethane foam - simple and quick
Polyurethane foam is a universal construction adhesive and sealant. Polyurethane material adheres reliably to almost all surfaces. This property construction foam sometimes used for local installation of gypsum boards. How to attach drywall to a wall without profiles using polyurethane foam?
It must be applied to a fragment cut to size. sheet material foam in strips or pointwise (taking into account leaving space for its expansion) and press tightly to the base surface. The desired position of the gypsum board fragment is adjusted using dowel screws or self-tapping screws. They will not allow the drywall to move under the pressure of the expanding polyurethane. After 2-3 hours, the gypsum board is securely fixed and ready for subsequent finishing.
One of the fastest, simplest and budget ways produce Finishing work indoors is the installation of drywall on the walls. This building material allows as soon as possible install a strong and fairly versatile wall, thereby creating an absolutely flat surface of the main load-bearing partitions, and also organize additional heat and sound insulation. And in order for you to succeed and the finished result to exceed all your expectations, we will tell you how to install drywall on the wall with your own hands.
Drywall for wall cladding - general information about the material
Drywall is a universal material for wall finishing due to the following qualities:
- Availability;
- Possibility of obtaining a completely flat surface;
- Environmental friendliness;
- High resistance to impact external factors environment;
- Ease of operation;
- Ease of installation;
- Possibility of spot repairs with at the lowest cost time and money.
In addition, drywall allows you to put sound insulation and all the communications you need into the empty space between the sheets and the rough coating. Concerning decorative finishing, such a wall can be covered with absolutely any material.
Important! Drywall allows you to design a variety of niches, shelves and arches directly on the wall surface. This is a huge advantage of this material compared to others, which allows you to arrange small rooms with minimal loss of free space.
Tools and materials you will need for the job
To install drywall on the wall, you will need special tools and materials that will greatly facilitate the work process.
Tools:
- Screwdriver for attaching drywall to the grid and mounting the frame;
- Medium spatula;
- Notched trowel for spreading glue over the surface of sheets;
- Construction or stationery knife;
- Electric drill with hammer drill;
- Drills for concrete;
- Mixer attachment for mixing glue;
- Capacity for adhesive composition, about 8 liters in volume;
- Paint roller;
- Scissors for cutting metal;
- Plane;
- Grout for processing joints;
- Sander;
- Cutter.
Drywall
In building materials stores you can find different colors sheets of drywall. This is due to the fact that this material is produced taking into account the room conditions in which it will be used.
For example:
- Grey. It is used mainly in residential areas with normal humidity. It is designated as gypsum board.
- Light purple or pink. This is a heat-resistant material that is used for lining stoves and fireplaces. Designation GKLO.
- Green shades. This type of plasterboard is used for covering the walls of rooms with high humidity, for example, a bathroom. Defined by the abbreviation GKLV.
- Light blue or dark grey. This material combines the properties of moisture resistance and heat resistance. It is most often used for finishing baths and boiler rooms, designated GKLVO.
Important! It is best to take plasterboard 10-15% in excess of the amount you need.

Metallic profile
You will need the following types:
- Guide.
- Rack-mounted.
- Ceiling.
- Defensive corner.
Additional consumables and components:
- Direct hangers.
- Sealing tape.
- Dry building mixture (in case of frameless installation of plasterboard sheets).
- Primer for pre-treatment of walls and preparation for subsequent puttying.
- Gypsum-based putty for sealing joints.
- Reinforcing mesh or tape.
- Self-tapping screws for working with drywall.
- Dowels for securing the posts.
- Thermal insulating material.
Installing drywall on a wall using a frame method
This type of installation is considered the most common, since this design is more reliable, especially if you want to decorate the wall with tiles.
Important! The only disadvantage of installing drywall on a frame is the complexity of the installation itself and the need to purchase additional materials.
To make it more clear to you, we have divided the further process of action into three stages.
Stage 1. Building a diagram and marking
Before starting all work, it is very important to draw future scheme placement of plasterboard sheets on the wall. Thanks to this action, you will be able to use the material more rationally and economically.
Important! Please note that the wall is sheathed exclusively in a checkerboard pattern, and the sheets of drywall are placed strictly vertically. These parts should also be indicated on the schematic drawing.
After you have drawn the location of the drywall on the wall, you should determine the future location metal profiles. The markup should be done as follows:
- From work surface leave a distance so that you can easily lay insulating materials and communications. Drill screws in the corners.
- Connect a thread with a plumb line to one of the screws. At the point of contact with the floor, fix the same screw. Do the same with the opposite corner.
- Stretch similar cords between the upper and lower screws and mark the base lines along which the supporting frame profiles will be laid in the future.
- Next, using the same principle, transfer the entire layout to the wall surface.
- When finished, remove the screws.

Stage 2. Installation of a frame made of profiles
After you have transferred the markings to the walls, adhering to them, you can install the plasterboard profile on the wall. The sequence of actions is as follows:
- Measure and, if necessary, cut the profiles to the length you need.
- Take the guide profile that you will mount to the floor and cover it with sealing tape. Fasten it to the floor along the marked lines. The fastening pitch must be at least 1 unit per 60 centimeters.
Important! Please note that if the base of the floor is concrete, the holes for fastening should be prepared in advance, and for stronger fixation, use plastic dowels.
- Fix the ceiling guide profile in a similar way.
- Now you can start installing vertical profiles. To do this, determine the center at the place where the profile will be fixed, and install a suspension in it. Moving up and down from the center point, install frame elements every 60 centimeters.
Important! Installation of vertical metal profiles should begin from the corner of the room.
- Insert the metal vertical profile simultaneously into the upper and lower profiles, placing it between the petals of the suspension. Check the accuracy of its location with a level, and then fix it to the suspension.
- Install the remaining vertical profiles in the same way.
Important! If you plan to decorate the wall with tiles, it is better to reduce the spacing of the racks to 40 centimeters.
- If the room has a window opening, install the lintel so that it is located between the window sill and the vertical profiles. It will be the main supporting profile of the window opening. Install the frame near the doorway in the same way.
Important! In addition to the window and door opening, such a frame element should be installed at all joints. They should be secured with rack profiles using “crabs”.

Stage 3. Wall covering
Before attaching sheets of plasterboard to the wall, insulating material should be laid.
Important! It is best to use foam, cork or mineral wool. It should be laid in empty strips of the metal frame, while passing it through the profiles and fixing it with the curved legs of the suspensions.
Now you can proceed to installing drywall on the wall with your own hands. The sequence of actions is as follows:
- Install the bottom sheets on the wall with a gap of about 10-15 millimeters from the floor.
- Secure the drywall using a special screw.
- Cover the rest of the wall in the same way.
- At the end of the work, putty all joints and clean the surface with an emery cloth.
That's all, the walls are ready for further decorative coating!
Important! Pay attention to these tips:
- Fastening with self-tapping screws must be carried out in all racks and lintels;
- The self-tapping screw must be located at least 10 millimeters from the edge of the sheet;
- The pitch between the screws should be about 25-35 centimeters;
- If the self-tapping screw cannot be fixed, then it is better for you to immediately remove the old one, and screw the new one into the hole located in increments of 5 centimeters.
Frameless installation method
This covering option is suitable for small rooms, since the plasterboard sheets are attached to the wall closely. If you decide to use this technology, keep in mind the fact that the method you choose has its own nuances:
- The height of the room should not exceed the length of the sheets. This is due to the fact that horizontal fastening in this installation option is unacceptable.
- If the curvature of the walls exceeds 5 centimeters, it will need to be pre-aligned before covering. Therefore, in this case, it would be more appropriate to cover the walls using a frame method.
To cover walls with plasterboard using a frameless method, you should adhere to the following procedure:
- Prepare the base foundation. To do this, remove old wallpaper, paint, and other debris from the wall surface.
- Prime the cleaned surface.
- Using a plumb line, measure the depth of the unevenness.
- Make preliminary markings of the walls.
- Cut out sheets of drywall and cut holes for sockets and switches.
Now do the actual wall cladding. This can be done in three ways:
- If the wall unevenness is approximately 4 millimeters, the drywall can be fixed using gypsum putty. To do this, using a notched trowel, apply the adhesive mixture to the center and along the perimeter of the sheet. Next, the sheet should be lifted and pressed against the wall. Use a level to check the correct position and, using a rubber hammer, level the sheet vertically with gentle blows. Subsequent sheets of drywall are laid closely without joints.
Important! If you plan to hang something on this wall in the future, then the sheet should be completely puttied.
- This cladding option is used in cases where the curvature of the walls reaches 2 centimeters. Therefore, it is advisable to use a stronger adhesive for such surfaces. As for the sheathing process, in this case glue is applied to every 25-35 centimeters in the form of piles with a diameter of 10-15 centimeters and a height of 2-2.5 centimeters. The process of sticking to the wall is the same as in the previous method.
- This technology is used when the walls are uneven about 4 centimeters. In this case, sheets of drywall are cut into strips 10 centimeters wide and glued in increments of 40-60 centimeters. Using a level, the strips are aligned vertically with each other in one plane. This frame is given time to dry for 2-3 days, after which it is fixed to the wall using putty.
Video material
Plasterboard wall covering is a creative process, and if you feel you have the strength to carry it out on your own, then you can take on the task with confidence, even if you have not encountered this material before. The most important thing is to prepare everything necessary tools and correctly decide on the installation method. Only in this case will you be able to short terms and without much physical effort, prepare the wall for further finishing work.