How to install external chimney pipes. DIY external chimney
Sandwich pipes for chimneys are ready-made constructive solution, suitable for both indoor and outdoor use. Such structures are assembled from ready-made shaped parts, regardless of the stage of construction of the house. They are lightweight, have a smooth inner surface and do not require insulation, as they have a fire-resistant thermal insulation layer. Their installation must meet all the requirements for chimneys.
Stainless steel is a current material that has found application in various designs, including in the production of smoke exhaust ducts. The use of stainless pipes for chimneys in almost all types of heating equipment is due to the material’s resistance to corrosion and aggressive environments resulting from the condensation of water vapor from exhaust products.
However, not all types of steel can be used for chimney structures. The choice of steel grade suitable for chimneys depends on the temperature of the product outlet: up to 400°C chromium-nickel steel AISI 304, 321 is used, up to 800°C - heat-resistant chromium-nickel-molybdenum steel AISI 316. As for galvanized or black steel, they do not have anti-corrosion properties and as chimneys they quickly burn out.
The undeniable advantages of stainless steel chimney pipes are:
- light weight - promotes ease of assembly and does not require the construction of a foundation;
- modularity of systems - a huge number of pipes and shaped parts of various diameters allows you to assemble a structure not only in a new building, but also in a habitable room;
- ease of installation - the quality of the connecting elements guarantees a gas-tight assembly of an error-free design. In addition, such chimneys can be deviated from the vertical state to bypass all kinds of obstacles;
- smoothness of the inner surface;
- resistance to burnout - promotes long-term operation of the chimney;
- thin-walled pipe - allows the system to heat up quickly upon startup, reducing the formation of condensation and providing good traction.

Steel chimneys are produced in two versions:
- single-walled (single-layer, single-circuit) - such chimney systems are intended for use in heated buildings, connecting the boiler to an existing chimney system, or for repairing and restoring an old chimney through refurbishment;
- double-walled (three-layer, double-circuit, sandwich pipes) - in the design of sandwich pipes for a chimney there is a heat-insulating layer located between two pipes of different sections. This arrangement of pipes makes it possible to install them both inside and outside the building without insulation. Insulation is carried out only in places where the chimney passes through the ceiling, wall or ceiling.
Do-it-yourself chimney installation from a steel pipe: basic rules
The modular design and wide selection of all components makes self-execution installation of a stainless steel chimney is as simple as possible. But, despite the ease of installation, such chimneys are part of the overall functioning cycle gas equipment and must comply with the requirements regulated by SNiP and gas safety rules.

How to install a chimney correctly? It would be useful to familiarize yourself with thematic video instructions before assembling a stainless steel chimney. On the Internet you can easily find a whole series of videos of installing a chimney from of stainless steel with your own hands. The videos contain a lot of useful information about the nuances of installation and the most common mistakes made when installing a chimney with your own hands.
Despite the ease of assembly, it is better to entrust the chimney exhaust device to a specialist rather than doing the installation yourself. A stainless steel chimney must meet the following requirements:
- if single-circuit ones are used to remove exhaust gases steel pipes, it would be most acceptable to use an internal chimney installation scheme, in which case the system is placed along the main internal walls;
- the diameter of the pipe must be suitable in size to the inlet smoke exhaust pipe of the gas boiler, which will ensure reliable tightness of the structure;
- the location of the chimney pipe at the junction with the boiler must be vertical and have a length of 50 cm or more;

- if the finishing of the wall next to which the steel chimney is installed is made of flammable materials, the distance from the pipe to the wall must be at least 25 cm; if the installation involves closer placement, it is necessary to cover the wall with protective screens so that the upholstery on the wall protrudes beyond the dimensions pipes 15 cm on each side;
- it is prohibited to use more than three rotary bends in the structure;
- the length of the chimney must be at least 5 m;
- the height of the chimney pipe above the roof must exceed 0.5 m;
- The presence of revisions, tees and condensate collectors in the design is mandatory.
Helpful advice! When installing a chimney system yourself, remember what is wrong installed structure may cause gas explosion, fire and carbon monoxide poisoning.

Using Stainless Steel Chimney Sealant
Answering the question of how to properly make a chimney, we can confidently say that to ensure its safe operation, the structure must be absolutely sealed. Complete tightness and protection of the structure from moisture can be achieved by treating the joints of the system elements with a special sealant for stainless steel chimneys.
It is worth noting that special silicate heat-resistant sealants are used for chimneys. Before installing the chimney pipe on the previous link, their joints are treated with this composition. connect well with most materials: stone, metal, concrete, ceramics. Considering that the surface of stainless steel chimney elements is smooth, it is recommended to use an abrasive treatment before using sealant.
Work on sealant treatment is carried out at positive temperatures from 20 to 40°C: this will ensure rapid drying of the composition. If you coat the entire contacting surface with sealant, you will end up with a monolithic structure that will be difficult to disassemble without damage. This is worth considering if in the future you need to disassemble some parts of the chimney for maintenance.

The sealant treatment is carried out using a gun, applying a layer of paste no more than 1 cm thick. You should not apply the composition in a large layer: they may not dry out enough, and if they dry out, they will crack in the future. Some chimney sealants take several hours to cure at different temperatures, which will be indicated on the packaging. Chimney sealants are available in only gray and black colors.
Helpful advice!When working with sealant, it is necessary to wear protective gloves, since if they come into contact with the skin, they can cause chemical burns.
How to insulate a chimney pipe with your own hands
Insulation of chimney pipes solves several problems at once, the main of which are preventing the destruction of the roof structure adjacent to the duct and protecting the chimney itself from the effects of negative natural factors. In addition, with thermal insulation, the heat losses, which also has a positive effect on the processes occurring within the system.

By insulating the pipe, you can significantly extend the life of the chimney due to the following factors:
- the ingress of chemically active condensate onto the inner surface of the pipe is minimized;
- the effect of temperature differences between the escaping hot substances and the cold air of the atmosphere is reduced;
- heat loss contributes to energy saving, which generally allows for economical fuel consumption;
- rises mechanical strength the entire structure, since the insulating casing acts as a frame,
Prices in stores. Chimney production. Dimensions of chimneys. Recommendations for selection and installation. Where to buy pipes for chimneys.
Before assembling a chimney from a sandwich pipe, you should familiarize yourself with the key assembly steps. You can get a visual representation of the installation by watching a video of sandwich chimney assembly on the Internet. Basic installation rules:
- The internal pipes of the sandwich structure are joined by the upper contour of the pipe to the lower one, and the external ones, vice versa. On the one hand, this ensures unimpeded smoke removal, on the other hand, it protects the system from moisture;

- joining points, areas where the pipe joins the equipment, as well as places where the chimney passes through the roof are fixed with clamps;
- to improve the strength of the connection, the joint seams are treated with heat-resistant sealant;
- to service the chimney, a tee for inspection is built into the structure, and a condensate collector is built into the structure to remove moisture;
- the outer section of the pipe is equipped with a head to prevent foreign objects from entering the channel.
Features of installing a chimney from sandwich pipes through a wall
When installing a chimney through a wall, you must comply with the basic rules and requirements for the installation of smoke exhaust ducts. However, there are some nuances that must be taken into account when venting the chimney through the wall. If the first link of the chimney is planned to be led horizontally into the wall, it is necessary to make a slight slope from the device. This will prevent condensation from entering the boiler.
How to install a chimney through a wall? There are two ways: you can raise the duct to the ceiling and bring it outside at this level, or make the chimney outlet through the wall at the level of the inlet pipe gas appliance. From the point of view of ease of installation and use of shaped parts, the second method is more preferable, since it has one rotating elbow.

The procedure for installing a chimney through the wall:
- punch a hole in the wall where the pipe will pass. Its dimensions must be such that the SNiP requirement is met: the distance from the outer surface of the pipe to the wall is from 0.5 m. To reduce the distance to 0.38 m, the hole is sheathed with sheet metal or a ready-made metal box is inserted into it;
- a sandwich pipe for a stainless steel chimney is inserted into the finished hole so that the joints do not fall into the passage unit. The pipe is fixed, and the space between the box and the channel is filled with heat-resistant insulation;
- the length of the horizontal section should not exceed 1 m;
- hole in the wall is closed decorative overlays, which are sold complete with pipes;
- on the outside of the wall we fix the holding bracket and the rotary unit for the removed channel;
- We attach the vertical section of the pipe to the wall so that the step between the fasteners is at least 2 m.
Helpful advice! It is strictly forbidden to insert ordinary single-circuit pipes between sandwich pipes. The entire system must consist of identical pipes.

Installation of a chimney from a sandwich pipe through the roof
Before installing a chimney from sandwich pipes through the roof, it is necessary to properly plan the outlet location. The fact is that, given the configuration of the roof structure, it is not possible to vent the chimney through the roof in all places. These include:
- Valleys, where a lot of precipitation accumulates and it is difficult to provide waterproofing.
- Places in the immediate vicinity of skylights.
- Opposite the windows of neighboring buildings.
Before installing a chimney through the roof, you should also consider the location of the floor beams and rafters. The channel must be located between these elements. To shift the chimney line, you can use two 45-degree rotary elbows. The sequence of work to complete the passage through the roof of a sandwich chimney:
- a hole is made in the ceiling in accordance with existing standards;
- the ends of the hole are protected with fire-resistant material;

- a pipe is inserted vertically into the formed box. It is worth noting that the chimney cannot be fixed rigidly; it must move freely up and down, since its length will change when heated;
- the space between the pipe and the box is filled with basalt-based wool, having previously sewn up the entry point with a metal sheet. Mineral wool cardboard is placed in the space between the screen and the ceiling. You can simplify the organization of a passage for a chimney through the roof and ceiling if you purchase a ready-made ceiling passage unit, consisting of a factory-made box and a decorative stainless steel screen;
- To allow the chimney to pass through the ceiling, make a hole in the roofing pie. The layers of the pie are cut crosswise so that they can be tucked under and secured with staples. The hole in the sheathing is made so that the distance from the edge of the passage to the surface of the pipe on all sides is at least 13 cm;
- All resulting ends of the holes are closed with mineralite.
When installing a chimney passage through a roof made of metal tiles or other roofing covering, use a special universal master flush sealant. Its purpose is high-quality sealing of the area when the chimney passes through the metal tile. The skirt of the roofing seal is shaped into the roofing material, after which it is fixed to the surface. The connecting lines of the seal with the pipe and the roof surface are treated with heat-resistant sealant.

Options for heat exchangers for the chimney pipe
To use the heat generated as a result of the removal of combustion products, a special device is used - a heat exchanger on the chimney pipe. There are various options for such devices, among which the most relevant are:
- Air heat exchanger - the operating principle of such a device is identical to the functioning of a convector. Cold air enters the heat exchanger through the inlet pipe, after which the heated air flows out through holes at the top of the device. As a result, additional heating of the room occurs. Having a certain set of tools and skills, you can make an air heat exchanger yourself.
- Coil-type design - for such a device, flexible and corrosion-resistant copper or aluminum pipes are used. They are bent to obtain required form, at the end sections of the pipe a thread is made for connection to expansion tank. For safety and improved heat transfer, it is recommended to protect the pipes with a special casing. The operating principle of such a heat exchanger is natural circulation of water. It is easy to install it yourself, however, it is necessary to make weight calculations that take into account the properties of the liquid to expand when heated. The disadvantages of such a system include a decrease in output temperature carbon monoxide, which can negatively affect traction and fuel combustion.
- Container with water - to construct such a device you will need copper tubes and a metal container with a capacity of about 20 liters. The container can be made independently from sheet steel. Holes are made at the lower and upper points of the tank. A tap is installed into the lower outlet of the tank to drain water.
- Corrugated device - for the manufacture of such a heat exchanger, three corrugated pipes, which are used to wrap the smoke exhaust duct where it passes through the attic floor. The surface of the chimney gives off heat to the corrugation, and the heated flow from it is directed to the room that needs to be heated. The operation of this heat exchanger reduces the temperature of the chimney, thereby providing fire protection.

Where can I buy sandwich pipes for a chimney?
Due to the fact that the operation of a gas boiler directly depends on the functioning of the chimney system, to assemble a sandwich chimney it is necessary to purchase high-quality and proven pipes. Only such products can guarantee safe and effective exhaust gas removal, preventing smoke from entering the room and causing backdraft.
It is very profitable to purchase the necessary goods through manufacturers’ websites: you can study the assortment in a relaxed atmosphere and make a comparative analysis of prices different manufacturers, and most importantly, get qualified advice on choosing a model suitable for specific equipment. Many online stores include product delivery in their services.
As a rule, many companies involved in the sale of chimney pipes offer professional chimney installation services. The price for the work depends on the thickness of the walls, the material from which the pipes are made, the presence of a passage through the wall for the chimney, the configuration and roof covering. The estimated price for installing a chimney made from sandwich pipes is 1,900 rubles. for 1 p.m. The visit of a surveyor, connection of equipment, and fire protection work are not included in the prices for the installation of chimneys made from sandwich pipes.

Some online stores sell sandwich-style galvanized chimney pipes. This material is cheaper, but it has good technical performance. Chimneys made of galvanized steel can be used to remove low-temperature smoke. If the construction of chimneys made of sandwich pipes involves only a galvanized outer contour, such a structure can be operated without the slightest harm to health. How profitable it will be to purchase a chimney made from a particular material can be found out by analyzing the price level.
Price of sandwich pipes for chimneys
When purchasing products from manufacturers or their official representatives, you can be sure that you will purchase a certified and high-quality product. The range of online stores and specialized departments includes not only the pipes themselves, but also a whole range of factory bends, tees, fittings and other related products that can be easily found in catalogs. If the design of the chimney from sandwich pipes requires passage through the roof, you can also order a standard roof cut here.

By visiting the website, before assembling a sandwich chimney, you can get expert advice on any issue of interest. For those who are planning to install a sandwich chimney with their own hands, online sites offer information about various assembly examples and the most important installation points.
The prices indicated in the catalogs are indicative and are subject to mandatory clarification from managers of companies and online stores.
Price of sandwich pipes for chimney installation:
| Manufacturer | Sandwich pipe made of stainless steel, length 1 m | |||
| Diameter, mm | Metal thickness, mm | price, rub. | ||
| outer | interior | |||
| NEST company | 220 | 120 | 0,5 | 1490 |
| 230 | 130 | 0,5 | 1600 | |
| 240 | 140 | 0,5 | 1670 | |
| 250 | 150 | 0,5 | 1760 | |
| 260 | 160 | 0,5 | 1850 | |
| Smirnov Company | 200 | 120 | 0,5 | 1480 |
| PC Ferrum | 200 | 110 | 0,5 | 1970 |
| 200 | 115 | 0,5 | 1985 | |
| 200 | 120 | 0,5 | 1990 | |
| 200 | 130 | 0,5 | 2030 |
Helpful advice! Before purchasing a sandwich pipe, it is worth discussing with the manager the complete set of the chimney system and familiarizing yourself with the rules for operating chimneys.

Some companies are engaged in the implementation of systems for the removal of combustion products, which have already been collected as much as possible. By purchasing such a design, you can reduce the labor intensity and time required to install a sandwich chimney with your own hands. In addition, the modular design is equipped with various seals to guarantee the tightness and reliability of the smoke exhaust system.
Thanks to a wide range of sandwich pipes various diameters, as well as shaped parts and components for them, you can assemble chimneys yourself, adhering to the rules and regulations. Follow the recommendations of professionals and use as an example a training video on how to install a chimney from sandwich pipes.
The chimney in a private house is most often built invisible to the eye. This can be done even at the planning stage of building a house. If there are several chimneys in the house, then they are combined into one or two devices.
Installation of a steel chimney in a private house
The design of the chimney depends on functional features devices for which they are intended. The complexity and configuration of the chimney depends on their location and power.
Types of chimneys:
- ventilation,
- gas outlets,
- smoke
Ventilation systems
The main function of ventilation pipes is that they help remove polluted air masses from the room.
 Originally made brick ventilation chimney
 Ventilation ducts must be in those places where the room is least ventilated. It is especially important to place such pipes in kitchen area, bathroom, toilet.
Gas exhaust systems
Gas flue pipes are used if the house uses a gas heating system. They remove combustion products outside the room, and thus ensure the safety of using the heating system. Pipes must be able to withstand a variety of exposures to harmful substances. As soon as combustion products enter the chimney, they immediately react with the moisture that is already in the pipe. As a result of this, an oxidation process occurs, which can cause destruction or internal deformation of the pipe. Also, such a chimney helps to increase draft.
 Diagram of the device and design of the flue pipe of the chimney
 Smoke pipes
Chimneys are used when heating equipment is installed in the house, which operates on solid fuel– these can be stoves or fireplaces. There are most of them in the house, which is why they are often combined into one or more.
 device diagram and design of a brick chimney
 Chimney pipes
The chimney design is quite simple; it involves the use of special pipes through which polluted air or combustion products are discharged outside the room.
Pipes are:
- brick,
- metal,
- ceramic,
- polymer.
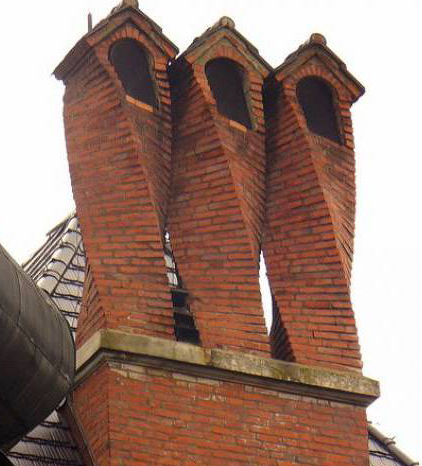
Distinctive features of a brick chimney
Despite the fact that today it is very a large number of materials that can be used to construct a chimney, brick chimneys have still been very popular for many years.
 Brick chimney
 This type of chimney has its advantages. It cannot be plastered inside, which will help save on finishing materials. It is also worth considering that the masonry of a brick chimney must have a joint of 1 cm. If it is recommended to use cement-lime or lime mortar indoors, then in the upper part of the building you can already use ordinary concrete mixture for masonry.
Advice. In order to use a brick chimney in a house, it is necessary to make a more powerful foundation for the building - brick will add extra load to the walls of the building and to its foundation.
In addition to the advantages, there are also a certain number of design disadvantages. Brick, due to its rough surface, can accumulate dirt. That is why such a pipe becomes clogged with soot very quickly.
Since combustion products exit through a brick chimney, oxygen condensate is formed, which causes brick pipe subject to destruction. It happens that a piece of brick breaks off and falls into the pipe. All this can significantly narrow the chimney channel and make it difficult for air masses to escape.
To ensure a long service life of a brick chimney, it is recommended to insert an asbestos-cement pipe inside. The gap between the brick and the pipe is filled with concrete mortar.
 An example of using an asbestos cement pipe
 Ceramic structures
Ceramic pipes are ready-made structures for constructing a chimney. They are sold in a modular design. Its inner tube is made of acid-resistant, heat-resistant and durable ceramic.
Ceramic chimney pipes have a number of advantages and have a very smooth surface. Thanks to this, soot does not accumulate on it, which is formed as a result of the passage of contaminated air masses formed during the combustion process.
 Installation of a ceramic pipe for a chimney
 Like brick chimneys, ceramic chimneys are quite heavy. It is for this reason that it is worth using a foundation for the structure.
Metal chimneys
As for metal pipes for the construction of a chimney, due to their ease of Lately began to enjoy great popularity. They also have a smooth surface, which eliminates the accumulation of soot. Accordingly, the air will flow much better.
Read also
If the apartment is hot: tips on how to solve the problem
High-quality thermal insulation is quite simple. For this, basalt wool is used, which is laid inside the pipe. It will only be necessary to correctly determine the thickness of the material, since a large thickness can completely or partially block the pipe and it will be very difficult for air masses to escape.
 Installation of a metal chimney pipe
 As a rule, metal chimneys are made of stainless steel, which is very resistant to all climatic, weather and other influences.
Modern chimney pipes are polymer structures. The pipe itself is very soft and has quite a small weight. The chimney will be distinguished by its practicality and durability. You can install the pipe yourself, and any beginner can handle it.
 Modern polymer chimney
 Most often, polymer pipes are used if the house has a gas heating system (boilers or water heaters). Such pipes can only be inserted into a chimney that is made of brick.
Types of chimneys
Today there are two types of chimney structures: a structure located inside the building and a chimney outside the house. They differ not only in the materials from which they can be constructed, but also in size and type.
 Drawings and design of internal and external chimneys in a private residential building
 Typically, brick or ceramic pipes are used to build a chimney inside a house. It is more rational to use metal chimneys outdoors, as they are resistant to temperature changes and are not exposed to moisture.
A chimney inside the house can also be made in two ways, more about this in the video
The chimney can be used in both brick and wooden buildings. Only chimney in wooden house must be properly constructed, as wood chars very quickly. There is a special technology for constructing a chimney in a wooden structure.
Construction of a chimney in a wooden house
Most often, there are several chimneys in a wooden house. But the number of such structures largely depends on the amount of equipment used in the house. The house must have a heating system with a separate chimney and may have a fireplace, which also has a separate chimney.
All chimney structures in the house must be installed on the roof of the building and made in compliance with all norms and standards.
 Chimney in a wooden house
 In order to properly build a chimney in a wooden house, you need to draw up project documentation and contact specialists in this field who can correctly draw up a chimney project.
The life safety of everyone living in the house depends on a properly built chimney, and the equipment itself will work better. The latter applies to gas heating boilers and pipes for fireplaces.
The chimney in a wooden house should only be in a vertical position. Of course, there is an exception to the rule. You can build it with a deviation that is no more than 30 degrees from the vertical position. If it is necessary to bring the pipes outside, and this cannot be done without moving the chimney pipe, then the size of such a transfer can be no more than 100 cm.
 Options for building a chimney in a wooden house made of timber
 As for the removal of the chimney on the roof of the building, it will largely depend on the type of roof and the type of roof itself.
Advice. When building a chimney on the roof, it is worth considering the direction of the wind, which is most common in this region. This is necessary due to the fact that if the chimney pipe is connected to a heating boiler, then wind masses can enter the pipe and thereby cause intermittent combustion of the fuel substance.
If there is, then the smoke exhaust pipe must be constructed with high quality. This will prevent smoke from entering the room and allow it to escape outside.
Recently, a chimney for a fireplace in a wooden house is quite complex design, which uses pipe-in-pipe technology.
The chimney itself consists of three components:
- stainless steel pipes;
- layer of thermal insulation material;
- steel pipe.
Initially, the stainless steel pipe is wrapped thermal insulation material, which can be secured to it using wire or any other material. After this, the finished structure is inserted into a metal pipe, which will have a larger diameter than the internal one.
 Methods for installing chimney pipes in a wooden house
 In addition to this method of constructing a chimney, there is another way; a plastic stocking is used for this. Its main advantage is that it heats up very quickly and cools down quickly. It can also be used when it is necessary to make a fairly large number of chimney passages.
The heating system in any building includes two elements. This is the installation of the heat generating unit itself - a boiler running on gas, liquid or solid fuel, and a system that facilitates the removal of combustion products. The installation of these elements requires close attention. The supply of heat in the house and the safety of people depend on the operation of the system as a whole.
In this article we will look at how to properly install an external chimney with your own hands and present a number of expert tips on installing a chimney. If the chimney is installed incorrectly outside the house, this can lead to unpleasant consequences: backdraft of the exhaust gas removal system (combustion products entering the room), this can cause a fire and people can be injured. There may also be insufficient heating. If you have come to the conclusion that you are quite satisfied with an external chimney, there is an opportunity to make it yourself, without resorting to outside help, and save a significant amount of money.
Currently, thermally insulated external chimneys are popular; they are usually called “sandwich” (see).
They have their advantages:
- Good traction (helps increase Thermal efficiency installations).
- Rapid overcoming of the condensation threshold.
- Minimal soot deposits on the walls.
- Durability of the structure.
- External chimney easy to maintain.
- Minimum weight.
- Installation in wooden houses is allowed.
- Meets fire safety standards.
The sandwich chimney has three components:
- outer pipe;
- inner pipe;
- layer of thermal insulation.
There are three types of connection of such systems:
- flanged;
- bayonet connection;
- type of connection “cold bridge”.
Attention: The main requirement for all types of connections is one: high tightness. Pay special attention to this.
Before starting installation yourself, you must know the structure of the external chimney. The main thing is to decide what elements you will need and their quantity. Make a drawing and add everything you need to the list.

- Any unit t for heat production - boiler.
- Bends– regulate the movement of exhaust gases. The name of the knee contains information about the angle of inclination. Welding of bends is carried out using argon welding or a tungsten electrode in an argon environment. They can install various types of dampers and inspection windows.
- Dampers, which are to be installed in bends, pipes, tees and transitions.
- Tee stand, made from a square stainless steel tube. Fastening to the wall is done using dowels. To do it correctly, you need the right stand for the tee. Be sure to indicate the distance between the chimney and the wall when ordering.
- Tee 45 thermally insulated, stainless, required for connecting the boiler to the bottom of the chimney, vertical direction. A condensate drain pipe and an inspection window can be installed on the side of the structure, or at the bottom of the tee. To comply with all requirements for the installation of chimneys after assembly, the inspection window door should be placed on silicone. There are continuous, solid and prefabricated tees, connections to them are made at different angles.
- Brackets, are made from stainless steel tube. When ordering, be sure to indicate the distance from the wall to the chimney (to comply with fire safety regulations).
- The external chimney must be thermally insulated. Chimney, together with thermal insulation, is placed in a protective casing and thereby forms a so-called sandwich. Standard size half-meter or meter-long pipes; for the manufacture of the casing, not only stainless steel and galvanization are used, but also the customer’s material. Ceramic wool or basalt fiber is used for thermal insulation.
- Dowel bracket reinforced, used when installing reinforced fastening. This helps with lateral loads; they are used to install unloading and expansion cups.
- Top, heat-insulating pipe in a protected casing. The diameter of the casing itself gradually decreases and approaches the diameter of the pipe, this helps protect the insulation from external influences.
- Cap, stainless steel, which is given the required shape by welding with a tungsten electrode.
Now you have an idea of the components and will be able to correctly select all the chimney parts for the heating boiler. Correctly calculate the length and cross-section of the structure.
Attention: At the development stage of the chimney system, parameters such as cross-sectional size and height should be taken into account. The thrust increases with greater length; the higher the pipe, the stronger the thrust. However, a very high chimney will create great aerodynamic resistance to moving combustion products. The placement of chimney pipes is clearly regulated SNiP 2.04.05-91. The cross-section of the chimney is important. As a rule, it is determined: the ratio of the internal diameter of the chimney to the maximum dimensions of the fireplace firebox opening (height/width) will be 10:1.
When you select the diameter of the smoke channel, you should take into account that, according to GOST 9817-95 the area of the smoke channel along the cross-section of the pipe must be at least 8 cm 2 per kilowatt of power of the heating unit (fireplace, boiler or stove). And the calculated value of the velocity of exhaust gases in the boiler itself should have an interval of 0.15 - 0.6 m/sec.
Installation of the structure
The external chimney (its main part) is installed outside the building, which is connected by a horizontal pipe through the wall of the building to the heating unit. After installing the heating boiler, it must be connected to a chimney pipe, which will be located outside the building. It's not as difficult as it seems at first glance. However, some rules must be followed.

Rules for performing work
The chimney is installed in all cases from the heating boiler, or rather, from the hob upwards. The gas exhaust pipe is always put on top of the previous one, this avoids the penetration of moisture onto the insulation.
- To seal the structure, a heat-resistant sealant is used, not less than 1000*C.
- Clamps should be used on waste connections, tees and pipes.
- At a distance of two meters, the external chimney must be rigidly attached to the wall with special brackets. They should also be used when fastening tees.
- Horizontal sections of the chimney pipe are not allowed to exceed one meter.
- Avoid contact gas pipes with chimney ducts and electrical wiring.
- When passing a pipe through a flammable structure, use special fire-fighting pipes.
- Install a removable door for cleaning (this must be done twice a season) of the structure at the base of the chimney.
Installation
When everything is known about the design and the material is ready, you can begin the main work.
- We connect the chimney to the heating boiler pipe using an elbow, pipe or tee (depending on the design).
- We connect the pipe to the chimney using the necessary transition unit.
- We treat the joints with sealant and install clamps.
- The passage through the wall is carried out using a special passage pipe (joining is prohibited in the place where the wall passes).
Attention: All sections of the chimney pipe should be pushed tightly into each other without gaps, the insertion distance should be at least 0.5 of the pipe cross-section (fitting depth).

- We are preparing the installation of the vertical part of the structure. At the end of a horizontal pipe leading through the wall, we attach a tee with fasteners for vertical pipe. If we use an elbow, it is necessary to create conditions for cleaning the horizontal gap of the connection. When using a tee, the lower outlet is blocked by a plug, which is removed or we use a tee with revision. How and to what to attach the chimney depends on its location. The pipe is attached to the wall with wall brackets every 2 meters. If the main pipe is heavy, the elbow should be supported. It often happens that it is impossible to fasten to the wall along the entire length of the structure; in this case, braces are used.
- We install a clamp with ears, attach clamps to the ears and attach guy cables of the required length to them. In this case, the guy rope must have a diameter of at least 3 mm.
- In the places where the guy wires are fastened, we install eye-pins or anchors (we choose based on the mounting surface).

The next step is to lift and secure the entire vertical pipe structure. It is possible to install it in parts, but this is unsafe work at height, and sometimes completely impossible. As a rule, the pipe is assembled on the ground, fasten all parts with clamps, prepare fasteners for braces and brackets.
- To facilitate this process, we use a hinge.
- We select the required elbow for the connection and fasten the hinge to the edge of the outer pipe, welding it.
- We raise the finished end of the pipe to the level of the joint and also attach the hinge to the end of the elbow.
- We lift the entire structure using attached cables and a fork. This should be done in good weather; it should not be done in gusty winds.
- We carry out fastening in accessible places.
- For stability, we secure the stretch marks lightly.
- Unscrew the nuts that secure the hinge. We use a grinder to cut off the bolts themselves and knock out the ends.
- We knock out the hinge and fasten the remaining bolts at the joint.
- We perform full tension on the stretch marks. We adjust the tension using the lanyard screws.
The installation has come to an end. We fasten the joint and seal the joint. Afterwards we insulate the vertical pipe and make insulation (this way we will avoid the appearance of condensation). Now you can rest assured about heating your home.
IN last years More and more chimneys are being made from sandwich pipes. The point is a relatively low price, long service life, and quite attractive appearance. It is also important that independent installation of a sandwich chimney is possible. This is not a very simple matter - there are many nuances, but you can do it yourself, without the involvement of specialists.
What is a sandwich pipe and what are they?
The sandwich pipe was named so for its multi-layer nature: there are two layers of metal, between which there is insulation. This structure solves many of the problems that were inherent in a simple chimney made of a metal pipe. Firstly, the insulation layer does not allow the outer metal casing to heat up to critical temperatures, and hard radiation does not emit from the pipe. More than one is created indoors comfortable conditions. Secondly, the same insulation significantly reduces the amount of condensation that forms when the pipe is brought outside. Thirdly, since the outer casing is no longer at such a high temperature, it is easier to make the chimney pass through the roof or wall.

A sandwich pipe is two metal cylinders, the space between which is filled with insulation.
What materials are they made from?
Sandwich pipes are made of galvanized or stainless steel. Galvanized sandwich pipes for chimneys are rarely used. Perhaps for the removal of combustion products from a low-power wall-mounted gas boiler or gas water heater. Can be used for insulated ventilation. They are unsuitable for more serious heating devices - at high temperatures, zinc burns out, steel quickly rusts, and the chimney becomes unusable.
Sandwich pipes for high temperature flue gases made from stainless steel. Moreover, stainless steel is used in different grades - from alloys with a small content of alloying metals, to highly alloyed heat-resistant. The thickness of the metal can also be different - from 0.5 to 1 mm, as well as the thickness of the insulation - 30 mm, 50 mm and 100 mm. It is clear that the scope of application will be different, and so will the price.
The main grades of steel that are used in the production of sandwich pipes for chimneys, their purpose and main characteristics are summarized in the table.
| Stainless steel grade | Main characteristics | Application area |
|---|---|---|
| AISI 430 | It has sufficient resistance to atmospheric influences, but does not tolerate high temperatures well | Used for outer casings of sandwich pipes |
| AISI 439 | Contains titanium, which increases resistance to elevated temperatures and aggressive environments. | Suitable for gas boilers, low-power solid fuel units (up to 30 kW) |
| AISI 316 | Alloying additives - nickel and molybdenum - provide high resistance to acids and increased heat resistance. | Optimal for gas boilers of any type. |
| AISI 304 | Cheaper version of AISI 316 with fewer alloying additives | Economy option for gas boilers of medium and low power |
| AISI 316I, AISI 321 | Withstands temperatures up to 850°C | Can be used for heating solid fuel stoves |
| AISI 310S | Increased heat resistance - up to 1000°C (and price) | For sauna and pyrolysis solid fuel stoves |
As is clear from the table, different grades of stainless steel have different purposes. Cheaper alloys are used for the outer casing, more heat-resistant and expensive - for the internal casing. This is necessary to reduce the cost of products, and high resistance to temperatures outside the chimney is not needed. There are even more budget options— the outer casing is made of galvanized steel. Externally, these products are inferior to stainless steel, but they serve normally (with normal insulation and its thickness).
Insulation and its thickness
There is insulation between two layers of metal. Most often this stone wool. The thickness of the insulation varies from 30 to 100 mm:
- With 30 mm thick insulation, the flue gas temperature should not exceed 250°C. Such temperatures are produced only by gas boilers of small and medium power.
- A 50 mm insulation layer can withstand temperatures up to 400°C. Scope of application - any gas and liquid fuel boilers, wood-burning, provided that the chimney is vented to the street (through the wall).
- A 100 mm layer of stone wool can withstand temperatures up to 850°C. Such a sandwich chimney can be installed on any type of solid fuel boiler, in fireplaces and hearths.
In addition to the thickness of the insulation, you need to pay attention to its brand, or rather, to the temperature range in which it can operate. Not every stone wool can withstand heating up to 850°C, but only some special brands. If you need a chimney for a solid fuel boiler, you will also have to take into account the heat resistance of the insulation.

Connection types
Sandwich chimney elements can be connected to each other in two ways: with sockets and corrugated edges. A socket connection requires a slightly wider chamfer on one side. With this design, a high degree of chimney tightness is achieved. This type of sandwich pipe is well suited for gas boilers, where it is important to prevent leakage. There is also a minus: installation requires high precision.
The corrugated edge of the sandwich allows you to assemble the chimney without problems. The disadvantage of this solution is that to ensure tightness, a significant amount of high-temperature sealant is required, and it costs a lot.

It is also worth paying attention to the longitudinal seam. It can be welded or folded. If the seam is welded, it must be made in an argon protective environment (so that alloyed metals do not burn out). This type of connection is necessary for solid fuel boilers, sauna stoves and fireplaces. For all others, you can use a seam connection.
Installation methods
There are two ways to vent the chimney outside. The first is to run the pipe through the wall, and then along external wall raise to the required level. The second is up, through the ceiling and roof. Both are imperfect.
If the chimney is outdoors, condensation actively forms in it due to temperature changes. Therefore, a tee with a condensate collector (glass) and a cleaning hole must be installed in the lower part of the chimney. This unit allows you to maintain the chimney without much difficulty: the glass is unscrewed and the condensate is drained. Also, soot periodically gets knocked off without any problems - you can run a special chimney brush through the cleaning hole.

If the chimney will be discharged through the roof, several passage units will be needed - according to the number of ceilings. If the house is one-story, you will need one passage through the ceiling, and a second through the roof. You will also need a flash master or an apron for round pipe made of galvanized steel.
Installation of a sandwich chimney on the street requires only one passage unit - through the wall. But it will be necessary to attach it to the wall every 1.5-2 meters. If the walls of the building are flammable (wooden house or frame), the walls must be protected with a non-combustible screen.
By smoke or condensation

As mentioned above, one side of the sandwich pipe is slightly wider, the other is slightly narrower. Due to this difference in diameter, the modules are connected to one another. If the wider end is turned upward (in the figure on the right), the assembly is called “condensate”. With this installation method, drops of condensate flow down unhindered. The disadvantage of this method is that if the joints are not properly sealed, smoke can leak into microcracks. This type of sandwich chimney installation is used when the pipe is routed through a wall. This is where the free drainage of condensate is required, and small smoke leaks are not scary - they are not critical on the street.
If the narrower edge is turned upward, the second element is put on top of it with the wider part. This type of assembly is called “by smoke” (in the picture on the left). In this case, condensate flowing down the wall may leak through a joint that is not sealed well enough. But the smoke passes freely. This type of assembly is used if the pipe goes indoors (out through the roof). Condensation flowing through the pipe, of course, spoils the appearance, but it is not as dangerous as flue gases leaking into the room. Moreover, if the joints are well sealed, condensation will not leak out.
In order for the connection of the sandwich chimney modules to be reliable, each of them is usually coated with a heat-resistant sealant and then tightened with a clamp.
Options
Sandwich chimneys are good because they have a modular structure, which allows you to assemble any configuration, with any parameters. Before you go to the store, you need to know the required chimney diameter, pipe height, and those additional elements that will be needed.
Chimney diameter
When choosing the diameter of a sandwich pipe, a simple rule applies: it cannot be less than the diameter of the boiler outlet pipe. If your outlet pipe is 120 mm, then inner diameter the sandwich should be the same or larger. It may be wider, but definitely not smaller, and the narrowing cannot be done along the entire length of the chimney. If the chimney is slightly wider than the pipe, an adapter is purchased, which is placed directly at the boiler outlet, and then it's already underway working size.
If you don’t have a boiler yet, but you know its power, you can choose a chimney based on these data:
- boiler power up to 3.5 kW - internal diameter of the sandwich - 80 mm;
- from 3.5 kW to 5.2 kW - at least 95 mm;
- more than 5.2 kW - 110 mm and more.
But it’s better to buy (or at least choose) a boiler, and then decide on the chimney, because many manufacturers insure themselves by making the outlet pipes wider to improve draft.

Pipe height
The height of the chimney above the roof surface depends on the location of its outlet, but at the same time its minimum height should be 5 m. That is, if the height of the house is small, in any case, bring the pipe to a height of 5 meters. If the height of the house is higher than 5 m, then the pipe should rise above roofing material to the following height:
- Should rise 50 cm above the ridge if it comes out at a distance of less than 150 cm from it.
- If the distance from the ridge to the pipe is more than 300 cm, then the pipe may be lower than the ridge level, but the angle should be no more than 10° (see figure).
- If the chimney exits at a distance of 150 to 300 cm from the ridge, its height can be at the same level as the ridge element or higher.
Under such conditions, normal traction is ensured. The smoke will go away normally regardless of weather conditions. To prevent leaves from getting into the chimney, they install special umbrellas, weather vanes, and in windy places - deflectors, which further improve draft.

If it is not possible to bring the pipe to such a height, they install a smoke exhauster - a forced draft is obtained. A fan will not be needed all the time, but in some conditions, when natural draft is not enough, forced exhaust saves the situation.
Installation of a sandwich chimney through a wall
When venting a chimney through a wall, there are two ways. The first option (pictured on the left) is to raise it in the room closer to the ceiling and take it out there. The second is to draw a conclusion at the level of the smoke pipe from the boiler. In this case, almost the entire chimney ends up on the street.

The second option is preferable - it has only one knee, which means, under equal conditions, the traction will be better. Also, with this structure there is less chance of soot plugs forming.
If the outlet of the smoke pipe is not at the back of the stove, but at the top, the installation diagram changes slightly - a 90° elbow is added, then a straight section for passing through the wall, and then the same as in other diagrams.
The stove itself is placed on a non-flammable base, and the wall behind the stove is covered with a non-flammable screen. The easiest way is to attach a sheet of metal to the wall. It can be mounted on ceramic insulators 2.5-3 cm in height. There will be a layer of air between the sheet of metal and the wall, so the wall will be safe. The second option is to place a thermal insulation material under the metal - for example, mineral wool cardboard. Another option is an asbestos sheet (as in the photo).

A hole is made in the wall. Its dimensions are determined by SNiP - the distance from the pipe to non-combustible walls must be at least 250 mm on all sides, and to combustible walls - 450 mm. It turns out to be a solid hole, especially if we talk about walls made of flammable materials. There is one way to reduce the size of the opening for the passage of the sandwich: make the dimensions according to the standards of non-combustible walls and sheathe the opening with non-combustible material.

The opening can be round or square, as long as fire safety standards are met. Square holes It’s easier to make and sheathe, that’s why they are made more often.

IN this hole a passage unit is inserted - a box made of non-combustible material. The sandwich chimney pipe is inserted into it and fixed in the center. All gaps are filled with heat-resistant insulation, the hole is closed on both sides with non-combustible material. This is usually a sheet of metal.

One important point: the chimney must be designed so that there is no junction of two pipes inside the wall. All joints must be visible and serviceable.
Next, you need to make or install a ready-made support bracket that will support the entire weight of the pipe. The design may differ in details, but the main idea is the same - a support platform, which, with the help of stops, transfers weight to the wall.
Homemade support platform for an external sandwich chimney from corners 50*50 mm and 40*40 mm
A similar structure can be welded from a profile pipe of small cross-section 25*25 mm or 25*40 mm.
As you can see, a tee is connected to the pipe that goes through the wall. At the bottom there is a removable glass in which condensation accumulates. Some models have a fitting at the bottom with a small tap. This is even more convenient - you don’t need to remove the glass, you can connect a hose to the fitting, drain it into some container (it is very toxic, so there is no need to drain it near the house) and drain it by simply turning the tap.
Next, the tube is brought to the required level. Since in in this case the distance to the ridge will obviously be more than 3 m; it is possible that the height of the chimney should be slightly lower than the ridge - no lower than 10° relative to the horizontal line drawn from the level of the ridge.

But since this house is located in a low area, to ensure traction, the pipe was raised even higher than the ridge. It was attached to the wall with stainless steel clamps, in increments of a little more than a meter. The roof is equipped with guy wires made of steel rods with a diameter of 6 mm. To install guy wires, there are special clamps “with ears” to which the guy wires are attached.

Attaching guy wires to a chimney from sandwich tubes
Another important point that many people forget: at the place where the pipe is installed, a snow retention section must be installed on the roof, otherwise in the spring the pipe may be blown away by snow (if the pipe is not routed towards the gable, as in the photo).
How to install a chimney through the roof
When venting a chimney from sandwich pipes through the roof, it is necessary to take into account the location of the floor beams and rafter legs on the roof. It is necessary to arrange it so that the pipe passes between these elements. Minimum distance there must be at least 13 cm from the outer wall of the pipe to the combustible element, and this is provided that the combustible element is protected by insulation. To meet this requirement, the pipe often has to be displaced. This is done using two 45° angles.

Please note that the installation of a sandwich chimney from a solid fuel boiler begins with a metal pipe without insulation. In the photo above it is black. After this, an adapter is placed on the sandwich, and a chimney with insulation enters the passage unit.
A hole is cut in the ceiling that meets fire standards - 250 mm from the edge of the pipe, if the ceiling is protected by thermal insulation material. Having cut a hole, its edges are covered with non-flammable heat-insulating material. Minerite is best suited for this (it is nailed or secured with wood screws).

The gray material around the perimeter of the hole is mineralite
The sandwich chimney pipe is inserted into the resulting box. It should be directed strictly vertically, without the slightest deviation. You can’t fix it rigidly, you can only give it direction by installing several bars that will hold it, but it can move up/down without difficulty. This is necessary, since when heated its length increases significantly.
The remaining space is laid basalt wool(check temperature range). Another option is to pour expanded clay or granulated foam glass. Previously, sand was still poured in, but sooner or later, it all spilled out through the cracks, so now this option is unpopular. On the front side, all this “beauty” is covered with a stainless steel sheet, under which a non-combustible material is placed (between it and the ceiling). Previously, it was an asbestos sheet, but since asbestos is recognized as a carcinogen, mineral wool cardboard began to be used.
There is another option. Trim the edges of the hole with mineral wool, and then insert the finished stainless steel ceiling-passage assembly. It immediately contains both a box and a decorative stainless screen.

Having brought the pipe into the attic, they make a hole in the roofing pie. All films in the passage area (vapor barrier and waterproofing) are cut crosswise. The resulting triangles are wrapped and secured with staples from a stapler. This way the damage is minimal. The exposed sheathing is cut so that it is at least 13 cm from the pipe.

How to bring a chimney through the roof - passage of the ceiling and roof
In the right photo above, the passage through the roof is incorrect - the distance between the pipe and the boards is too small. In a good way, you need to cut them according to the standard, and cover them with the same mineralite. The result should be something similar to the following photo.


Master flash for a sandwich chimney - a rubber cap with a flexible “skirt”
The joint between rubber and pipe is sealed with heat-resistant sealant. The roof surface under the “skirt” is also coated with sealant.

Please note that each connection of the sandwich modules is tightened with a clamp. This is also true for the internal chimney.
Despite the wide range of electric and gas boilers on the modern market, solid fuel stoves are in no hurry to lose their positions. Thanks to the autonomy of use and affordable price, they are optimal choice for country houses, dachas and baths.
For correct and safe work stove, it is necessary to correctly design and install the chimney. But often, at the stage of building a house, people miss the need to install a chimney simultaneously with the construction of walls. This problem has many solutions: output through ceilings, roofing. The best option would be to install a chimney through the wall, which will not only help to significantly save interior space, but also reduce the number of units and passages through the ceilings.
We will tell you in this article how to carry out installation correctly and what materials are best to use.
Despite the huge selection of materials for the construction of chimneys, the most widely used today are double-circuit steel pipes, popularly called “sandwich”.
The sandwich type chimney is a two-layer structure. Between two metal pipes different diameters a layer of thermal insulation material is laid, which simultaneously serves as insulation and insulation.
Video: Chimney made from sandwich pipes
Compared to single-circuit pipes, which are made from steel 0.5 mm thick, the double-circuit design is characterized by increased fire safety and better technical characteristics. To install a chimney outside the building, single-circuit pipes are not recommended. After all, due to only one layer, they are simply not able to retain heat in the cold season. Due to a sharp temperature difference, condensation forms in such a chimney, reducing draft and creating blockages in the pipe.

Therefore, for installing a chimney through a wall, the most the best option will be the purchase of sandwich pipes. The popularity of such a double-circuit chimney is due to its low price compared to a brick chimney, attractive appearance, excellent technical characteristics, fire safety and long-term operation.
In addition, you can do the installation of a chimney made of this material yourself. And although there are some nuances and subtleties here, even a beginner can cope with the task if you strictly follow our detailed instructions.
Advantages and disadvantages of sandwich pipes
- The thermal insulation layer prevents the outer pipe from heating to a critical temperature.
- Compact and versatile in use.
- The smooth surface of the inner casing increases the chimney draft.
- Low price compared to ceramic material.
- Operating temperature up to 850 degrees (for single-circuit pipes, for comparison, 500 0).
- Easy to assemble.
- The fire safety of the home increases.
- Easy maintenance compared to a solid pipe chimney (less soot accumulation).
- Does not create additional noise when drafting smoke.
The only drawback of the multilayer structure is the decrease in sealing after long time. Because of sharp changes temperature, air can penetrate at the junction of sections.
Technical characteristics of sandwich pipes
- Material. Basalt fiber is mainly used as a thermal insulation material ( mineral wool). This type of insulation is resistant to high temperatures and exposure to chemical substances. Mineral wool has excellent thermal insulation/sound insulation properties and is laid with a thickness of 30-60 mm. Due to their fireproof properties, multilayer pipes can be used in houses built from any material. More expensive alloys with a high degree of heat resistance are used for the inner casing.
The inner layer of the sandwich pipe is mainly made of galvanized steel, and the outer layer can be made of copper, brass, stainless steel, etc. The scope of the pipe and the price depend on the content of alloying materials, various alloys and the thickness of the heat-insulating layer.


- Connection type. Sandwich pipe elements are connected in two ways: corrugated edges and sockets. The advantage of a corrugated connection is ease of installation, but to ensure tightness, a large amount of sealant is required, and this increases the cost of the chimney. With a socket connection, a high degree of tightness is achieved due to the presence of a wider chamfer on one side of the pipe. The advantage is a high degree of tightness, due to which the design can be used for gas boilers. But the downside is the complexity of installation and the need for very precise adjustment of all parts.

Chimney installation rules
- In no case should the chimney be laid in the place where communications pass (electrical wiring, sewerage, etc.).
- To minimize heat loss, it is recommended to locate most of the structure indoors.
- The outer part of the chimney must end with a deflector to prevent precipitation from getting inside. Don't forget about the snow guard. They will protect the gas outlet channel from damage.
- Keep the step of fastening the structure to the wall no more than one meter to avoid further curvature of the chimney.
- The place where the pipe passes through the wall must be additionally protected with thermal insulation material. To do this, the diameter of the hole needs to be made slightly larger than the diameter of the pipe.
- The sandwich pipe cannot be installed as the first pipe above the combustion tank. It is preceded by the so-called “sandwich start”.
- The length of horizontal straight sections of the chimney should not exceed 1 m.
- When designing a chimney, make sure that when passing through the wall there is a single pipe without joints. All connections must be visible and directly accessible.
Selecting the type of chimney outlet
A chimney through a wall can be done in two ways. The first option involves raising the pipe closer to the ceiling and then exiting. The second option represents a design that goes directly from the boiler in a straight line.
With the second option, almost the entire chimney ends up outside the house. The advantage of this type of design is that only one elbow will need to be used, which will affect the efficiency of traction. And the likelihood of soot plugs forming is much less.

Before execution installation work, it is necessary to draw an assembly plan, calculating the diameter of the chimney and its height. There are some factors to consider.
Warm air rises, which means the higher the chimney, the greater the draft. It also depends on the diameter, so it is very important to correctly determine what size chimney you need. Its size is also affected by power. heating device.
Calculate the diameter of the structure
The diameter of the double-circuit pipe directly depends on the size of the boiler installation pipe. Therefore, it is difficult to draw an installation diagram without knowing what type of heating device will be used. A simple rule applies here: the inner casing of the sandwich should in no case be smaller than the pipe itself. You can take more.
For example, if the diameter of the outlet pipe is 120 mm, then the internal diameter of the sandwich pipe should be the same size or larger. In no case should you allow “narrowing” at the junction of the pipes and throughout the entire chimney, otherwise this may affect the draft.

The diameter of the chimney is also affected by the type of heating device. Therefore, if you are building a smoke exhaust structure before purchasing a stove or boiler, then immediately take into account its power.
If the power of the heating device does not exceed 3.5 kW, then you can limit the diameter of the internal casing to 80 mm. For more powerful boilers (up to 5.2 kW), the pipe size should be increased to 95 mm. The larger the diameter of the inner pipe, the faster it will cool.
Determining the height of the chimney
Calculating the height of the chimney pipe depends on the overall height of the house. If the height of the house is small (up to 5 meters), the height of the chimney in any case should be at least 5 meters. A short chimney can cause “smoke” in the house, and the power of the device is significantly reduced due to poor draft. And an excessively long pipe will increase fuel consumption, as if “forcing” the operation of the heating device, which affects the low efficiency of the heating system.

The optimal pipe length is considered to be in the range of 5-10 meters.
If the house is higher than 10 meters, then we focus on the ridge of the roof. The chimney should be 0.5 meters higher than the ridge to avoid creating turbulence. Consider also the material from which the roof is made. If the roof is covered with flammable material, then the top of the chimney should be 1 meter from the ridge.
How will we assemble the sandwich: by smoke or condensation?
Before you start construction work, you should decide on the type of assembly of the pipes themselves: “smoke” or “condensate”.


The “smoke” design is characterized by building sections inward (visible clearly in the figure):
Inner tube: The bottom element is inserted inside the top element of the sandwich.
The outer pipe is built in the same way as the inner one. The lower section is inserted inside the upper contour.
Each subsequent section is built upon the previous element, as if being put on top. This type of chimney connection is best used in stoves with high combustion temperatures.
The “condensate” design is built using the opposite method:
Inner tube: take the upper section of the sandwich and insert it into the lower part.
Outer pipe: Here you have to do the opposite method. Take the lower element of the outer pipe and insert it inside the outer pipe of the upper element.
With this construction, condensate flows freely along the outer casing of the chimney into a special sump.
When is it better to use this assembly scheme?
- at low temperatures of combustion products;
- for external installation of a chimney;
- in stoves with a long burning function;
- in fireboxes with smoldering combustion.

Differences between smoke and condensate connections
Considering our task - to assemble a chimney outside the house, the choice of the type of sandwich connection is obvious. Pipes outside the house, exposed to low temperatures, will cool faster, which means that the likelihood of condensation forming is high. Under the influence of moisture, soot begins to dissolve, forming acids. These substances pose a serious threat to pipe surfaces.
What tools are needed for installation through a brick or concrete wall?
- screwdriver;
- construction gloves to protect hands;
- ladder;
- building level (to check the verticality of the chimney installation);
- perforator (for a hole in the wall).
What materials are needed for installation?
- metal box (pipe);
- dowels;
- sandwich pipe set;
- silicone sealant (necessarily heat-resistant!);
- tee (necessary to change the direction of the smoke and connect the pipe directly to the firebox of the heating apparatus).
- knee (45 0 or 90 0);
- support console, bracket (the entire structure is supported on it);
- clamps for connecting sections;
- plug (protective umbrella from precipitation and debris).
Step-by-step instructions for installing a chimney through a wall (brick or concrete)
- Preparatory work. Determining the location of the chimney.
- Installation of a heating device (fireplace, boiler, stove, etc.)
- Making a pipe outlet hole through the wall.
- Installation of a pipe (metal box)
- Connection of pipe and boiler.
- Pipe outlet and connection to the tee.
- Attaching the bracket to the wall and connecting to the tee.
- Installation of a chimney of the required height.
- Attaching to the roof and installing the plug.
Video instructions for installing a chimney through a wall
Now let's take a closer look at each step of the instructions:
| We determine the place where the heating device will be located, and therefore the chimney will be laid. Consider the overall structure of the house, the exterior and the installed communications. Ideally, the outer part of the chimney should be on the gable side. If this is not possible, then you will need to install it from the side of the slope, taking care of the safety and stability of the structure. |
| We prepare the place where the heating device will be installed. The stove itself (fireplace, boiler) is installed on a non-combustible base. Make sure that the plane is perfectly level. To do this, check it with a building level. |
| We use a marker on the wall to mark the future opening for the chimney passage. To do this, measure the height of the stove and the smoke exhaust pipe. Consider not only the diameter of the pipe, but also the fire safety standards of the thermal insulation layer that will need to be laid between the pipe and the wall. It doesn't matter what shape you make the hole: square or round. This does not affect fire safety in any way if all standards are met. Consider the size of the box. Double-check the size of the box and the markings on the wall. If everything matches, then proceed to cutting the hole. |
| We make a hole through the wall using a hammer drill. We make insulation from non-combustible materials. For brick or concrete walls will do polyurethane foam, but you can also use asbestos sheet. |
| We insert a box made of non-combustible material into the resulting opening. According to industrial safety standards, the thickness of the pipe must exceed the thickness of the ceilings by 7 cm. |
| We install the horizontal part of the chimney. To do this, we connect a single chimney(starter sandwich) with the nozzle, using the “smoke” method, that is, insert the starter sandwich inside the nozzle. Be careful to ensure that the connection is made at a strictly 90 degree angle. |
| We fix the sandwich strictly in the center of the box, and fill the distance between the walls of the pipe and the opening with heat-resistant insulation (you can use foiled mineral wool). From the outside of the wall (from the street), we close the opening with a box plate. |
| We bring the pipe through the wall to the street and connect the tee. The lower part of the tee is allocated for condensate collection. The element may end with a removable glass, which will have to be removed and cleaned periodically during operation of the chimney. It’s better to purchase a model with a fitting and a small tap. Maintaining such a chimney will be much easier. Simply connect the hose to the fitting and unscrew rotary valve, thus draining all condensate. But keep in mind that the substances that accumulate at the bottom of the tee are very toxic. Therefore, do not drain them through the hose directly to the house, but take them to the side at a safe distance. Also make sure that there is not a single joint in the path of the sandwich through the wall. If the length of the pipe is not enough to lay it through the hole in one piece, then cut the previous element with a hacksaw and make a joint to the entrance. |
| We mount the support bracket using dowels with external wall Houses. It will bear the main structure, so take care of its reliability and stability. You can build the bracket yourself using stainless steel pipes, which are welded at an angle of 90 degrees, with additional support. |
| We assemble the chimney from individual sections of the sandwich using the previously chosen method (“by smoke” or “by condensate”). You can easily figure out how to do this, since one part of a double-circuit pipe is always of a smaller diameter. We “strengthen” the joints of the connected sections with metal clamps. Simply wrap the clamp around the pipe, pull it tightly along the diameter of the sandwich and tighten with bolts or nuts. Treat the joint area additionally with sealant. The fastening step should be approximately at least 1 meter, but more frequent fixing is allowed to avoid curvature of the chimney. Whatever assembly element you choose, it is best to install elbows and tees “on condensate”. All joints are treated well with sealant. |
| We fix the structure along the length of the entire chimney with additional ties and brackets. Make sure that the clamp does not come into contact with the pipes. The solid part of the double-circuit pipe is fixed. If the height of the pipe above the roof exceeds 2 meters, then it must be secured with metal cable or an additional bracket under the roof. |
| On top part pipes we put on a deflector or a protective umbrella that prevents debris and precipitation from getting inside. The choice of deflector or protective umbrella determines the type of heating device. According to building codes, the installation of a deflector on the chimney of a gas boiler is not carried out. For such a device it is better to install a weather vane. It will prevent the gas boiler from blowing out, creating turbulence and improve draft. |


Instructions for installing a chimney through a wooden wall
In general, the installation process through wooden walls is similar to installing a chimney through concrete or brick wall However, some nuances related to fire safety should be taken into account. The maximum temperature at which wood begins to char is 200 0. At 300 0 it begins to burn.
Unlike the previous installation, here it is necessary to pay great attention to the insulation of chimney ducts through the ceilings, so as not to burn the house and not create smoke interior spaces. Moreover, this applies to the entire length of the chimney, starting from the heating boiler and ending with the roof of the house.
We will need the following tools for work:
- screwdriver;
- sharp knife;
- electric drill (for attaching the bracket);
- jigsaw;
- drill;
- building level (to check the verticality of the chimney installation).
Prepare the following materials:
- metal box for passage through a wooden wall;
- dowels;
- sandwich pipe;
- sealant;
- tee;
- elbow (45 0 or 90 0) depending on the design of the chimney;
- bracket;
- clamps for connecting sections;
- asbestos sheet;
- foiled mineral wool (for insulating the pipe opening);
- protective cap, spark-extinguishing mesh.
| We determine the location of the pipe outlet (along a horizontal line from the stove or under the ceiling). Draw out the required hole diameter with a pencil or marker. Counting general scheme design, do not get carried away with too many bends and transitions, as this may affect the further efficiency of the heating system. Two or three transitions with a change in direction will be enough, and even then try to use a guide angle of 450. Also consider the distance of the chimney duct from the wall. According to fire safety requirements, it must be at least 50 cm for wooden walls. |
| We prepare the place where the heating device will stand (fireplace, stove, boiler). Considering wooden floors, you need to perform a catwalk from cement screed above the floor to a height of 20 cm or (if this is not possible) lay a heat-resistant coating made of galvanized steel - asbestos cardboard. |
| If there are wooden walls at a distance of less than 50 cm, then it is necessary to build a protective screen made of brick to the height of the boiler. When installing a solid fuel stove (stove), preferably brickwork from wooden wall separate with additional thermal insulation (asbestos cement sheet). Make sure that the plane is perfectly level. Always check with a building level. |
| We make a hole in the wall (consider not only the diameter of the pipe, but also the place where the heat-insulating layer is laid between the pipe and the wall). We install a protective metal box. We carefully insulate the distance between the inserted box and the wall with basalt fiber. Additionally, to increase fire safety, we wrap the passing pipe with asbestos sheet. |
| We remove the pipe from the boiler strictly at an angle of 900. This is a very important point and any deviations are not allowed here, as this will subsequently affect the efficiency of the heating device. We make sure that there is no pipe joint in the section of the transition through the wall. If you see that the length of the pipe is not enough, you need to trim the previous pipe and build a solid sandwich element onto it. |
| We carefully insulate the pipe passage through the wall with heat-insulating material, and screw it to the outside of the house with self-tapping screws metal plate, protecting the wooden surface from overheating. |
| We install a tee on the pipe, which will serve as a smoke direction vector. The lower part of the tee is designed to collect condensate. We make sure that it is clearly positioned perpendicular to the chimney outlet pipe through the wall. All seams are carefully treated with sealant. We attach a stable support to the wall of the house or to the ground, depending on the overall design of the chimney duct. |
| We begin the vertical expansion of the gas exhaust channel from the bottom up according to the previously selected type (“through smoke” or “through condensate”). | |
| Every 100 cm (60 cm is possible) we fix the chimney to the wall metal brackets. We ensure the strict verticality of the structure. To do this, use a level, checking that there is no deviation. It is also very important to make fastenings opposite the solid part of the chimney duct, and not at its junction. We fix the upper part of the pipe with a metal clamp and be sure to install a snow retainer on the roof so that the structure is not damaged by precipitation. |
| We install the cap on the sandwich cut using bolts or self-cuts. To improve traction, use a deflector. When installing a chimney in a wooden house, you can play it safe and attach a spark-extinguishing mesh to the deflector. It will protect the roof from sparks. This metal mesh will also reliably protect the chimney from leaves, birds, and debris getting inside. |


As you can see, installing a chimney through a wall does not require high qualifications or more experience. The main thing is to correctly calculate the height and diameter of the chimney and purchase high-quality material.
If you pay attention to all the points and strictly follow the instructions, you will definitely cope with this task. And the video will help you visually study the process of installing a chimney.
Video. Installation of a chimney for a fireplace