We repair the screwdriver battery. How to restore a lithium battery from a DeWalt screwdriver? Is it possible to repair the lithium battery of an Interskol screwdriver?
We will talk about the possibility of restoring the battery of your screwdriver, and how to do it correctly so as not to harm the device as a whole.
No matter how complex your screwdriver is, filled with various functions, most often the batteries for all such devices are the same. Therefore, on the Internet you can find a lot of tips on how to repair a battery.
You can often find in the operating instructions for screwdrivers that it is impossible to disassemble the battery and there is no need to do so. But often, the price of this essential device makes up the majority of the total instrument, then the ordinary consumer constantly buys new battery not profitable at all.
Briefly about how to restore a screwdriver battery
- disassemble;
- find the cause of the malfunction (the most common is the failure of one of the circuit elements);
- measure voltage (there are several ways);
- remove and replace the defective part.
We are looking for the weak point of your battery
To determine which part has failed and can no longer function as before, you will need a multimeter. It is needed to measure voltage. Since this parameter is various types batteries are slightly different, first find out which one you have. So,
Nickel-cadmium and nickel-metal hydride batteries have a voltage of 1.2 V, and lithium-ion batteries are already 3.6 V.
- First, fully charge your screwdriver battery;
- Second, measure the voltage of all the cans in turn;
- Third, note which of them the voltage is below normal (according to the fact that the error is allowed only 0.2 V);
- Fourth - return the battery to its place, turn on and work with the device to discharge it before the power decreases;
- On last stage You disassemble the tool again and measure the voltage with a multimeter. If the deviation is 0.7-0.5, then you can safely consider this a malfunction.

Another way to measure
It practically repeats the previous one, only in order to discharge the instrument, you will use a 40 W lamp. Plus this method The advantage is that you don't have to assemble and disassemble the battery several times.
If everything is fine inside, then the problem may lie in the charger, which should be dealt with.
Also, several methods are offered to restore entire blocks:
- Add the boiled-off electrolyte;
- Eliminate the so-called memory effect.
How to properly disassemble a screwdriver battery
An ordinary battery consists of a housing, inside of which there is a chain of connected elements, and sometimes also a temperature sensor installed by the manufacturers to help you work in critical conditions.
It will not be difficult for every person who has used this device in his life to use a screwdriver and open the case, and then all that remains is to examine the circuit as a whole.
How to deal with the memory effect
First, determine whether your battery has this effect. It manifests itself in the fact that when the battery is fully charged, it discharges extremely quickly, and the device can only work again over time.
To extend the use of a screwdriver without repair for more than a year, the following procedure should be performed about five times before the actual start of operation - fully charge the battery and then slowly discharge it (you can take a typical 220 V lamp) to 5 V (which is 30% of the rated capacity ).
Thus, you will be able to eliminate this problem. It is worth noting that only owners of nickel batteries may encounter this problem.
Adding boiled-off electrolyte
The following algorithm of procedures, which requires accuracy, will help to cope with this problem.
- Unusable cans that you have identified using a lamp or multimeter must be removed by cutting off the connecting plates;
- Taking a punch (d=1 mm), make a hole in the body from the side of the “-” sign;
- Pump out air in a volume that matches the volume of distilled water (0.5-1 cubic cm), which must be poured through the hole;
- Cover the hole with epoxy resin and return the element back to the circuit.
After the procedure, before using it is worth recharging (five times will be enough) your electric tool.
Let's consider cases where elements can be restored
If you have a nickel-cadmium battery, then a flashing option with a higher current than the base one is likely.
If you have on hand lithium ion battery, then in this case, only replacing faulty parts will help to improve the operation, since such batteries do not suffer from the memory effect and you will not solve this problem so easily.
About the features of repairing nickel-cadmium batteries
Strong overheating is unlikely to have a positive effect on the condition of the elements; it is worth keeping an eye on this. After reflashing the old elements, study the rules for overclocking a new battery. This action should be carried out once every six months. This can ensure maximum battery capacity. Repeated charging must be carried out with preliminary discharging.

Removal and replacement
Here you will have to work with a soldering iron. Also, you will need an alcohol flux for rosin and tin.
Cut off the unnecessary element, then solder a new one in its place. Try to solder quickly so as not to damage the battery, as it may overheat. Be sure to check whether you have combined the pros and cons correctly. When soldering plates, it is better to use those that were already in the device.
To equalize all the potentials on the banks, charge them overnight, let them cool for one day, and then measure the voltage. It should be the same on all banks (up to 1.3 V). Operate the screwdriver until it is completely discharged and charge again. Repeat this 2 more times.
The task at hand is very simple: to make a battery so that it is quite easy to charge it and replace the elements inside using simple manipulations.
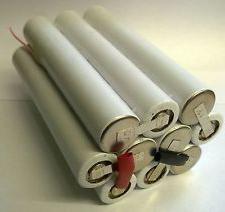
First, let's look at the insides of a regular screwdriver battery. Inside most screwdrivers there are many 1.2 Volt “cans” made using Ni-Cd or Ni-MH technology. There are 12 such cans in the screwdriver on top, i.e. the final battery voltage is approximately 12*1.2=14.4 V. The capacity does not exceed 1.5 A/h. The batteries themselves last quite a long time, but among 12 pieces there are often 1-2 that stop working much earlier than their colleagues. It turns out that after some time the battery dies due to a small part of its insides. There is a recipe: replace the jar that does not work, and leave the rest unchanged. But at the same time, these banks are difficult to find and if you change them, then everything is better. Another plus is that it is very difficult to solder them; you need to have a welding machine. As a result, I came to the following conclusions:
It is necessary to have a larger battery capacity in order to charge less often
The cans were replaced in a couple of minutes
Don't buy a charger
Implementation
Modern technology batteries that are used everywhere are Lithium (Li-Ion). It is used in phones, laptops, players, flashlights and much more. An affordable solution is the 18650 battery. If you disassemble a regular laptop battery, you can find them there:
These batteries can be bought or taken from an old laptop. If you buy, I recommend “Sanyo 2400 Ma/h red” based on the price/quality ratio. Keep in mind that they must be unprotected. Otherwise, they will turn off when a 2A current occurs, which often happens in a screwdriver. I recently bought a bunch of them on ebay, unfortunately my seller is no longer available, because... I'm not providing a link.
To make it convenient to change them, we will also need a so-called spring holder for 18650:

Many of these have been seen for regular AA batteries. There are 1-4 batteries. What’s strange is that it’s difficult to find these in a radio store or on the market; it’s easier to order them online on websites with cheap Chinese items using the request “18650 holder”. The cost of the latter is about $1-2.
The last important thing for a homemade battery is smart charging. I had one close by, I highly recommend “Imax B6” or analogues: 
Now there are two ways to connect:
1) We simply connect all the batteries in series using holders and connect the terminals of the smart charger to the ends. The advantage of this system is its simplicity. Minus: the jars must be the same, otherwise everything may go bad. The fact is that if the voltage on any 18650 bank drops below 3 volts, then it can soon be thrown away. If your batteries are different, then you will not be able to control this nuance. If something happens to one can, you will need to change everything together, otherwise there will be problems.
A screwdriver is a necessary tool in the household, but the time comes and its source of energy - the battery stops working. Models are constantly changing and sometimes it is not possible to find the right battery. At the same time, you can completely restore it or extend its service life by 2-3 years. This article explains how to repair a screwdriver battery.
Disassembling the battery
When deciding whether it is possible to restore a screwdriver battery, you must first of all figure out how to remove the elements from it. The battery is housed in a plastic case made of two halves. First you need to unscrew the connecting screws. If the connection is made with glue, you will have to tinker with a screwdriver or chisel. You should disassemble it carefully so that you can seal the case again later.
Inside there are elements connected in series. Some designs use a parallel-series connection.

Replacing elements
When deciding how to restore a screwdriver battery, you must first of all identify faulty banks that are spoiling its operation. If the battery is dead, you need to charge it and then check the voltage on all elements. It should not differ from the nominal value by no more than 10%.
Repair consists of how to restore the screwdriver as a whole. It is affected by the serviceability of each element. It must have a given capacity, which means the ability to power the load connected to it. Sometimes it is better to replace failed elements that quickly discharge. They can be detected by corrosion or the presence of characteristic traces of electrolyte on the surface.
One or two elements can be a serious hindrance to the operation of the entire line.
If the battery is used for more than 3 years, then most of the elements may be faulty. In this case, it is better to replace them all. It is important that they are suitable in voltage and size. The cost of batteries assembled separately is lower than new ones assembled.

The serviceability of each bank is checked by the value of internal resistance, which should be about 0.06 Ohm. To do this, connect a load to it (a 5-10 Ohm resistor) and at the same time determine the current and voltage. It is convenient to use low-voltage incandescent lamps. Measurements are made with two different resistances, respectively 30% and 70% of the permissible load. The 2nd is subtracted from the 1st voltage, and the 1st from the 2nd current. Then the subtraction results are divided and, in accordance with Ohm's law, we find the internal resistance of the battery.
The battery is often sold complete with a spare. Of the two, you can collect one and still have jars left in stock. It is advisable to use them somewhere as power sources, for example, for a flashlight with a car lamp.
After diagnostics, the elements that have passed the test are assembled into a line. The selected set must be soldered in the same order. The can body has negative polarity, and the middle bus has positive polarity. Then, without assembling the battery, you should connect it to it. In this case, you need to control the temperature of the elements. If they are working properly, then there should not be severe overheating. After the charging time has expired, as well as after a day, the voltage on each element should be measured. If any battery drains by more than 10%, it must be replaced with a new one. After the battery will pass the test, you can finally assemble its body. The fastening screws are screwed into place according to the dimensions, and acetate acrylate (“Super Glue”) is used as glue. With proper selection of elements, the battery will serve like new. After charging, it should be subjected to intensive training, creating maximum load on the screwdriver until it runs out. Such cycles should be repeated 2 more times, and then 1 time per quarter.
Restoring cans
Batteries that do not pass the test should not be thrown away in a hurry. The main reason for their failure is the evaporation of water through sealing gum located between the body and the middle tire. When it is completely “zero”, the battery is briefly charged by pulsed voltage supply of 12 V through a resistance of 40-50 Ohms. At the same time, care should be taken to ensure that the housing does not overheat. If after this there is still no voltage on it, the jar can be thrown away.
To restore the electrolyte, some craftsmen drill mini-holes for the syringe needle in the side recess of all batteries. The jars are then filled with distilled water. Afterwards, the batteries should sit for 24 hours. The battery is then “trained”, charged and the voltage on each element is checked. The holes are sealed with silicone.
How to restore a screwdriver battery
The batteries inside all look similar. They consist of cans soldered in series. The result is the total battery voltage at the output contacts. The following types of elements are used:
- Ni-Cd (nickel-cadmium, U=1.2 V).
- Ni-MH (nickel metal hydrite, U=1.2 V).
- Li-Ion (lithium-ion, U=3.6V).
Battery for screwdriver "Interskol"
The Interskol screwdriver is one of the most popular due to its versatility. Except main function it can also serve as a drill.

The batteries in it can be any of the common ones. Nickel-cadmium and metal hydrite are used more often as they are cheaper and quite powerful. For them to work reliably, they must be fully discharged and charged to fully utilize the charge. Otherwise, the service life of the equipment is significantly reduced. The reversible loss of cell capacity due to incomplete discharge and charging is called the memory effect.
They do not have this disadvantage, but they have a much higher price. During operation, when every minute counts, a small recharge is often required to maintain the required power of the screwdriver. Here, such batteries are indispensable, since their capacity can be quickly restored.
The buyer chooses the Interskol screwdriver battery independently, depending on preferences, capabilities and the required work. In most cases, nickel-cadmium batteries are used.
How to restore the battery of an Interskol screwdriver if it long time not used? During operation, you must try to ensure that the voltage does not drop to zero. For a 1.2 V can, the discharge is up to 0.9 V. If it is completely discharged during long-term storage, the charger may not “see” it. It is necessary to “push” the battery with another, more powerful current source so that a small voltage appears on it. After this, you can connect it to a standard charger.
Makita screwdriver

Before you restore the battery, you first need to disassemble its case. It consists of 2 halves connected with glue. If you gently tap the battery case with a rubber hammer, the glue will come off. In some places there may be problems with disassembly. There may need additional hand tool. Next, you should separate the halves of the case, holding the terminals with a screwdriver.
In terms of performance characteristics, the Makita drill-driver is close to a network tool. Autonomous power supply is provided by 2 replaceable Li-Ion batteries. Computer technology charging allows them to be restored in just 22 minutes. At the same time, it is significantly increased.
Faulty banks must be replaced with similar new models. If they are difficult to find on sale, you will have to assemble one from two batteries. Factory welding may be contact, but during repairs you will have to create a connection by soldering.
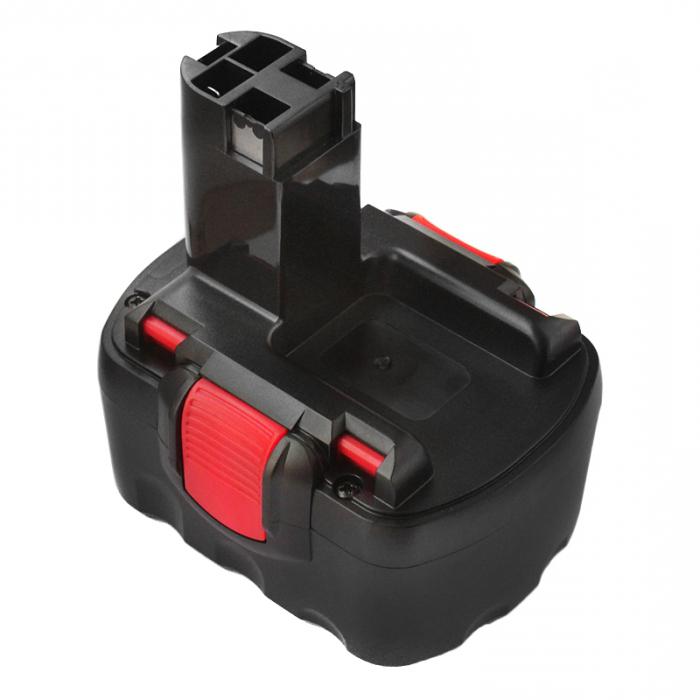
How to restore a Bosch screwdriver battery
Bosch screwdrivers are perfect for non-professional use. They contain batteries with Ni-Cd cells. They can withstand high load currents, but quickly self-discharge (in 3-4 weeks). They must be restored at least once a month to prevent them from breaking down. In addition, during operation, the elements become unbalanced and capacity is lost over time.
One of the restoration methods is to disassemble the case and “train” each element separately. If this doesn't help much, some of them will have to be replaced. Then the battery will last for a long time.
Hitachi screwdriver battery restoration
How to restore the battery of a Hitachi screwdriver? Both Ni-Cd battery need to be charged, after which they should be disassembled and the voltage on each bank with a load of 1.5 ohms measured. Elements showing lower voltage can be thrown away, and whole ones can be assembled into one high-quality battery. Just 1 or 2 banks can spoil the impression of a battery. How to restore the battery of a Hitachi screwdriver, as well as all other models, depends, first of all, on the type of elements installed in them.
Aeg screwdriver battery restoration
The screwdriver comes with 2 Li-Ion batteries. If one of them does not charge, this does not mean that it is faulty. It is quite possible that it is too discharged. To do this, you can try to “train” the battery by applying a pulse voltage to it, and then put it on charge. The most in a simple way is to connect to a charged battery for a few seconds.
After it was not possible to restore the battery of an Aeg screwdriver using the above method, its case should be disassembled and each battery checked.
- If the battery has not been used, it should be discharged once a month permissible load and charge again.
- It is advisable to buy a screwdriver with two batteries included.
- Screwdrivers must be stored and used in conditions that prevent ingress of moisture.
Conclusion
How to restore a screwdriver battery? There are several ways. Before disassembling it, you must try to find the cause of the malfunction, which may also lie in the mechanism or charger. By following the battery operating rules outlined in the instructions, you can significantly extend its service life.
And needs replacing. Buying a new one is often difficult, and if you succeed, it is at a very high price. That's why they say it's easier to buy new tool, or repair the screwdriver battery yourself.
On the Internet there is a large number of videos in which electronics enthusiasts clearly show how to repair a screwdriver battery with their own hands. If you are seriously concerned about the issue, think about saving Money and whether it is possible to repair a screwdriver battery with your own hands, watching such videos can be a good start for repairing the battery yourself in the future.
How to disassemble the battery
Battery packs home tool their design is almost identical to each other, regardless of the model of the tool (Bosch, Makita, Hitachi). They are packaged in a plastic case consisting of two parts. The number of batteries may vary depending on the output voltage of the tool used. All elements are soldered in a certain sequence. The lead ends or terminals at which the battery voltage is usually measured are brought out.
Most screwdriver or drill battery packs are designed so that they are very easy to disassemble, regardless of whether we are repairing the battery of an Interskol screwdriver or another model. Several mounting screws need to be removed using a regular screwdriver. There are batteries that are difficult to disassemble, but can be removed with a screwdriver and a pocket knife. The adhesive layer is removed with a knife, and the two mating surfaces are moved apart with a sharp self-tapping screw.
The difference between screwdriver batteries and each other may lie in the presence or absence of a temperature sensor, which automatically turns off the battery under critical heating conditions (above 50°C). The sensor constantly monitors the temperature not only under load, but also under current charge conditions battery. The controller reads all the data and processes it, “remembers” the capacity and other indicators. As soon as the capacity reaches 80-90% and the voltage reaches 14 V, the control unit turns everything off. Such batteries last for years without losing their technical characteristics.
The market offers a large number inexpensive models screwdrivers.
Cheaper devices do not have these technical devices, and you need to monitor all processes yourself.
Types of battery repairs
How to reanimate a screwdriver battery? There are three ways:
- express battery repair using zapping method ;
- replacing individual elements in the battery ;
- replacement of all elements of the battery pack .
Express repair of nickel-cadmium batteries using zapping method
Translated from English, this means burning, applying short pulses of high current over a period of several seconds. We can say that this is a kind of emergency resuscitation of batteries. It should be noted right away that this option is quite risky, and not every battery is able to withstand such “shock therapy” with high current. It is possible to use high current only if the screwdriver is equipped with nickel cadmium batteries. Other batteries ( , ) cannot be subjected to such effects.
The essence of purging is to destroy the crystals formed inside nickel-cadmium batteries with high current. These crystals are called dendrites, and due to their growth, the battery capacity gradually decreases. “Pumping” with high currents quickly destroys the formed crystals and sharply reduces the self-discharge of the battery.

It is stated that zapping can be effective for any NiСd, even if they are completely discharged to zero or have been lying unused for 10 or 20 years. The question is always one of probability. successful repair in such “difficult” cases - when batteries are “repaired” in this way, it will either be successful or not. However, it doesn't hurt to try to revive them. Of course, while maintaining maximum caution.
To carry out zapping you will need:
- any high current charger ;
- multimeter to monitor voltage ;
- welding machine ;
- crocodile clip ;
- zapping electrode ;
- protective equipment .
You should not use a regular power supply as a charger. Even if the current strength of such chargers is 10-15 A, they will not withstand high voltage. Using a double-sided clamp, tight contact is ensured on one terminal, and the electrode itself will be held on the other terminal. It is impossible to hold it with your fingers: during burning it will become hot. A zapping electrode is a piece of wire that is rolled into a tight bundle (there is no insulation). Its cross-section is maximum 1.5 mm 2, and its length is 6-7 cm.
Instead of higher quality welding machine Especially daring electronics enthusiasts repair batteries using a regular soldering iron. But a spot soldering tool will be preferable for repairs. Protective equipment (robe, goggles, special non-flammable substrate) is necessary because sparks always appear during high current blowing.

Work progress
It is better to blow through each battery separately, the algorithm of actions is as follows:
- Attach the electrode with a minus sign to its minus pole. Do not confuse the polarity, an important point.
- “Blow out” the positive electrode with short pokes, their frequency is 2-3 times per second . Typically, for a can with an output voltage of 1.2 V, blowing must be done for 3-4 seconds with a frequency of 2-3 small pokes per second;
- Measure voltage readings after the first stage . It should be raised to a maximum of 1.3 V. If the voltage is higher, the time of pokes or their number should be reduced.
You need to poke very quickly and carefully, not allowing the electrode to weld even for a short time to the pole of the Ni Cd battery of the screwdriver, in order to avoid completely burning the battery. It is recommended to put a protective intermediate electrode on the positive electrode, or to hook on an alligator clip to protect the surface of the battery pole.
The procedure is repeated up to 25 times until the battery capacity is restored. During the entire process, it is necessary to constantly monitor the temperature of the batteries. The intervals between zappings should be at least 15 minutes. Only in this case will the reanimated battery have a chance to extend its service life.
Replacing individual elements in the battery
If the battery capacity drops, it means that at least several of its elements have failed. All batteries cannot die at once, so first you need to find the lowest-capacity batteries in the chain, and then disassemble the battery and replace them with new ones.
New batteries can be ordered from any online store. At the same time, it is important to buy those elements whose type and capacity fully correspond to the previous ones. If the screwdriver contains nickel-cadmium batteries, then you should purchase the same ones, with a similar level of capacity. If you can get the same battery, you can remove the most capacious elements from it and put it in the one that is being repaired.
How to identify “weak links”
Searching for dead batteries in a circuit can be done in two ways:
- using a multimeter ; .
For the first method you only need a multimeter:
- charge the battery completely ;
- disassemble the battery case ;
- measure the nominal U on each battery (rated value for nickel-cadmium batteries is 1.2 V, for lithium-ion batteries - 3.6 V);
- mark with a cross the elements where U is below nominal so as not to be confused with others;
- assemble the battery ;
- turn on the screwdriver ;
- work until there is a noticeable reduction in power ;
- disassemble the battery again, measure the U values again .

On batteries marked with a cross, the “dips” in voltage will be significantly greater than the others - most often below 1 V. As for the difference between the U values in the battery, if it is at least 0.5-0.7 V, this is quite significant.
The second method of finding dead batteries is less labor-intensive and simpler. If the screwdriver output voltage is 12 V, you will need a lamp with the same output voltage.
Procedure:
- charge the battery completely ;
- connect the lamp as a load to both poles of the battery ;
- wait until the battery is completely discharged ;
- use a multimeter to measure the voltage readings at the terminals of all elements one by one .
“Dead” batteries are easy to separate because their voltage drops the most after discharge.
Repair
So, the failed elements have been found, new ones have been purchased, and now you can proceed directly to repairing the battery.
To repair the battery you will need:
- soldering iron;
- low corrosive flux ;
- tin;
- copper plates (in case the “original” ones broke during disassembly) .
It is not necessary to use spot welding in case of partial battery repair. But during soldering you need to be careful not to overheat the elements. It is best to connect the batteries to each other using the plates that they had. If they break during disassembly of the battery into individual elements, then new plates will need to be made from copper.
Don't forget about polarity. Each battery element for a screwdriver is connected to its neighbor according to a certain sequence. The minus of one can must be connected to the plus of another, and the minus of another can must be connected to the plus of the third, and so on.
After the chain is reassembled, care must be taken to ensure that the voltage potential of all elements is equal. To do this, you should leave the batteries on charge for the whole night, then they should cool down over the next 24 hours. After this, the voltage is measured on each element. If soldering and the charging cycle were carried out correctly, then the multimeter will show approximately the same U figure on all batteries - 1.3 V.
Now you need to carry out at least two charge-discharge cycles for the battery in a natural way: place the repaired battery in a native screwdriver and work with it until it is completely discharged.
By the way: Partial repair of a Li-ion screwdriver battery can be carried out in a way that requires minimal financial costs. If the unit has 18650 batteries installed, you can actually borrow the same ones from an old non-working laptop, if possible.

Replacing all elements of the battery pack
The required number of cells can be ordered at any online store, depending on the number of old batteries. It is important to pay attention to the fact that they all initially have the same capacity.
You can completely replace all elements of the battery pack with new nickel-cadmium batteries. They are much cheaper than nickel-metal hydride batteries, and, compared to other batteries, they are the most durable and hardy. However, in Lately Increasingly, self-conversion of batteries “from cadmium to lithium” is being practiced, in other words, installing new lithium-ion batteries instead of old Ni-Cd.
Despite their reliability, nickel-cadmium batteries can quickly fail because they have serial connection to each other without a balancing board. If the batteries are from the same production batch, their parameters will still have a wide spread between them. With this connection, one element will charge faster, another slower, and the third may overcharge.
To make a complete switch from nickel-cadmium to lithium-ion, you will need:
- number of elements equal to the number of previous ones (with the same capacity);
- balancing board 5S (its amperage depends on how many volts the screwdriver is designed for);
- tester or multimeter ;
- soldering iron with a good tip ;
- high quality flux and lead solder ;
- silicone wires AVG 16 ;
- heat-resistant tape and hot melt adhesive .
Before starting soldering, discharge the batteries. Remove the old batteries from the unit and release the contacts. It is better not to throw away the old temperature sensor, but leave it as additional protection against lithium overheating.

Now the main thing is to solder the lithium correctly . Cut the wires to the required length in advance, insulated, in silicone, very thick, to avoid them melting when the lithium is heated. Use a knife to clean the battery pads for soldering.
It’s good to heat the soldering iron to 300°C and start soldering using flux and lead solder. There must be flux good quality, indelible, non-conductive. Do not use acidic fluxes under any circumstances. Soldering should not take more than 2 seconds to avoid overheating of the lithium. In order for the heat to escape faster, after soldering, you can attach any iron object to the battery that absorbs heat.
Allow the batteries to cool and connect the positives and negatives as usual. Check the overall voltage. Its indicator should be on average 20.7 V if there are 15 elements.
After measuring the voltage, the board is connected. All its wiring must be laid with special gaskets so that nothing “shorts” during operation. The entire battery pack is sealed with heat-resistant tape designed specifically to insulate batteries and their contacts.
The wires and connector are soldered. If the contacts are “dangling”, they can be attached to hot glue. Now, finally, you can finally assemble the screwdriver battery pack and check its operation.
Sometimes it seems that repairing the battery of a Hitachi screwdriver (or other tool) is very difficult. But if you look into general principles, such as the basics of electronics from the inside, and the main principles of proper soldering, it becomes clear how to repair a battery for a screwdriver yourself. This will not only save financial resources, but will also contribute to the acquisition of valuable and useful skills.
One day, when I took my screwdriver out of the closet, I discovered that it didn’t work. The batteries were dead, the first thing I thought was and put the screwdriver on charge. But as soon as I connected the charger to the battery, it immediately showed the full charge of the battery. I connected a tester to check charging and it turned out that the batteries had high resistance, which meant they were failing.
After browsing the forums, I found out that the problem of failure of nickel-cadmium batteries used in screwdrivers is by no means new, but rather very common. In general, in addition to being cheap, these batteries are a plus for the manufacturer; they have a lot of shortcomings that become apparent during operation. This is small life cycle, and low capacity, and short battery life.
All forum members who are faced with a similar problem without hesitation boldly change nickel-cadmium batteries to lithium-ion ones, which is what I will do as well. They may be more expensive, but the screwdriver will work much longer and harder.
Without hesitation, I purchased. Since my screwdriver is 18-volt, and one battery produces 3.7 V, therefore, I needed 5 pieces. 5x3.7=18.5 V is what you need.
I also bought battery compartments, one for two batteries, the other for three. I connected everything in series. I took out the old batteries and replaced them with new ones.


This could be the conclusion, but as it turns out, I made a terrible mistake. The fact is that lithium-ion batteries cannot under any circumstances be charged in the same way as old batteries! This is even dangerous, as they can simply explode.
How then? It's not that complicated - you need a charging controller for lithium-ion batteries.
Lithium-ion batteries are very sensitive to overcharging and being discharged below normal - all these factors quickly damage them. This is perhaps their main disadvantage. But it’s easy to get rid of it by using a controller that will take over all the functions of monitoring and limiting dangerous modes and make the operation of the battery at a high-quality level.
Purchase links:
- or specifically - .
Charging controller connection diagram

The batteries are also connected in series, except that each connection between the batteries is connected to the controller. As a result of this, the controller monitors the condition of each battery and prevents it from overcharging in the circuit.
I put together a diagram. Everything works perfectly.


Check video
Screwdriver battery assembly
Since the controller was added, from battery compartments I had to refuse because there was a catastrophic lack of space. Well, this is for the better, since the screwdriver is subject to vibration, and not tight contact could not have a very good effect in the future...I decided to solder the batteries together. In general, lithium-ion batteries are very afraid of overheating and need to be connected resistance welding. But I don't have it. So I soldered everything with a soldering iron. If you do this, then teach: use only a powerful soldering iron of 40-60 watts. Solder with acid or active flux. And under no circumstances solder one connection for more than a second. If it doesn’t work the first time, it’s better to wait five minutes and try again.
In the end I did this:

I soldered the circuit.