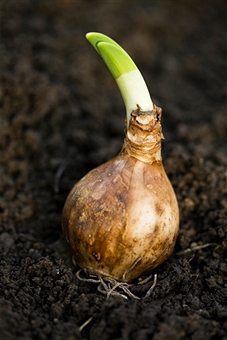
Preparing tulip bulbs for planting in the fall. Planting tulips
Tulips are our favorite flowers in the country. We plant them not just in flower beds, but in whole beds! Ours are mostly bright red. We don’t buy new varieties; we are also pleased with these with their lush, elegant flowering. No special knowledge is required in reproduction and care. We do not consider ourselves to be advanced gardeners, but we are great at growing tulips! 🙂
Digging up tulips after flowering and then planting the bulbs in the fall - mandatory events. We wrote about how to store bulbs in the summer and how to plant them in the ground again. And here I would like to pay special attention to the pre-planting treatment of the bulbs.
Recipes for solutions
Treatment of tulips before planting carried out for the purpose of disinfection and disinfection of bulbs. Healthy planting material is the key to elastic leaves and strong flowers in the future! So don’t be lazy 🙂 and read, How can you treat tulips before planting in the fall:
- Potassium permanganate.
- Prepare a pink solution: dissolve 2 g of permanganate in 10 liters of water.
Fundazol.
Prepare the solution as follows: dissolve 30 g of foundationazole in 10 liters of water.
Before planting, tulip bulbs are soaked in one of the solutions for 1 hour.
- (source of information: magazine “My Blooming Garden”)
- In video blogs on the Internet, we were able to find the following processing methods, more modern ones:
Vitaros. Before you begin pre-planting treatment of tulip bulbs, you need to carefully inspect all the bulbs. They must be clean, not rotten or damaged, without wounds or cuts. After soaking in a fungicide solution, the bulbs do not need to be washed. It is enough to let them dry for half an hour, avoiding exposure to sunlight.

Tulip bulbs before planting
- Sort by size. The quality of the bulbs depends greatly on their size. Large specimens produce higher quality flowers than small ones, so it is better to plant them separately. Small bulbs In general, it’s worth culling and not planting. Although in conditions summer cottage, small bulbs can be planted well in a common flower bed, next to other flowers, and large ones can be placed in the best, separate flower bed.
- Inspect for damage, disease and cuts. It is recommended to remove the hard shell (husk), because underneath it there may be a source of disease. In addition, the husk will prevent germination. It must be removed carefully so as not to damage it.
- Soaking in a solution of a fungicide or growth stimulant. It is recommended to process each variety separately to avoid mixing.
- Finally, let it dry. Bulbs treated with fungicide should be laid out in a shady, warm place for about 30 minutes to dry before planting.

It is necessary to prepare not only the tulip bulbs for planting in the fall, but also the soil. It is recommended to dig it up the day before planting, select the weeds and let it stand for a day so that the soil settles. If you plant immediately after digging, then, as the soil settles, it will pull the bulbs to a depth. Let us remind you that the optimal planting depth for tulip bulbs is 2-3 times the height of the bulb.
Good luck with your landing and lush flowering in the spring!
Bulbous plants are very popular among flower lovers. And the spring-blooming ones - best decoration garden
They paint the garden, awakened from sleep, with all the colors of the rainbow - from sunny yellow to dark purple, from soft blue to violet.
The world of bulbous plants amazes with its diversity and if you choose the right bulbous plants, then we can admire them for six months, with early spring until late autumn.
Immediately after winter, flowers of small-bulbed primroses appear - snowdrops, chionodoxa, scillas (scylla), crocuses, muscari and others. I talked about these beloved flowers in.
In autumn, the last representatives of bulbous plants bloom - colchicum And autumn crocus.
Although the range of bulbous plants is very diverse, there are general rules on growing and caring for them. We will talk about these rules in this article.
We purchase planting material
 The best time to buy bulbs is when they are dormant - late July - September. When purchasing, be sure to check their condition.
Bulbs must meet the following requirements:
- dense and heavy;
- shells intact;
- intact, without cuts or damage;
- without regrown roots and stems;
- The bottom is not damaged, without rot.
If you nevertheless bought bulbs whose stems and roots have begun to grow, then you need to immediately plant them in the ground.
Size planting material also has great importance. Try to buy larger bulbs, then the plant will be stronger and bloom more profusely.
How to store
Before planting, bulbs must be stored in a cool and ventilated area (but not cold).
The bulbs of plants such as snowdrop, whiteflower, scilla, chionodoxa, and pushkinia are not covered with dry filmy scales, so we store them in slightly damp sawdust or peat in plastic bags.
Just don't forget to make holes in the bag to allow air access. It is advisable not to over-moisten the substrate in which the bulbs are stored, so that the plant does not begin to grow ahead of time.
The bulbs of hyacinths, daffodils, hazel grouse, tulips and decorative onions are not afraid of heat and even need it. They are placed in them at high temperatures and in dry conditions. flower bud. But even here you need to know when to stop.
When is the best time to plant?

Plant bulbs, blooming in spring, we plant in September - early October. If the weather is warm for a long time in the fall, then planting is possible until the beginning of November.
But still, this work should not be delayed until frost.
Colchicums must be planted in August - early September and no later. After all, they should already bloom in mid-September.
Selecting a site for planting and preparing the soil
 All bulbous plants do not like excess moisture. And therefore better soil for them it is considered medium-heavy and moisture-permeable.
Bulbs can also be planted on sandy soil, as it drains water well. But first you need to increase its fertility by adding nutritious soil or compost.
If your soil is too dense, then in order to avoid stagnation of water and, as a result, rotting of the bulb, it is necessary to create an additional drainage layer in the planting hole.
To do this, pour coarse sand, crushed stone or gravel into the hole. The layer thickness should be approximately 4-5 cm.
To prepare heavy soil for planting bulbs, you need to dig it thoroughly, adding coarse sand or compost.
One more thing important condition, do not under any circumstances replace compost with fresh manure! This usually leads to the bulbs becoming infected with fungal diseases.
Treatment of bulbs before planting
This is necessary in order to prevent in advance the development of various bulb diseases (fusarium, sclerotial rot, penicillium rot, bacterial rot).
Or you can treat the bulbs with a solution of potassium permanganate for 25-30 minutes. The solution is prepared at the rate of 5 g of potassium permanganate per 10 liters of water.
Landing according to the rules
At what depth should I plant?
There is a rule: we must plant the bulb at a depth that is 3 times greater than its height.
Based on this, we plant bulbs of plants such as lilies, tulips, imperial hazel grouse to a depth of 15-20 cm, and if the bulbs are very large, then up to 25 cm.
We plant the bulbs of small-bulbous plants to a depth of approximately 5-10 cm.
You need to plant a large onion in the hole so that its bottom is directed straight down. And small onions can simply be sown.
Distance between bulbs
We plant large bulbs at a distance of about 12 cm from each other, and small ones at a distance of 5-7 cm.
Depending on the size of the bulbs, their number planted per 1 m2 ranges from 50 pieces (tulips, daffodils) to 400 pieces (small bulbs).
If we want the plantings to have a natural look, then we need to plant the bulbs at different distances from each other.
But if, on the contrary, we want to create the effect of a single flower field, then in this case it is necessary to plant the bulbs at the same distance from each other.
Methods of planting in flower beds
 There are two main ways to plant bulbous plants when creating flower beds.
They are the main ones" actors": a monochromatic or variegated seasonal composition is created entirely from bulbous flowers and, when they fade, the entire flowerbed is planted again, but with annual flowers.
Bulbous plants are planted in narrow strips among low shrubs and trees or among perennials, and in the spring they delight us with their beauty, filling the voids in flower beds.
And then, after they bloom, their withering leaves are hidden by other grown plants.
Watering and shelter
If you plant bulbs in warm, dry weather, they should be watered immediately. Then the roots will grow faster and the plants will survive the winter well.
Bulbous plants are quite frost-resistant, but it is advisable to cover newly planted plants with fallen leaves or peat humus for the winter. Those that we planted later than others especially need this.
It is also necessary to cover the plantings in the absence of snow cover during severe frosts. In the future, bulbous plants no longer require shelter, and peat humus can be used as mulch.
During budding and flowering of plants, try not to let the soil dry out; water not often, but abundantly.
Avoid Excess Fertilizer
All bulbous plants cannot tolerate excess fertilizers and with a high concentration of salts in the soil, their roots begin to rot and the plant may die completely.
Therefore, in the fall, it is enough to add only compost for fertilizing.
In spring, plants can be fed complex fertilizers(15-30 g/m2), which are best applied in liquid form.
Do you need self-seeding?
Many bulbous plants can reproduce by self-sowing. On the one hand, many summer residents like this, but on the other hand, this chaotic and involuntary distribution of plants can disrupt the design of the flower garden you have created.
If you do not need self-sowing, then remove wilted flowers as early as possible. Leaves should be left as much as possible.
This way you can control the number of bulbs and create favorable conditions for the accumulation of nutrients for future flowering.
When is a transplant required?
 Bulbous plants can grow in one place for several years. The need for transplantation arises if the nests of bulbs have already grown too much and interfere with each other, and the feeding area becomes insufficient and the flowers will be much smaller.
Plants that multiply quickly (crocus, scilla, chionodoxa, muscari) need to be replanted already in 3-4 years.
And, for example, hazel grouse and kandyk, which reproduce slowly, can grow in one place for 6-8 years without transplanting.
Plants can be replanted only when the above-ground part dies off completely.
The dug up bulbs must be cleaned of old scales and roots and laid out in one layer in a dry, well-ventilated area.
Until next time, dear readers!
Processing tulip bulbs before planting. Before planting tulip bulbs in the ground, they must be prepared. There is no need to hope that it is enough to stick them in the ground and they will next spring They will bloom just like in the picture. Proper treatment of bulbs will protect plants from diseases and pests, help them grow faster and bloom better. What should be done? 1. Peel the onions; 2. Treat bulbs that have minor damage. 3. Carry out disinfection; Lay out in front of you all the tulip bulbs that you intend to plant, and inspect each specimen from all sides for damage, rotting, or signs of disease. Remove the hard outer skin from the bulbs, because it is under it that there may be pockets of infection that are not visible at first glance. In addition, peeled tulip bulbs will better absorb nutrients from the soil. Just peel the delicate bulbs very carefully so as not to inadvertently damage them. Also read: “Storing tulip bulbs – where and how correctly?” http://ogorodko.ru/xranenie-lukovic-tyulpanov.html Bulbs infected with penicillium rot often go on sale. The disease manifests itself in the form of gray-green sporulation on the integumentary scales of the bulb. If the penicillium spots are small, the bulb can be cured. Often, on apparently healthy bulbs, if you remove the integumentary scales, you can find the first signs of fusarium: grayish depressed spots surrounded by a brighter border. They should be removed to avoid introducing infection into the garden. Peel the bulbs, sprinkle the sections with crushed coal or powdered fungicide. Let the cut dry and slightly cork for 2–3 days. Before planting, treat the bulbs in a liquid disinfectant (Vitaros, Maxim) according to the instructions. After dressing, the bulbs must be immediately planted in the ground, since they quickly become saturated with moisture, and young roots can easily break off as a result, and new ones are no longer formed in their place. If you find a diseased or damaged bulb, but you are sorry to throw it away, then cut off the damaged area from the bulb, being careful not to damage the inner layer of scales. Such bulbs should also be soaked in a solution of potassium permanganate, dried and planted in a flower bed. However, although after such treatment, infection of the remaining tulips and garden soil is very unlikely, it is still worth planting the treated damaged bulbs separately from healthy ones. Also read: "Tulips at home - how to plant and grow gorgeous flowers?"
Among gardeners, winter forcing of tulips at home, like other bulbous crops, is interesting because it allows you to get delicious flowers by a certain date. How to speed up the germination of bulbs and grow a full-fledged, flowering plant by March 8? Experienced flower growers use a whole range of measures aimed at awakening planting material in an unusual period for it.
Disembarkation dates
The timing of forcing is closely related to biological features tulips. By the time the material for awakening is planted, all the organs of the future flower should be formed. A sufficient amount of nutrients must accumulate in the bulbs. Therefore, strong and large bulbs. The weight of each should not be less than 25 grams.
- 1st period – planting and rooting of the material. Conditions: in a dark, cool place with a temperature of 5...8 °C. For different varieties, this period can last from 16 to 22 weeks;
- Period 2 – keeping germinated plants warm at a temperature of 12…15 °C. Lighting is moderate. The duration of the period before the buds appear is from 3 to 4 weeks.
Video on forcing tulip bulbs for March 8
The sum of the durations of the periods will allow you to accurately determine the period for forcing planting material at home. All that remains for the novice gardener is to decide on the date for planting the tulip bulbs. Depending on the variety, the following four planting dates are determined:
- Early boarding. Allows you to receive flowers at the end of December, the first ten days of January. Just in time for the New Year holidays.
- Mid-early landing. Will ensure flowering for the Christmas holidays.
- Medium landing. Gives you the opportunity to drive out tulips for Valentine's Day.
- Late disembarkation. Will allow you to prepare for March 8th.
If you plan to receive flowers in more late dates, plan to plant bulbs in the following way. Subtract from the required date of bud production the duration of both periods necessary for plant growth.
Variety selection
More the exact date forcing determines the variety of tulips, the conditions for harvesting and storing the crop. When choosing a variety, pay attention to plant resistance to diseases. Fungal spores and some viruses live for a long time in the soil or husks and manifest themselves when favorable conditions. Stores offer dozens of types of tulips, from which you can easily choose the right one. Varietal groups are formed taking into account flowering dates:

Tulip varieties for early forcing
- For early germination of bulbs, early-flowering varieties of tulips are suitable, which are cooled for up to 10-16 weeks. The height of such flowers is 30-40 cm, the bud size reaches 7-8 cm. The flowers have the shape of a bowl or glass. The buds of early flowering varieties open their petals in the sun. Suitable varieties include Bridge Mize, Diamond Star, and Christmas Marvel.
- Varieties of tulips with medium and mid-early forcing need to be kept in less cold than early flowers. These varieties include Darwin hybrids. The height of adult plants reaches 60-80 cm, the height of the buds is 12 cm. Since these are quite large flowers, it is not recommended for inexperienced gardeners to grow them.
- Class 5 tulips are suitable as material for late and very late forcing; their height varies from 60 to 75 cm. The height of the flower does not exceed 10 cm, the shape of the bud is cup-shaped. The following varieties are suitable: Temple of Beauty, Triumph, Aristocrat, Negrita.

By planting late varieties, you will get beautiful buds for International Women's Day.
Technology
For beginning gardeners, the technology of forcing tulips may seem like a difficult task. In fact, everything is much simpler if you break the whole process into main stages:
- Harvesting and storage of bulbous crops.
- Planting bulbs in a substrate for rooting and germination.
- Direct forcing of plants.
Start preparing tulip bulbs for subsequent forcing in the summer, when growing flowers on the site. Select the healthiest, strongest plants and carefully care for them throughout the growth period. After harvesting, store the bulbous crop for 30 days at 25 °C. In August and September, lower the storage temperature by 3 and 5 °C.
When planting, tulip bulbs are placed in nutrient substrate with a neutral environment. The planting date depends on the planned timing of the appearance of buds. Planting material is planted in pots with a pitch of 5-10 mm, slightly buried in the soil and watered. Then the container is transferred to a cold room with a temperature below 9 ° C for 16...22 weeks.
At the third stage, the sprouted bulbs are transferred to warm room and ensure proper temperature regime. To prevent the plant from getting stressed, the temperature should be within 12...15 °C. Provide the seedlings with dim lighting. The sooner flowering is expected, the sooner they should be transferred to warmth. By the time the containers are moved into the room, the size of the sprouts should be 5-7 cm.
How to prepare bulbs for planting
Before planting tulips from your planting material, prepare the bulbs. Select large and healthy specimens. Remove the covering husk and examine the smooth shell. The procedure will help to identify hidden cuts and damage, and will also speed up the fixation of “nude” in the substrate. Bare bulbs absorb water and fertilizing better.
Healthy tulip bulbs selected for winter forcing, hold in the potassium permanganate solution for 30 minutes. To do this, dissolve a couple of crystals of potassium permanganate in a 0.5 liter jar of water. The procedure will allow the planting material to be disinfected. If there are no means of disinfection, you can immerse the onions in water at a temperature of 40 ° C for 5 minutes.

Preparation of tulip bulbs and nutrient substrate
Substrate preparation
The nutrient medium must have good water and air permeability and a pH of 6.5-7.0. For planting, you can use river sand (Dutch flower growers use it) or various sand mixtures(with peat, soil, sawdust). Some gardeners use perlite (a material of volcanic origin).
To make tulip forcing at home ideal, prepare a special nutrient substrate. Mix the soil, manure and compost, keeping the proportions 2:1:1. Add a little to the resulting mixture. Do not take used soil from greenhouses; it may contain harmful microorganisms and fungal spores.
If you plan to use peat or sawdust, pre-treat it with lime mortar. Be especially careful with sawdust. Steamed hardwood sawdust is suitable for germinating flowers. At the same time, make sure that the seedlings in such a substrate do not grow to the side.
Features of planting bulbs
After preparing the soil, all that remains is to figure out how to plant the tulip bulbs. Distribute the prepared soil among the planting containers and bury the bulbs there in increments of 5-10 mm. There is no need to deepen the planting, otherwise it will take a long time to break out of the ground. There should be a drainage hole at the bottom of the container to remove excess moisture.
Spray the newly planted tulip bulbs with a solution of calcium nitrate (only 20 grams of fertilizer will be needed per bucket of water). If the soil has sagged after watering, add more on top required amount substrate. Place the containers with the bulbs to be forced into a room with a temperature just below 10°C. The crops will take up to 22 weeks to strengthen and begin to germinate.

Sequence of planting tulip bulbs for forcing
During the forcing period, sprouted bulbs need periodic watering. The humidity in the room should not drop below 80%. In such conditions, plantings must be maintained until mid-December. In the second half of December, the temperature in the room should be lowered by 2-4 °C so that the sprouts do not stretch too much. 1.5 months before the start of flowering, the containers are transferred to a warm room with a temperature of 15 ° C.
During the first days, while the tulips get used to the change in regime, keep the light dim in the room. Plants that did not grow as long as the right size in due time, cover with cardboard caps. After a few days, increase the temperature to 18 °C.
Important! To prevent the stems from stretching, hang a fluorescent lamp - turn it on daily for 5-6 hours.
Growing and storage
If you carry out early forcing, there is no point in growing tulips, the plant will not form a full-fledged child and all your efforts will be wasted. You can successfully grow flowers low-growing varieties. To do this, cut the flowers and leaves from the stem, and after three weeks dig up the onion. This method will allow you to obtain medium-sized bulbs.
After flowering has ended, you can leave the foliage on the tulips, cutting off only the buds. Water the stems for 21 days and then remove the bulbs. Some plants react to similar method maintenance and create a new viable baby. After digging, the bulbs are dried for 14 days at 24 °C, then 30 days at 15-20 °C, then at 15 °C before planting in the soil.
At proper storage, tulip bulbs are well preserved (they do not sprout or spoil). They need to be planted in the soil at the usual time and then grown according to the rules. About 30% of onions grow from March varieties. It is not worth growing early varieties, as the result will be small children that will bloom only after 3-4 years.
Forcing tulip bulbs is available not only to professionals, but not experienced flower growers. To see bright buds in winter, you need to follow the technology of growing flowers: store them correctly, maintain the temperature, monitor lighting and humidity. By properly caring for your plantings, you will receive a bouquet of bright flowers in winter.
Just one bulb, infected with some fungal or infectious disease, when planted in a common flowerbed, can lead to the death of other flowers. Just imagine what sad consequences there could be due to a single small mistake! While proper treatment of the bulbs will protect the tulips from diseases and pests, it will help them grow faster and bloom better.
What is pre-planting treatment of tulip bulbs?
Regardless of what time of year you decide to plant tulips - autumn or spring, such an important process as preparing tulips for planting deserves special attention. Of course, you can simply put the bulbs in the ground and cover them with soil, and then hope that “if they want to live, they will grow.” However, experienced gardeners are well aware of the role pre-treatment of tulips before planting can play.
Many gardeners, even when storing bulbs, pay attention to sorting them, dividing them into large and small ones. Accordingly, tulips are then planted also, focusing on the diameter of the bulbs. In the future, this will greatly facilitate the summer care of tulips and digging up the bulbs after flowering. If you did not sort before storing the planting material or just recently bought bulbs of different varieties, it is not too late to sort them immediately before planting. Video about proper planting of tulips
Processing tulip bulbs before planting includes several simple techniques:
- peeling the onions;
- careful inspection;
- sorting of planting material;
- disinfection;
- processing bulbs with minor damage.
So, having laid out in front of you all the tulip bulbs that you intend to plant, inspect each specimen from all sides for damage, rotting or signs of disease. Remove the hard outer skin from the bulbs, because it is under it that there may be pockets of infection that are not visible at first glance. In addition, peeled tulip bulbs will better absorb nutrients from the soil. Just peel the delicate bulbs very carefully so as not to inadvertently damage them.

Sort the peeled and carefully inspected bulbs according to their diameter. It is best to use large specimens for planting, but there is no need to throw away small ones either - you can plant them in flower beds. The main thing is not to plant the bulbs big size together with small ones, so that later it would be easier to select large planting material from the garden bed for storage.
Pickle tulip bulbs suitable for planting in a weak solution of potassium permanganate for half an hour to protect the flowers from fungal diseases.
After etching with potassium permanganate, the bulbs must be immediately planted in the ground, since they quickly become saturated with moisture, and young roots can easily break off as a result, and new ones are no longer formed in their place.
If you find a diseased or damaged bulb, but you are sorry to throw it away, then cut off the damaged area from the bulb, being careful not to damage the inner layer of scales. Such bulbs should also be soaked in a solution of potassium permanganate, dried and planted in a flower bed. However, although after such treatment, infection of the remaining tulips and garden soil is very unlikely, it is still worth planting the treated damaged bulbs separately from healthy ones.

For some, the annual sorting and processing of tulip bulbs will seem too troublesome. In this case, you can purchase in the store already prepared planting material that has undergone heat treatment. But when purchasing, you must definitely pay attention to the quality of the bulbs, as well as the reputation and reliability of the supplier. It is advisable that the varieties of tulips purchased be tested in your area and have high percent germination.
In addition to processing the bulbs, you need to take care of the soil in which the butu tulips are planted. If the soil on your site is not entirely suitable for growing beautiful tulips, you can make an effort and improve its properties.

Please note that tulips need soil:
- permeable;
- loose;
- fertile;
- neutral acidity;
- with groundwater level up to 75 cm.
If the groundwater level is higher, artificial drainage from a layer of sand can be provided for tulips, otherwise the bulbs will quickly rot. Add peat and sand to clay soil. To increase the permeability of the soil when digging, it will also be useful to add coarse washed sand and humus.
You should not plant bulbs in sandy soil, because such soil dries out quickly and the tulips will lack moisture.
Video about planting tulips in autumn
Before planting, loosen the bed or flowerbed to a depth of 30 centimeters and leave for a day for the soil to settle. Remove weeds so that they do not impede the growth of flowers. Additionally, you can spill the soil with a solution of potassium permanganate, but if you have correctly carried out the pre-planting treatment of tulip bulbs, this point will no longer be necessary.
By following all the above recommendations, you can safely count on the fact that the tulips in your area will grow well and give you an unforgettable experience of the beautiful abundant flowering! In addition, caring for tulips will be much less hassle than if you planted unsorted and untreated bulbs.
orchardo.ru
Is it possible to plant tulips in spring - the answer from experts!
Is it possible to plant tulips in spring?
Beginning gardeners are very concerned about the question of when to plant tulips: in spring or autumn, because there is an opinion that both seasons are suitable for this. However, it is better, of course, to carry out all the work in the spring, because you will have one advantage - time that can easily be used for various experiments. And the likelihood of flowers dying from frost is reduced. In order for planting and feeding tulips in the spring to follow all the rules, you must take into account a lot of nuances.

- Beautiful flower bed for tulips
The first of these is the choice of location. If you plant plants in conditions that are unsuitable for them, then even with the most careful care you are unlikely to achieve their normal development. For example, high level groundwater can lead to rotting or disease of the bulbs. Therefore, the choice of location must be taken very seriously. Tulips are not shade-tolerant flowers, and therefore the planting area should be light and protected from the wind. Lack of sunlight will cause the stems to stretch and bend.

In addition, the site should not have unevenness or slopes, with a permeable subsoil layer, because the depth of penetration of tulip roots can reach 60 cm. The level of groundwater penetration also depends on this.
Proper soil preparation when growing flowers
When answering the question whether it is possible to plant tulips in the spring, it should be noted that much will depend on how well the soil is prepared. Many things influence the development of flowers:
- Soil looseness;
- Air capacity level;
- Soil moisture capacity.
Despite the fact that tulips are quite unpretentious plants, for rapid growth they need soil rich in nutrients, preferably loam. But if your site has sandy or other soil, you will have to water the flower beds more often and feed them with fertilizers. Those who have predominantly clay soil at their dacha are out of luck - you will have to use rather radical measures.

First of all, you need to add river sand to the ground (about 20 kg per square meter), peat or other “organic matter”, which will increase water permeability. If you are going to use peat, you will have to use chalk or lime to neutralize the oxidizing effects of organic matter. Heavy soils will also have to be loosened more often, especially during the growing season.
What to feed plants for fast growth?
It is necessary to cultivate the soil for planting once a year, when the main work will be carried out. To do this, we carefully dig up the ground, uproot all weeds, and also apply organic fertilizers to a depth of 35 cm. Approximately 10 kg are needed per square meter. Advice: fresh manure cannot be used for the first time - you can start using it at least six months after planting flowers.

The second time we dig up the soil is about three weeks before planting. To a depth of about 30 cm, we apply 40 g of mineral fertilizers per square meter (superphosphate or potassium salt). If the soil is “light”, potassium fertilizers are suitable, but we will add nitrogen nutrients during planting. You can use a variety of mineral mixtures of nitrogen, potassium and phosphorus fertilizers.
Transplanting and planting tulip bulbs in spring
As we have already said, the most common question among new gardeners is when to plant tulips, and whether it can be done in the spring. In fact, you can carry out all the work in the fall, but it is much more burdensome, especially if you have not previously been involved in breeding tulips. That's why spring best season for carrying out work. Good weather conditions also contribute to this, because already in April the thermometer consistently shows above +15 °C - this is exactly the temperature that is suitable for planting.

Before proceeding with the final work, it is necessary to carefully inspect each bulb. There should be no damage to it, the skin should be very clean and free of stains, and the bulb itself should be heavy and elastic. If something suddenly seems suspicious to you, remove the skin from the bulb, and if there are white spots inside it, you will have to say goodbye to the flower. Most likely, he was struck by illness. But we treat healthy “specimens” with a solution Fundazola for half an hour, then dry it and proceed to planting.
The size of the holes for planting depends on the size of the bulbs - the diameter of the trench should be approximately 10 cm larger. And the planting depth is determined by the formula: the height of three bulbs. In addition, for the normal development of each flower, leave a distance of approximately 5-10 cm between the bulbs. Having answered the question of whether it is possible to plant tulips in the spring, we move on to further caring for the plant.
Tulips: spring planting and care
If you follow our advice on soil preparation, you will further care behind the flowerbed it will become much easier. So, you will just need to water the beds with plants, especially in dry weather. In this case, it is important that the water penetrates closer to the roots, and therefore it is advisable to water the ground around the tulip, and not the flower itself. After watering, be sure to mulch the soil with peat and add ammonium nitrate For better development root system.
We remove flowers that have bloomed - this technique is called “decapitation”. And if you decide to cut tulips, they need to be cut with two leaves, but no more, otherwise the bulb will be spoiled, which means it may not produce “fruit” next year. As preventive work inspect the plants often – when you find sick or damaged flowers, remove them along with the bulb so that the infection does not begin to spread throughout the garden.

Naturally, in order to preserve the flowers for next year, be sure to cover the bulbs. To do this, you can use ordinary spruce spruce branches, which will protect against frost and rodents. In early spring The spruce branches must be removed so that the plant receives both the sunlight and air it needs. Now you have learned how to plant tulips and how to provide them with proper care. This will help you do beautiful bouquets, delighting your loved ones with spring flowers
nasotke.ru
When and how to plant tulips: basic rules and mistakes
Despite the fact that the flowering period of tulips is short and we have to decide how to fill the quickly empty space in the flowerbed, they never cease to be popular. Today there are almost three thousand varieties of tulips that can satisfy the taste of the most demanding gardener.
The most suitable period for planting tulips
The optimal period for planting tulips begins in mid-September and continues until the end of October. Adjustments should be made for certain regions: in the north, planting should be done already in early September, south of the landing can be postponed until the end of October. To correctly determine the time of planting tulips in a certain region, it is enough to know optimal temperature soil.
Tulips are planted when the temperature at a depth of about ten centimeters does not exceed ten degrees Celsius. Planted in warmer soil, the flowers will have time to germinate before winter, but will not bloom in the spring. More late boarding will not give the opportunity to take root before frost.
Rules for planting tulip bulbs
You can grow elite and most capricious varieties of tulips in the garden by adhering to simple rules for planting them:
- Choosing a landing site. Tulips prefer a sunny place. They bloom in partial shade if the soil is sufficiently fertilized and loose. Plants do not like strong, sharp winds. If the place where you plan to have a flower bed with tulips is prone to moisture stagnation, sand or fine gravel should be poured into the bottom of the holes or furrows. It will provide natural drainage and will not allow the bulbs to rot.
- Soil preparation. It is advisable to plant plants in a bed with light sandy loam soil. The land should be ready by the end of August. It needs to be dug up to the depth of a shovel, fertilized with humus, compost and superphosphate. Fresh manure is contraindicated as it causes fungal diseases or rotting bulbs. Tulips absorb nutrients in close proximity to the root system, so superphosphate can be added when planting under each bulb. It will be useful to add wood ash in the proportion of a glass per square meter. Too dense soil can be lightened by adding sand.
- Selection of bulbs. If the planting material has not grown in your own flowerbed and you need to purchase it, it is best to do this immediately after digging it up. This is the end of July, beginning of August. After spending money on bulbs, the gardener will make sure that they are properly stored before planting in the ground. After lying for several months in a warehouse or store shelf, where the microclimate is not always appropriate, they can dry out and die.
- The planting material must be dense, evenly colored, without visible spots and mechanical damage, well dried. Before planting, the bulbs need to be soaked for about two hours in a weak solution of potassium permanganate. If there is no time for prevention, just pour this potassium permanganate into the planting holes. Large bulbs and children should be planted separately from each other. Children planted in autumn will not bloom yet next year.
- Planting depth. Depends on the bulb and is approximately three times its size. This is approximately 10-15 centimeters for large bulbs, 5-7 for children. Bulbs can be planted either in holes or in furrows. With the second planting option, you should choose planting material of the same size for each individual groove. For tulip bulbs, it is very important to maintain the correct planting depth, and with their different sizes, the depth of the groove is almost impossible to determine.
- Distance between bulbs when planting. Depends on the size of the bulb itself. Usually it is about 10-15 centimeters. Children can be planted more closely together. If planting is done in rows, then the distance between them is 30-35 centimeters. It is not necessary to take a tape measure with you to the garden: this distance is equal to the height of a bayonet shovel.
- Watering. Before planting, the prepared holes or grooves must be thoroughly watered. You can water the plants after planting to help the soil better cover the bulbs. But first you need to level the ridge with a rake so that water does not accumulate in the recesses.
- Preparing for winter. Although tulips are perennial plants, which means they are adapted to wintering, they should be covered if the winter is going to be cold. For these purposes, humus, peat, and fallen leaves are used. In addition, under such a “fur coat” the earth will not crack during temperature changes, and the temperature itself will be more even, which has a beneficial effect on plant growth.
Mistakes when planting tulips and how to avoid them

Tulips are enough unpretentious plants, but some mistakes when planting can leave gardeners in the spring without their flowering:
- Planting dates are too late. A plant planted late will not have time to prepare for winter and take root. It will most likely enter spring sick and will not bloom, or this will happen much later. If the tulip “delays” the beginning of flowering until June, then you may not admire the flowers. The peculiarity of this plant is that at temperatures above 25 degrees, the growing season stops and the flower stalks die.
- Incorrect planting depth. It is very important to maintain the required planting depth. If the bulb is higher than the required depth, it may not tolerate winter cold. Burying deeper may result in the plant being late to begin its growing season in the spring.
- Planting diseased or damaged bulbs. Planting material must be in perfect condition. If tulips were not purchased, but grown and dug in your own garden, you should carefully examine each bulb. If there are doubts about its quality and health, you need to throw away such material without pity. A diseased bulb will not decorate the flower garden, but will only harm it, infecting all other planting material.
Breeders bred a large number of varieties for various periods flowering: early flowering, medium flowering and late flowering. Selecting different varieties of plants will extend the flowering period for several weeks.
Watch how to plant tulips correctly in the video:
OgorodSadovod.com
It is necessary to decide in advance on the most convenient method for planting tulips in open ground or special baskets for planting bulbous ones.
In the conditions of central Russia, tulips are planted in late September - early October, when the soil temperature at a depth of 15 cm is set at 5-8 ° C, optimal for plant rooting.
Choosing a site for planting tulips
When choosing a place for planting, you should prefer light, sandy loam soils rich in humus. Sandy and heavy soils are unsuitable. On clay soils, coarse river sand should be added, and on too light sandy soils, humus, peat, and turf soil should be added.
Tulips grow best in well-lit areas protected from strong and cold winds; you should choose flat areas, without depressions; steep slopes are unsuitable for planting tulips. Late varieties can be placed in partial shade, where they bloom longer. In heavily shaded areas, plants' bulbs quickly become smaller. Do not allow water to stagnate and the bulbs to get wet.
There are indications in the literature about the need for high groundwater levels with a well-aerated upper soil horizon. In Holland, for example, the high level of groundwater during the growing season of tulips is maintained artificially, since when the groundwater is deep, plant development is delayed and few large bulbs are produced. However, it's too wet soil With stagnant water, bulbs are susceptible to fungal diseases and often die. To reduce the groundwater level, a device is needed drainage ditches at a depth of 50-60 cm. B middle zone Open ditches are installed to drain excess moisture.
Soil preparation and fertilizers
Excess organic matter can negatively affect flowering: flowers will be irregular in shape and peduncles will be crooked. Application fresh manure even in small quantities directly under the bulbs often leads to rotting of the root system. Daughter bulbs obtained from such areas are unsuitable for further propagation. Good action The development of bulbs is influenced by plowing green manure, as well as pre-disinfected compost. After applying fertilizers, the soil is plowed, which will produce more developed plants and large bulbs. Tulips grow best in soils that have a neutral or alkaline reaction, so liming the soil is necessary. If you need to quickly prepare the soil in flower beds and ridges, then add decomposed humus several months before planting the bulbs.
The application of fertilizers to tulips in England and Holland - in the countries of industrial tulip culture - was considered not only unnecessary, but even harmful. In Holland, fertilization using only silty sediments from canals has long been practiced. However, further experience has shown the high efficiency of introducing well-decomposed humus several months before planting the bulbs. In addition to organic good influence influence the development of plants and mineral fertilizers, which affect the timing of flowering, the size of the bulbs, and the length of the flower stem.
Tulip bulbs used in planting
Bulbs for planting are selected by size, laid out in calico bags, baskets or bags made of thick paper, diseased and mechanically damaged specimens are first removed; the packaged material must have a label with the name or number of the grade. Tulips are usually grown on ridges, which will be used as cutting material and, on a small scale, for bulbs. In combination with other bulbous plants, large-sized bulbs are used.
Large bulbs (extra and I, II varieties) are planted in flower beds and ridges. Small bulbs (III grade, baby I and II categories) - on beds (for growing larger bulbs from them).
Autumn planting of tulips in open ground
Tulips are planted in the fall, so that the bulbs take root well before the onset of frost. Rooting of bulbs is most successful at temperatures of +4, +6° and with sufficient soil moisture. In some years, during the tulip planting period, the soil is too dry; in these cases, you should water or wait until the rains to plant.
In the northern regions, planting begins from 5-10 and continues until September 25, in the middle zone - from September 15 to October 5, in the south - from October 1 to November 15. In Central Asia, tulips must be planted in September-October, since dug up bulbs, due to the extreme dryness of the air, can lose a large amount of moisture and give worst bloom next spring.
Before planting, you should outline a plan for placing varieties into groups, this will make subsequent care of tulips and digging up bulbs easier. Early varieties should be planted first, then middle and late ones.
Ridges in the northern and middle zones are made 12-15 cm high so that the soil warms up faster and does not linger in it excess moisture. The ridges are usually 1.2 m wide, the passages between them are 0.4 m. In Central Asia, the ridges are low, and the passage between them serves as a groove for irrigation, or the bulbs are planted in furrows, between which there are irrigation grooves.
Using a hand marker, make transverse marks at a distance of 20-25 cm from each other. Open the furrows with a shovel to a depth of 20 cm (or shallower, depending on the size of the bulbs being planted). Sand is added to the bottom and, depending on the size, the bulbs are laid out along the bottom of the furrow at a distance of 6-7 cm and 2 cm for children, lightly pressing the bottom into the soil. During preparation, soil for filling the bulbs is taken from the next furrow. To separate one variety from another, you need to make an interval of 50 cm and put a label with the name of the planted variety.
For convenience (during boarding) upper layer It is better to temporarily remove pre-prepared and fertilized soil (15-20 cm deep) from the entire surface of the flowerbed or ridge and put it aside. After leveling the surface, place the bulbs at a distance of 3 to 15 cm, depending on the size, and then return the top layer of soil back.
If planting is carried out on heavy soils, sand is poured into the bottom of the furrow in a layer of 2 cm, only then the bulbs are laid out on the sand in a certain pattern. Humus is added to the previously removed soil at the rate of 10 kg per 1 m2 and complete mineral fertilizer, and the bulbs on the ridges are covered with this soil.
To plant a small number of bulbs, use a scoop to required depth a hole on the bottom of which the onion is placed, slightly pressing. On heavy soils, add a little sand to the bottom of the hole. The bulbs are first covered with sand and then with soil taken from the next hole.
On large plantations where tulips are grown for bulbs, planting is carried out under a plow in furrows located at a distance of 60-65 cm; The bulbs are laid out 10-15 cm from each other. Row planting allows you to mechanize all care processes.
The number of bulbs required when planting, depending on the size of the planted bulbs
florets.ru
Planting and caring for tulips in open ground and greenhouse, preparing soil for tulips
At proper cultivation For tulips, plant care begins literally immediately after they bloom - it is necessary to stop watering in time so that the bulbs do not rot in the ground, and at a certain time, dig them up and send them for storage. Before planting tulips in open ground or a greenhouse, you need to treat the bulbs to avoid contamination of the planting material and protect them from damage by insects. Where to plant tulips and how to provide them with decent care - read below.
Where to plant tulips: planting bulbs in autumn in open ground
To successfully grow tulips, you need to choose a suitable place for them, plant them correctly and give the flowers necessary care. Let's look at the growing process step by step.
Where to plant tulips largely depends on their class and variety. They are quite demanding on lighting, as they are light-loving plants. Tulip bulbs are planted in a well-lit and, preferably, open area. They can also grow in the shade, but they will bloom later, the flowers will be smaller, and the daughter bulbs will develop less well.
However, given the early flowering time of tulips, planting tulip bulbs in the fall can also be done under trees with a sparse crown. This primarily applies to early flowering varieties. By the time they bloom (late April), there will still be no foliage on the trees, so the lighting even through the crown will be quite sufficient.
When growing tulips in open ground, their predecessors can be almost any vegetable or ornamental plants. The only exceptions are vegetables of the nightshade family (potatoes, tomatoes, eggplants, bell pepper) and all bulbous flowering plants (daffodils, lilies, gladioli, hyacinths, etc.).
Preparing the soil for planting tulips
There are also a number of requirements for soil for tulips. It should not be heavy, loose, fertile, well-drained, with a neutral or slightly acidic reaction. Flowers do not tolerate heavy clay soil, as well as waterlogged soil with stagnant water. You should not plant them in lowlands or recesses - melt water will remain there for a long time in the spring, which can lead to rotting of the bulbs.
Before planting, the soil for tulips must be prepared: it is dug deep with the simultaneous application of fertilizers: 5-6 kg are applied per 1 m2 of land organic fertilizer(rotted manure, compost), 2-3 kg of peat, 50 g of nitrophoska. In heavy clay soils, add an additional 5-7 kg of coarse granular sand per 1 m2. You can replace sand with the same volume of perlite. Slaked lime is added to very acidic soil at the rate of 200 g per 1 m2. Alkaline soils are corrected by adding calcium sulfate to them when digging. The dug up soil is then loosened, breaking up large clods of earth. Preparation should be carried out 1-2 weeks before planting.
As already mentioned, bulbs are planted from the end of September to the end of October (with minor adjustments for different classes of tulips).
Regardless of whether it is your planting material or purchased, the bulbs must be disinfected before planting. For this, a 2% solution of Fundazol is usually used. The bulbs are immersed in small portions for 30-40 minutes in a container with a solution, then dried in the open air for 20 minutes.
Before planting, planting furrows 10-15 cm deep are prepared in the designated area, depending on the size of the bulbs. When growing children, the depth of the furrows should be 6 cm. The distance between the furrows in the flower bed should be 20-25 cm. The distance between the bulbs in the furrow depends on the dimensions of the given variety.
When planting and caring for tulips in open ground, the bulbs are placed in a furrow with the bottom down or slightly to the side. After this, the furrows are covered with soil, leveled and watered at the rate of 3-5 liters per 1 m2. 10-14 days after planting, the bulbs actively begin to grow, producing sprouts up to 1.5 cm and roots up to 3 cm.
How to care for tulips so that the bulbs do not freeze? Before the onset of frost, tulip plantings must be mulched with a 6-7 cm layer of sawdust or peat. Mulch will slow down the freezing of the soil and protect the bulbs from frost. Early-blooming tulips have low winter hardiness, so they need to be additionally covered with straw or spruce branches. Mid- and late-blooming varieties do not need shelter.
Planting and care in spring: how to care for tulips after flowering
Planting and caring for tulips in spring is a separate topic in growing these plants. Immediately after the snow melts, it is necessary to remove the cover so that the bulbs do not overcook. Mulch is not removed, as it protects the soil from drying out quickly and prevents the growth of weeds. Care for tulips in open ground begins from the moment the first shoots appear. First of all, it is necessary to give the plants fertilizer for good growth roots.
When caring for tulips in the spring, grooves 7-10 cm deep are made between the rows and dry complex mineral fertilizer is embedded in them. You can use nitrophoska (50 g/m2) or a mixture of individual fertilizers: superphosphate (60 g/m2), urea (30 g/m2) and potassium salt (30 g/m2).
The second feeding is done when the first buds appear. This time, fertilizers are given in liquid form. Mineral fertilizers are added to the mullein solution. For 10 liters of solution, add 30 g of potassium salt and 15 g of superphosphate. Nitrogen fertilizer is no longer given. The solution consumption is 8-10 liters per 1 m2. Liquid feeding is repeated again after 7-10 days, during active budding and the formation of baby bulbs. It is necessary for intensive flowering. In addition to fertilizing, tulips require watering. Water from the moment the first shoots appear, once every 8-10 days, using 7-10 liters of water per 1 m2.
During flowering, intensive growth and maturation of baby bulbs occurs simultaneously. They also require extra food, so they give one more feeding. Without it, flowers and bulbs will compete for nutrients. This feeding is made in composition and rate the same as the previous two.
Some taller tulip varieties may require a slightly higher dose of fertilizer than the average given here. In general, a deficiency of certain minerals is usually judged by appearance plants. For example, when tulips do not have enough nitrogen, their stems droop, and the leaves and flowers turn out smaller than is typical for this variety. A lack of potassium and phosphorus affects the appearance of a bluish color on the edges of the leaves.
Flowers are cut in the morning. For cutting, choose tulips at the colored bud stage. You need to cut it either with a well-disinfected tool or break off the stems. When cut, tulips remain fresh for 7-12 days, depending on the variety. And one more important point- when cutting tulips, you must leave at least two leaves on the stem so that they can provide adequate nutrition to the bulb. Otherwise, neither the mother bulb nor the baby bulbs will be able to fully develop.
How to care for tulips after flowering in order to preserve the bulbs? After the tulips have faded and the leaves have dried, you can start digging up the planting material. Optimal time This occurs when the leaves of most tulips turn yellow at two-thirds of their length. It is not recommended to leave the bulbs in the ground longer.
Where to plant tulips and how to grow bulbs in a greenhouse
Tulips are perfect for growing in a greenhouse. There you can time their flowering to coincide with any time. The method by which plants are forced to bloom at unusual times is called forcing. When growing tulips in a greenhouse, only large mature bulbs are used for forcing, since the plant will be nourished by the substances accumulated in it.
Usually the bulbs are dormant from the moment of digging until next spring, but there are a number of techniques that awaken them ahead of schedule. The entire forcing period takes an average of 16-22 weeks, depending on the variety (early flowering varieties have a shorter forcing period).
There are two ways of forcing tulips - traditional and new, Dutch. The first method is less labor-intensive; amateur gardeners prefer to use it. With this method, after storage, the bulbs are transferred to containers, at the bottom of which a layer of coarse grains is poured. river sand 5 cm thick. The bulbs are pressed with their bottoms into the sand, sprinkled with a layer of sand on top so that it completely covers them, and moisturized well. After this, the containers are placed in a room with a temperature of 10-12°C. Before growing tulips in a greenhouse, during the entire rooting period you need to regularly moisten the substrate, preventing it from drying out. In such conditions, the plants are kept until shoots 8-9 cm high appear above the surface of the substrate.
Next, the containers with tulips are placed in a greenhouse. For the first 3-4 days, the temperature is maintained at 12-14°C, and the containers themselves are covered with dark film. The film is folded back for ventilation 2-3 times a day.
Then the film is removed, and the temperature in the greenhouse is raised to 18°C. The substrate continues to be moistened regularly. Plants are given full light. They also need to be additionally illuminated for 3-5 hours a day. In such conditions, the tulips will bloom in 2-3 weeks.
It should be taken into account that only early-flowering varieties of tulips are suitable for early forcing (January - February). Medium flowering ones are also suitable for forcing by March. Late-flowering varieties are used only for forcing by April.
orhide.ru