All the secrets on how to properly apply lipstick - Step-by-step instructions. How to stylishly paint walls without extra expenses, using a regular sponge, rag and broom. Paint your lips correctly with lipstick.
To understand how to properly apply lipstick to your lips, you need to determine their type, shape and choose high-quality cosmetics.
Several attempts in front of the mirror will show an unsurpassed result.
Which lipstick color to choose
Observe correct technique applying lipstick is only part of the success. After all, if the color is chosen incorrectly, the face can visually age. Insufficient whiteness of teeth can also occur due to lipstick that is not suitable for the girl.
A variety of shades allows you to experiment and add solemnity to your image even after a working day. The main thing is that the lipstick tone goes well with your skin color. For example, fair-skinned girls are recommended to choose cool tones. The range from light pink to plum is perfect.
Dark-skinned young ladies are better off paying attention to bright specimens. Shades of peach and brown are suitable. Girls of average type will look good with red and golden tones of lipstick.
The following lipsticks are suitable for girls depending on their hair color:
- coral, berry, soft peach and mauve are intended for fair-haired girls;
- brown and terracotta shades make-up artists recommend for red-haired beasts;
- bright shades are amazing for girls with dark hair.
You can also choose lipstick based on your eye color. For example, brown and scarlet shades are suitable for brown-eyed beauties. Cherry and beige colors harmonize perfectly with the pupils blue color. Terracotta and orange lipstick are recommended for green-eyed representatives of the fair sex. Light beige and cherry shades highlight the depth of gray eyes.
Makeup artists recommend taking age into account when choosing lipstick. For young girls, it is best to give preference to light pearlescent glosses. Thick and matte ones add solidity to the image, which looks out of place in this case.

For women who are about thirty years old, it is appropriate to wear bright makeup. Satin and satin texture will emphasize youth and freshness of the skin. Women over forty do not need to choose pearlescent glosses. Bright shades also inappropriate because they highlight wrinkles around the mouth. Cherry and plum shades are ideal for mature women.
Advice! If you choose the wrong shade of lipstick, do not rush to throw it away. Perhaps if you mix it with another shade, you can get the perfect tone for you.
How to apply lip pencil correctly
Lipstick adds shine and beauty to makeup, but from a functional point of view, you can’t do without a pencil. It can be found in any cosmetics store. When choosing, you need to pay attention to the fact that the pencil is waterproof.

Lip liner is also used as a base for lipstick to make it last longer. In this case, you need to mark the outline and shade the line inward, gradually shading the surface. Do not apply the pencil under the glitter, because there is a risk of the color pigment peeling off, which collects in the folds and looks ridiculous.
You can use a pencil instead of lipstick to get a matte effect. The main thing is to apply cosmetics in a thin layer. The shade doesn't matter.
Most often, the pencil is used to enlarge and reduce lips. It is especially appropriate to use it if the surface is flat.


Advice! Lip pencil can be used as a base for eye shadow and as blush. The basic rule is to choose quality product. The color is selected individually in accordance with the application area and color type.
Technique for shaping lips without pencil
You can diversify your usual makeup using different techniques applying lipstick:
- Ombre involves treating the visible part of the mucous membrane with matte, preferably red lipstick. The color is applied with strokes to the center of the lips. The torn border looks harmonious. You can experiment and apply a gradient not only from the corners to the middle, but also from upper lip to the bottom.
- In 2017, piercing is again fashionable, the imitation of which on the lips can be done with gold lipstick. To do this, you need to apply a vertical golden or metallic stripe in the center of your previously painted lips.

- Matte lipstick does not always give the desired effect, so to create texture, it is better to choose a glossy one, which is nailed on top with crumbly shadows matched to the tone. To avoid monotony, you can experiment with different shades decorative cosmetics. When doing this type of makeup, choose a flat brush made of natural bristles. Before applying eyeshadow, shake lightly.
- Colored shadows stick worse to lipstick than fine glitter. If the entire surface is covered in glitter, watch the container you drink from. There is a risk of getting it dirty. This option is possible, but it is more appropriate when used in combination with gloss rather than lipstick.

- It is important to apply the effect of chapped lips. To create it, you need to apply lipstick with patting movements, without highlighting the contour. Carelessness is back in fashion.
Advice! Don't be afraid to make bold decisions and use original techniques applying lipstick. The effect on your lips will look different than in the photo on the Internet. You just have to try to find the perfect look for yourself.
Red lipstick suits everyone, the main thing is to know how to apply it
Red lipstick is considered universal, although because of its brightness, not every girl will risk purchasing it. It is suitable for any color type, the main thing is to choose the right shade.
Scarlet lipstick ideally hides small cracks, wounds and even colds on the lips. Also used to change the contour.
If a girl doesn't risk using red lipstick, she simply doesn't know how to use it. It is believed that bright makeup indicates the vulgarity of the owner. But in fact, a new image will eliminate indecision and give confidence and sexuality.


How to properly apply red lipstick? Makeup artists distinguish three main methods:
- When applying makeup to your face, you need to lightly powder your lips. Then, from the stick with a thin pointed brush, draw a large number of lipstick. With bold movements, the contour is drawn starting from the upper lip. Then a thin layer of powder is applied again and the contour is drawn. After this stage, the inside of the lips is painted over. It is recommended to use a brush to apply the color perfectly. Once your lips are complete, apply powder around the area to highlight the edges of the color.
- After completing the basic makeup, apply a thick layer of base to the lips. It is advisable that it contains cosmetic silicone to smooth the surface. In addition to smoothness, the base increases the durability of the lipstick. The outline is drawn with a pencil, and the entire surface is filled with a brush and lipstick. The lipstick should be layered using tapping movements until the desired shade is obtained.
- You can do without a contour pencil if, before applying lipstick, you treat the edges with a colorless wax pencil. The color is then applied to the entire surface. Use a paper towel to dry your lips to prolong the color's longevity. After which cosmetics are applied again in a thick layer.
Don't be afraid to wear red lipstick. It reveals femininity, sexuality and speaks of the courage of the individual.
Advice! When choosing scarlet lipstick with a bluish tint, be careful, as the lamps in the store emit a cold light and the cosmetics look paler than they really are.
Features of applying dark lipstick
Dark lipstick becomes a bright accent in makeup. When choosing a shade, you need to consider your skin color. Fair-skinned blondes are recommended to choose purple tones, and dark-skinned brown-haired women should choose plum tones.
Before treating your lips, you need to perfectly even out your complexion tone. To accentuate the lower part, use the sculpting method. That is, correction powder is applied to the cheekbones and side areas of the forehead. Light tone highlight the center of the face.

Basic requirements and approaches to makeup under dark lipstick:
- one color scheme for eyes and lips;
- eyeliner for brown-haired women should be black, for blondes – brown;
you need to exclude blue eyeliner, since in combination with rich - a shade of lipstick, naturalness disappears;
- "Smoky Ice" goes with dark lipstick, if the shadows chosen are not too bright (brown-haired women can use the classic technique with coal-black makeup, and brown colors are suitable for blondes).
- Also hides all lip imperfections, including dry crust.
Advice! Remember that brightly painted lips are in harmony only with discreet eye makeup.
How to add matteness to your lips with lipstick?
Matte lips have been a real trend of the season lately. However, choosing a lipstick with the right texture is not so easy. That's why makeup artists offer original ways creating perfect lip makeup.
The main advice is to combine matte with rich dark shades. Pale color schemes are lost and do not look seductive.
To pre-treat your lips, you can use a scrub that removes dead skin particles. It contains a mixture of honey, granulated sugar and olive oil.


To ensure that matte lipstick stays on your lips for a long time, you should moisturize your lips with any vegetable oil before applying it.
Unlike glossy lipstick, matte lipstick does not need to be rubbed with your lips. Use a special synthetic brush to paint the corners.
At home, you can do without special matte lipstick. Makeup artists recommend using a regular lipstick without glitter to apply lipstick. Then a regular dry napkin is applied on top and sprinkled with powder or blush. The napkin removes shine, but maintains color saturation.
Advice! To enhance the color of matte lipstick, you need to apply a concealer to your lips as a base.
Change the shape of your lips with lipstick? Just!
You can change the shape of your lips yourself using cosmetics if you know the secrets of applying makeup.
- You can increase the volume using a pencil. The corners are carefully painted, and coral or pink lipstick is applied on top. The lips are made plump by a shimmering gloss that is applied to the already painted surface.

- Foundation will help reduce volume. With its help, they hide their own lip contour, and draw a new border below with a pencil.
 Perfect bright lips - step by step
 The main thing is not to forget that even thin lips look seductive if you do the right makeup. Therefore, do not try to increase the volume so as not to look funny.
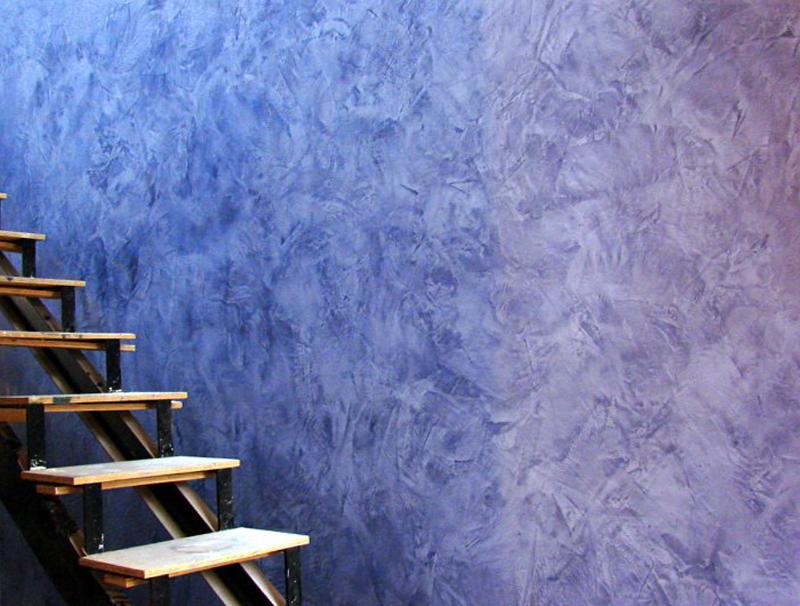
Plain smooth surfaces can easily be given a wonderful shimmering effect by treating them with a sponge. This technique is very simple to perform and ideal for finishing large surfaces. However, it can also be used to decorate individual pieces of furniture or other items. So, let's begin to master the technique of applying paint using a sponge.
Materials and tools:
- water-dispersion paint (preferably latex, so that the surface can be washed later)
- roller
- paint tray
- sponge
- paper
- gloves
Why did we choose emulsion latex paint? It is easy to use, does not smell and is not too expensive. Please note that the choice of sponge also affects the result of finishing work; it is best to do the work with a natural sea sponge.
Preparation:
Before you start painting, it's best to check if the colors you choose go well together. To do this, apply paint to a sheet of paper or a piece of wallpaper and apply samples to the wall.
The walls to be painted must be smooth, free from dirt and dust. Be sure to thoroughly prepare surfaces for painting.
Process
- Pour some paint into the tray.
- Blot the roller in the paint and squeeze it well so that it does not drip or flow.
- Apply a base coat of paint to the wall.
- Let the surfaces dry for a couple of hours.
- Prepare the sponge for work by soaking it in water and squeezing it out.
- Pour paint into a clean tray for the second coat.
- Lightly dab the sponge into the paint. To ensure that the paint does not drip and uniform prints are obtained, the sponge should be almost dry.
- Press the sponge against the edge of the tray or blot with paper to remove excess paint.
- Start finishing from the top of the wall, lightly pressing the sponge onto the surface.
- Let the second layer dry.
- Rinse the sponge well and prepare the paint for the third coat.
- After this, we apply a third layer of paint with a sponge, and try to fill the gaps between the prints of the first layer. The base layer should also show through a little.
- If you are using one color, it is better to place the prints closer together so that the layer is even. If there are several colors, then, on the contrary, slightly shift the prints in relation to each other. Avoid overlapping prints, especially in corners and near doors. Rotate the sponge periodically to change the pattern.
Important! To prevent adjacent areas from getting dirty, the sponge can only be used at the third stage of work. At the second stage, apply paint on top of the base layer with a brush. Then remove excess fresh paint: simply blot it with a clean sponge.
If you are a novice decorator, try using a sponge to paint the walls. It's fast, it looks great and it's hard to mess anything up.

Add a visual punch to a plain, plain wall with a sponge. It's fast and easy way achieve subtle texture and add depth to your walls. And it’s okay if you mess something up; less “ideal” stains can be easily removed. Just follow our advice, study the photos and practical recommendations, and you will achieve confidence and avoid mistakes.

What you will need:
Transparent gloss paint
Roller for the base coat of paint
Wide masking tape
2 plastic painting buckets
Roller handles
Paper plates
2 natural sponges
Narrow brush or sponge roller
Instructions:
Using a paint roller, apply a base coat to a clean, dry wall and let dry.
If necessary, apply a second coat and let it dry. Use wide masking tape to protect doors, windows, ceilings and floors.
In a painting bucket, use 1 part rich brown and 4 parts latex glaze. Fill another bucket halfway with water to rinse the sponges.
1. Pour a small amount of mixture onto a paper plate.

2. Wet the sponge with water and squeeze thoroughly. Dip a sponge into the icing mixture and wipe off the excess on newspaper. Practice on a piece of cardboard, apply the sponge lightly to the edges of the color and rotate the sponge to achieve a messy effect. Once you are comfortable with the color intensity and texture, move on to the wall, starting from the top corner.

3. Coat sequential square sections, dipping a sponge into the glaze mixture as needed.

4. Once the sponge is saturated with the glaze mixture, rinse it in a bucket of water and wring it out thoroughly before continuing.

5. After processing 1 square meter, wet a clean sponge in clean water and squeeze thoroughly. Apply a damp sponge to the freshly applied glaze to remove some of the glaze from the wall, thus allowing the base layer to show through slightly; Rinse and wring out the sponge as needed.

6. Continue repeating this technique until you complete the entire wall, then move on to another.
Color combinations and tips
There is no magic formula for choosing the perfect color combination. If you like a subtle texture, choose colors that are not very contrasting and don't let the base color show through too much.
For bold texture, choose sharply contrasting colors. Or try something in between. In short, experiment with colors and lighting. In the meantime, we will offer you several color combinations that may inspire you.

Serene blue combination

Stunning pink combination

Confident yellow combination

Fresh green combination
Tips:
Paint a sample board to evaluate possible options. When using contrasting colors, swapping the colors of the base layer and the top layer can completely change the result. For example, use a sponge to cover a warm orange base layer with dark brown.
Use base and top coat colors from the same family. For example, a light blue layer may be topped with a darker blue, or vice versa.
Work with a partner and use two sponges. One person can apply the glaze with a sponge, while the other can remove excess glaze.
Decorative painting walls - one of the popular types of decoration. It is very diverse, individual, and with its help you can create a unique, beautiful room that will have no analogues. Nowadays, this type of wall decoration, such as decorative painting, has become a strong competitor to ordinary wallpaper.
Dyes for wall decoration, as a type finishing material, is characterized by many advantages:
- The service life of painted coatings is several times higher than that of wallpaper or plaster.
- There are no joints on the painted surface, resulting in a perfect continuous picture.
- Huge assortment of different color range and effects.
- Moisture-resistant properties help make walls unique even in the kitchen and bathroom.
- In case of repainting, there is no need to clean the existing paint layer.
- Usage water-based paint when decorating, it guarantees an environmentally friendly surface that does not emit toxic substances and does not cause allergies, is ideal solution finishing a children's bedroom.
- Regardless of the base surface (be it concrete, drywall, plaster), it fits equally well on the wall.
Decorative painting of walls has only one requirement for the coating - it must be even.

Painting tools
Apart from the paint itself, painting walls in an apartment is done using the following tools:
- roller;
- spatulas (metal, plastic, toothed, rubber);
- sponges;
- hard brush;
- sandpaper;
- stencil (for the effect of a pattern on a painted wall).

Before you start decorating the walls, you need to decide what decorative effect I want to get it so as not to buy an extra tool. Although the price of rollers and brushes is low, you can use them more than once.
Preparing the walls
If decorating a wall with paint is being done for the first time, you need to prepare the surface for this. design solution. Preparing walls for primary painting is carried out in stages:
- Cleaning the coating from old finishes.
- Surface priming.
- Inspection for flaws, which are repaired if necessary.
- Uneven surfaces are puttied and sanded.
- Re-priming.
Related article: All about methods of painting walls with water-based paint
After all the work done, the wall is ready for decorative painting.
In order for the paint to lay evenly on the walls and to avoid any defects on the coating, you must wait until the putty mixture and primer on the wall have completely dried.

Types of wall decoration with paint
Due to the fact that decorative paint is too expensive, an alternative is in demand among construction professionals - artistic painting of walls with ordinary cheap paint. There are several varieties to create a unique room using regular paints. Let's take a closer look at them.
This is the name for painting walls with decorative paint, which creates the effect of an old, shabby surface. To create such a masterpiece you need:
- Cover the surface with the chosen color.
- Apply acrylic painting to create a shade contrast.
- Apply colored glaze to the surface in combination with the shade of the painted wall, smooth it evenly over the surface with a wide brush, and when all surfaces are covered with glaze, touch the uncured paint with the same brush.
- A round paint brush should be poked in a chaotic manner over the surface, thus making the walls look antique.

There is only one drawback to this method of application: all irregularities and bulges become more noticeable.
This decorative coloring is a great idea for decorating an office; it gives the impression that the walls are covered in leather. After preparing the surface, you need to start finishing:
- We cover the walls with latex paint of our favorite color.
- Making a suede tassel.
- Mix the glaze with latex paint, slightly darker than the tone of the surface.
- We cover a piece of the surface with the mixture, moisten a suede brush in water and squeeze it out, lightly touch it over the not-dried coating, making streaks and partially removing it.
- We blot the existing noticeable lines with a piece of wet suede to give a natural leather finish.

Venetian plaster effect
One of the most beautiful and decorative ways painting walls. To recreate the Venetian effect, you must complete the following steps:
- Place latex paint in a wide container. Sprinkle a little pigment for paint on one side, carefully stir half with a stick so that the dark and light sides come out in the container.
- We take a lighter paint on a spatula and apply it to the coating like regular plaster.
- Dip a spatula in a dark color and cover a piece of the wall.
- When light and dark spots, we begin to move the spatula along the wall in different directions to evenly smear the colors for a harmonious look.
Related article: Is it possible to plaster over paint: recommendations for preparing walls
On finishing stage Venetian plaster is sanded finely sandpaper and rubbed with a special wax composition.
To create the effect " Venetian plaster» It is necessary to use only a plastic spatula during the work.

Wrinkled skin effect
This effect is easy to create, but requires patience, because everything is done slowly, gradually.
- Take a piece of paper and paint a piece of the wall according to its size.
- We crumple the sheet, apply it to the surface, begin to smooth it, while creating the outline of a crumpled coating.
The entire wall is gradually processed in small pieces.

In the video: the effect of wrinkled (worn) leather on the wall.
For decorative painting of walls, you can use not only purchased tools, but also improvised means. A simple rag roller creates an interesting indoor effect that is suitable for children's rooms. In case of use this method The surface preparation may not be ideal, because this type of finish hides all the imperfections on the wall.

Roller painting steps:
- Apply the first layer of paint and wait for it to dry.
- Dilute another shade of the base color (slightly darker than the previous one).
- We soak a rag in paint, twist it to make a tourniquet, and wrap it around the roller.
- We paint from the very top of the wall to the bottom in different directions to obtain a textured pattern.
Types of paints
Decorating walls with special dyes for wall decoration is a variety of materials. They have many color tones and look beautiful. Types of decorative paint differ in properties based on their composition.

According to the components of the paint composition, they are divided into:
- acrylic;
- latex;
- water-based;
- alkyd and oil.
Acrylic paints
They are most often used for painting walls in an apartment. They are popular due to their price-quality ratio. They have the following properties:
- fireproof;
- make walls strong and durable;
- resistant to temperature changes;
- dry quickly, create a protective film on the walls;
- adheres well to the coating;
- environmentally friendly;
- have an assortment of more than a thousand.

Latex paints
- no pungent odor;
- high degree of fire safety;
- the paint does not react to sudden changes in air temperature;
- Possible dilution with plain water;
- dries quickly after application;
- abrasion resistance;
- environmental Safety.

In addition to positive qualities, there are also negative ones. The color range of this type of paint does not have bright colors, and under the resulting film, good conditions for living biological organisms. Before using latex dye, the surface must be well primed.
Related article: Calculate the required amount of paint for the walls and ceiling
Water-based paints
They are in demand for painting rooms without creating an interior; their price is low, and they cope with the direct purpose of painting surfaces. The advantages of water emulsion include:
- low cost of material on the construction market;
- low consumption during application;
- harmless to health;
- have good permeability to moisture.
Among the disadvantages of water-based coating, experts highlight the speed of washability from the coating, as well as the need for a certain temperature in the room during painting.

Alkyd and oil paints
Alkyd and oil based dyes are characterized by rich color finishing, durable layer. The positive qualities of these types of finishes are:
- rich beautiful colors;
- very durable layer when dry;
- long service life.
Negative qualities are also present: there is a very strong smell during painting, high consumption material, high cost, small range of colors.

Many people, in order to save money, want to paint the walls with their own hands, without the help of professionals. But how to apply decorative paint on one's own? There are some recommendations from experts regarding the application of decorative paints to walls:
- Before painting the surface, it must be primed to avoid mold.
- Prepare the room by covering the floor with protective film.
- Stir the paint well after opening it.
- When using a brush, apply horizontal stripes and then spread them vertically.
- If you use a roller, you need to roll it over the tray with the material, then from top to bottom, then cover the walls with paint, pressing the tool well (for a uniform color).
In order for the coating to be evenly colored, you must first apply a layer with a brush, and then go over the painted surface with a roller. If desired, you can use a variety of decorative painting methods.

Decorative painting of walls with your own hands is a very real task. The main thing is to follow the instructions for use of the material along with recommendations for application.
Learning to decoratively paint surfaces (2 videos)
Various decorative painting effects (28 photos)


Decorative cosmetics have existed for more than a century, and now most women use mascara and other products every day. Sponges are everything, they reflect facial expressions and emotions. Therefore, it is important for every coquette to know how to learn how to evenly, beautifully and correctly paint her lips step by step from a photo, otherwise the makeup will be the same type every day. Such knowledge will help you create the perfect coverage, like in a fashion magazine.
Often women prefer to buy lipstick of the same color, for example, pink pearl or bright red. Makeup in this area is corrected more often than makeup on the eyes or face as a whole. Eating, walking in the rain, or simply having dry skin that quickly absorbs cosmetics - all these factors reduce the durability of cosmetics applied to this area. But now there are many techniques on how to make sponges perfect. You can make them visually larger or thinner, apply them with a brush, mix shades like an artist on a palette. It is ideal to have several options suitable for going out with casual wear or evening wear, in a color scheme appropriate to the occasion.
How to paint your lips beautifully and correctly
To create a delightful image, you need to follow certain rules in makeup:
- You shouldn’t grab the first lipstick you see off the store shelf, even if it’s the trend of the season;
- the color of the cosmetic product should be in harmony with the shade of the skin and eyes;
- if the clothes are bright, it is better to choose a neutral pigment tone;
- To complement the pale or achromatic colors of the outfit, you can choose a bright color, with the exception of a tone-on-tone combination;
- top part you need to paint separately from the bottom, and not blot it to save money in order to get beautifully painted lips;
- to obtain a more saturated color, you can first apply foundation or primer;
- with a business suit you should not use bright mother-of-pearl or glossy coatings;
- for girls with dark skin, plum, wine and lilac shades are suitable; blondes should avoid them;
- Matte ones make the sponges visually narrower, while pearlescent ones, due to the reflection of light in different directions, will hide minor defects and visually increase the volume.
We paint our lips correctly with lipstick
This cosmetic product is presented in a huge variety in the retail chain. As a rule, it is in any handbag. The function of this product is not only decorative, it also protects against weathering and frost. Every woman is beautiful in her own way, but to highlight natural beauty, you need to follow certain rules and follow the sequence of application.
Makeup artists advise using skin peeling once a week. The application steps are as follows:
- painting lips begins with cleansing their surface with tonic and moisturizing with nourishing cream 20 minutes before using decorative cosmetics;
- Next, you should apply a primer or foundation, so the base coat will be more expressive;
- draw an outline with a pencil; if a pencil technique is used, the color may match or be darker than the main coating;
- apply the contour with a brush using a pencilless technique;
- then you can start applying the first layer of lipstick;
- then press a dry cloth to the surface, apply a little powder through it;
- Now you can use the stick a second time;
- the final layer can be glitter.
This option will create an expressive and dense coating. For summer makeup, you can skip some steps, then the question of how to perfectly paint your lips can be solved more easily. For example, do not apply primer, apply dye only in one layer. Pencil lining is not necessary for daytime makeup, but for evening makeup it will help enhance the expressiveness of the image. The color is chosen to match the tone or a little darker, but never lighter.
The question itself is interesting - which is better: applying lipstick from a tube or with a brush. The brush has the following advantages: all areas are painted over. You can mix colors, as on a palette, apply a contour, make transitions from one shade to another.

The secret to painting your lips beautifully and correctly is that you can apply a thicker layer with a stick. So you need to choose based on your specific needs. You can apply the first layer with a brush, and the final layer directly from the tube. For the effect of color depth, you can take different but similar shades. For example, the initial layer of lilac is distributed with a brush, the second - from a tube, the color of wine berries. This produces an interesting effect.
Another application method is finger tapping. The result is a muted shade feel, ideal for narrow lips. You can apply a little light glitter to the central part.
How to properly line your lips with a pencil
There are no trifles in such a matter as makeup. Therefore, everything is important, from the choice of products to the nuances of application. There are two types of pencils to use in coloring the lip area. To trace the outline and mark individual zones, use a hard pencil. First you need to choose it according to its purpose. Basic rules for choosing a shade:
- The color is the same as the base coat or a little darker. With red lipstick - the same shade or one tone darker, with lilac - the same or dark purple.
- For a light coating, you should not outline the edge with black or dark brown; this is an outdated trend of the nineties, and it also looks vulgar.
- Colorless is needed to secure the outline. It is important to know how to line your lips with it. This pencil is used together with glitter. It contains mother-of-pearl elements.
- White - to visually enlarge the contour and central part. It’s convenient for them to draw a checkmark at the top. Often contains shimmering particles that visually add volume.
- When choosing in a store, you should not take a modification with a structure that is too soft. They won't be able to draw clear lines.
If the pencil acts as a means for creating a contour line, the sequence of actions is as follows:
- Mark the tick on top with white, then draw it from below, but not at the center, but closer to the edges.
- Do not outline the corners, highlight the central part with bronzer. Blend with gentle movements.
- Now you can outline everything with the main color. Many people are interested in how to do proper lip makeup; if you can’t immediately draw the right line, you can put dots and connect them.

The second use of pencils is for complete coloring of the lip space. Here a soft pencil or lipstick pencil is used. All leading manufacturers have them - Maybelline, Yves Rocher, Avon and others. The entire surface is painted over, top and bottom, and then shaded with a brush. An excellent option for quick make-up.
Pros - it turns out to be more matte and less bright than lipstick, but you can focus on the eyes. If you want to know how to learn how to paint your lips exactly beautifully and correctly, step by step with photos, then the basic rule - to emphasize either the eyes or the mouth - has not been canceled. There is also a new trend - to make both bright, but this is more suitable for the catwalk or parties, where there is artificial light, and you need to attract attention. If you show up to work at the office wearing bright red lipstick and pearly blue eyeshadow, others will most likely perceive it as an inappropriate attempt to stand out.
Visually enlarging your lips is not that difficult. You need to go beyond the natural boundary by drawing a contour line. But no more than 1 millimeter, otherwise it will look unnatural.
How to paint lips for volume
Ideals of beauty change over the years. And if several decades ago the fullness of this area was not given importance, now all girls dream of plump lips. Not everyone will solve this problem radically, for example, with the help plastic surgery, but using cosmetics, you can achieve a lot.
The basis of all such techniques is the optical effect: everything that is light and pearlescent tones seems larger and more voluminous. First you need to choose the right products. Lipstick colors are nude, pale coral or brown, light pink. Texture is also important.

Matte, velor, velvety structures are not suitable. They will reduce the volume. Satin, glossy, pearlescent ones are good. Anything that has the effect of shine, shimmer and light reflection will help create the desired effect.
For outlining you will need a pencil in nude tones, close to the natural color of the skin. It is advisable to have two close shades - lighter and darker. The makeup stages are as follows:
- Apply nourishing balm. It will prevent the appearance of weathering and cracks.
- Preparation - base, foundation or primer.
- Trace the contour line with a light beige or pale pinkish pencil. The line can extend beyond the natural boundaries by no more than a millimeter. This will create additional volume.
- Now comes the most important part. Paint your entire lips with a darker color of lipstick, apply a lighter color on top of the more prominent parts, and shade the borders. This stage is performed with a brush.
- Apply a transparent gloss on top, with a pearlescent or other reflective effect. Makeup is ready.
A few secrets on how to improve the volume effect. You can use a plumper - gloss with components that have an irritating effect. This is usually pepper extract or menthol. Light pigment can be used to highlight the upper lip, the lower lip, or both. We must not forget about the depression, called a bird or a tick. It can be painted on with a white pearlescent pencil.
How to paint lips with gloss
When applying this, it would seem that simple remedy, there are some nuances. The shade and texture must correspond to the purpose. Vinyl, varnish textures - perfect option for a night club. Nude, soft shades are good for natural make-up in the daytime. For an evening out, products with microglitter will create an impression. In artificial light, the sparkles will shimmer beautifully, reflecting the rays in different directions.
Don't forget about your type. For ladies with dark hair, cool colors are ideal - wine, cherry, cranberry, carmine tones. For blondes and redheads - pinkish, beige, nutty options. For an office with a strict dress code for any appearance - the color of cocoa with milk, warm flesh tones.
Sequencing:
- The first step is cleansing and moisturizing. Lubricate with hygienic lipstick or nourishing balm. After this, gently rub with a brush to remove flaking epidermis. You can use Librederm Vitamin E Cream for deep hydration.
- Contour with a pencil. For the daytime option, you can skip this step.
- Apply glitter using a brush or applicator. If the product is in soft packaging, you can squeeze it onto your finger and apply it. Apply little by little, in small quantities, so that you don’t have to clean up the excess later.
- Use a napkin to wipe off excess and spills.
- AND last tip. Glitter wears off faster than other products. Therefore, it is better to take it with you to update it.
What to do to make lipstick last longer
The easiest way to deal with a coating that wears off is to carry a tube with you and touch up as needed. If during the working day several cups of coffee were drunk, a hamburger and a couple of cakes were eaten, one can hardly expect that even a long-lasting cosmetic product will remain in its original form. You'll have to apply another layer anyway.
Another option is to use long-lasting products. They don't wear off for a long time, but they dry out the skin a little. You need to remove this product with milk remover or something similar. To make regular lipstick last a long time, you can apply it as follows:

- moisturizer;
- wipe off excess, cover the entire surface with concealer;
- contour tone on tone;
- cover the entire surface with a pencil, shade with a brush;
- paint in the desired color;
- place a napkin on top and apply powder on it to remove excess;
- another layer of base coating;
- Add a small layer of powder on top of the makeup brush.
For a long-lasting coating, it is better not to use too greasy products. The effects of drinks will be reduced if you drink them from a straw. It is better to minimize contact with food, otherwise no tricks will help. Dark and matte lipsticks last longer than light and pearlescent ones. You can use retainers, but most often this is an option for brides, not for every day, because long-term use can cause allergies.
Examples of makeup in different ways
With the help of cosmetics you can create completely different images - from a simpleton or a business woman to a femme fatale. Makeup examples with different designs lips:
- Natural - despite its apparent simplicity, it will require effort, the main thing here is to create the effect of naturalness. Apply foundation all over your face to create the effect of a healthy skin tone, as if you were washing your face with dew every day. Apply peach or pinkish blush with a brush. Use a beige pencil to outline the outline, apply lipstick of the color pink rose, but not too bright and without mother-of-pearl. Powder a little on top and make a second layer.

- Focus on the eyes for going out - outline the eyes with a pencil like a cat. Apply dark gray and pearlescent shadows to the upper eyelid and temple. Under the eyebrow there is a stripe of white pearlescent. Blend the borders, apply blush with shiny particles in the direction from the corner of the mouth to the temple. Outline the mouth with a pencil, then shade the entire surface and smooth it out with a brush. Apply a little glitter to the protruding parts. Straight colored hair will look beautiful with this makeup, but you should not combine it with curls.

- Focus on the lips - cover the face with base, highlight the cheekbones a little with pale blush. Use gel to straighten eyebrows, apply brownish-beige shadows to the upper eyelid. From the upper eyelid to the eyebrow arch, distribute a thin layer of whitish shadows. Outline the mouth with dark red, 1 millimeter away from the natural border. This way the image will be more sensual. Apply dark cherry pigment from the tube. Blot lightly with a napkin and powder. Now comes the second layer of cherry lipstick. Next, apply vinyl gloss one shade lighter. This makeup is suitable for brown-haired women.

You can experiment a lot with lip makeup and combine it in different ways with the makeup of everything else. On the Aromacode website you can please yourself not only with a variety of cosmetics, which will help you do makeup, but also with caring creams, oils and perfumes from famous manufacturers.
To understand how to learn how to paint your lips evenly beautifully and correctly step by step so that you get gorgeous photos, you can focus on the advice of makeup artists and fashion shows, without forgetting about your individuality. Then the image will be stylish and harmonious.