We do our own kitchen renovations. DIY kitchen renovation step by step - personal experience with photos How to do a kitchen renovation yourself
Sooner or later, the moment comes when apartment owners begin to seriously think about major repairs, remodeling, and modernization of their kitchen. Some people are simply tired of the old dilapidated walls, ceiling, and worn-out furniture. Some people are not satisfied with what they think is too little functionality of the room. Someone wants to optimize a cramped space to the maximum. In any case, renovating a good kitchen results in a fairly large-scale and expensive undertaking.
In addition to the fact that you will have to purchase a lot building materials good quality, select new furniture and kitchen appliances, carry out or update communications, a very significant part of the costs should be planned for paying specialists. Is it possible to save money on this by renovating the kitchen yourself?
To make such a bold decision, it is necessary to have a very clear understanding of the amount of work that will be faced. The purpose of this article is to give the reader an idea of the specifics of kitchen renovations, the nuances of arranging this room, in such a way that one can realistically assess one’s strengths and capabilities before taking on the job.
Why is the kitchen so special?
The kitchen almost always has a special “status” compared to other rooms in the apartment, and there are special requirements for its equipment and decoration.
- Housewives spend a very significant part of their lives in the kitchen. This means that it is necessary to create the maximum possible comfortable conditions. It should be warm here, good lighting is required, and drafts should be prevented.
- Food preparation should be carried out in conditions that are as clean as possible. This means that you need to make sure that the premises meet the accepted sanitary standards. Cleaning the kitchen is done after almost every use and therefore should not cause undue difficulty.

- All necessary communications must be laid in the kitchen - water supply, cold and hot water, sewerage, gas mains (if the house is gasified), electrical wiring of the required power.
- Products used for cooking often leave oily, greasy traces and can be quite chemically aggressive. At the same time, the danger lies not only in the direct contact of such substances on the surface of the floor and walls adjacent to the working areas - one cannot ignore the abundant evaporation that is inevitable during thermal cooking. This means that even the ceiling is not completely immune from such influence. Materials for finishing all surfaces of the room and kitchen furniture must be selected so that they are not afraid of such influences and are easy to clean.

- At the same time, the kitchen is a room with high humidity - this must also be taken into account when choosing finishing materials. Whatever one may say, no one in the kitchen can be protected from liquid spills on the floor - hence the increased requirements for waterproofing.
- To minimize Negative consequences fumes and maintain a comfortable atmosphere in the kitchen, it is difficult to do without an exhaust system and/or autonomous cleaning air.
 Required element kitchens - efficient ventilation
 - The modern kitchen is full of technology, without which many housewives can no longer imagine their lives. It requires thoughtful placement of devices and their correct connection, taking into account operating safety rules.
- The kitchen itself and the placement of all the necessary elements in it must be thought out to the smallest detail - it should be as convenient as possible for the owners to use it for its intended purpose.
- Another important point is that in the vast majority of families, the kitchen is not only a cooking room. Usually this is a kind of “family club”, where a lot of topical internal issues are resolved and where “get-togethers” are held with the closest relatives and friends. This means that, if possible, it should be provided cozy corner where you can sit comfortably. And all the decoration of the kitchen should be such that it pleases the eye, and so that it would not be a shame to receive guests there.

And all this, as mentioned above, needs to be organized, most often, in a very limited space, where you can’t really “run away”. So the task is quite difficult.
What remains to be accomplished?
Actually, the kitchen renovation itself can be divided into many stages, each of which is important in its own way, but most often it is mandatory, with certain variations. It is enough just to list these stages to make it clear how large-scale the overall task is. So, “on the way to the finish line” the following will happen:
- Evacuation of the premises - usually required to be carried out in full, otherwise it is difficult to carry out measurements and planning.
- Checking the condition of walls, ceilings, floors, windows and doors, communications, etc.
- Carrying out careful measurements.
- Planning the placement of large stationary kitchen and household appliances.
- Preliminary selection of kitchen furniture - both in size and functionality. Drawing up a project for its placement.
- Thorough cleaning of all surfaces of the room.
- Carrying out repairs (updating) of the base floor surface.
- A similar operation is an inspection of the condition and basic repair of the ceiling.
- Repair of communications or laying of new ones, corresponding to the drawn up project.
- Checking the condition of the ventilation and possibly making changes to its design.
- Replacement or thorough restoration of windows and doors.
- Finishing work in the direction top down: ceiling, walls and finishing flooring with installation of skirting boards.
- Installation and suspension of stationary equipment, furniture, lighting fixtures.
- Connecting and checking the functionality of all systems.
Now it makes sense to consider these stages in more detail. However, not all will receive equal attention: some of them are simple and intuitive, do not require special explanations, others are related to technological processes, which are described in great detail and intelligibly in special publications on our portal (the corresponding links will be offered to the reader). But certain specific moments require a really close look.
Primary activities
Assessing the overall condition of the kitchen
It is impossible to properly plan repairs without conducting a thorough audit of the condition of the room - walls, floor, ceiling, communications. And it will be possible to carry out such a deep check only after the kitchen is completely emptied of furniture and equipment, since in most cases it will be necessary to remove the old floor covering. Ideally, it is better to carry out repairs in conditions where the family temporarily lives in another place. If this is not possible, you will have to somehow get out of the situation - temporarily leave the old stove in place, there is water in the bathroom, and a small work table can be moved wherever needed.
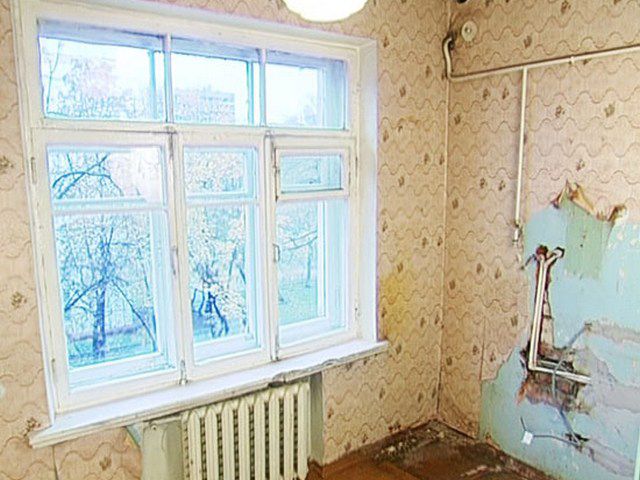
After this, it will be possible to soberly assess the condition of the room - whether it makes sense to leave something in its original state, or is a more radical approach required. It is necessary to tap all the walls to identify weak, unstable places. We have already mentioned the floor covering - in 99 cases out of 100, dismantling will be required. The condition of windows and doors is assessed - is it worth repairing and restoring them or is it easier to install new ones. The same applies to the heating radiator - perhaps the old radiator will not fit into the intended concept of the kitchen interior.

It is necessary to assess the condition of the water mains and sewerage systems - whether they need to be replaced, moved to another location, or completely remodeled in connection with the planned installation of, for example, a water heater or boiler.
The location of the outlets and their condition should be assessed. True, if renovations are carried out with the installation of new kitchen appliances, then Most likely, The wiring will have to be redone to accommodate the corresponding increasing load.
Once the room has been vacated, it will not be difficult to take careful measurements of all the parameters of the kitchen - down to the smallest detail. This — necessary condition for further planning.
Taking measurements
You need to draw on a piece of paper at least an approximate plan of the kitchen so that the results can be transferred to it directly during the measurements. Subsequently, the plan can (and even needs) to be “cultivated.”
What parameters are subject to mandatory measurements:
- Length and width of the room. The distance between opposite walls is measured, preferably not only along the wall perpendicular to them, but at several points. Don’t be too lazy to measure the diagonals to compare them - this will help you know for sure whether the rectangle lies at the base. If the room has a complicated shape - with a niche or part of a corridor, this is also transferred to the plan with all dimensions
- Height from floor to stream.
- The location of windows and doors - their distance from the walls, length and width, direction of opening of the sashes, for a window - the height of the window sill.
- Location heating device(batteries) tied to the wall on which it is placed, the passage of the heating riser and pipes to which the radiator is connected.
- The specific position of the gas riser, the meter (if there is one) and the mounted pipe with a tap for connecting the gas stove.
- Input location water pipes and sewerage. If a transfer is planned, you can then mark their desired position on the diagram.
- Vent size and position.
- The exact location of power outlets and general lighting switches in the kitchen.
- If there are other stationary elements in the kitchen (for example, mezzanines above the door, etc.), then they are also applied to the diagram.
For convenience, the reader is offered an approximate graphical diagram of the necessary measurements:
 Scheme of measurements. Decoding - in the table below
 | Designation on the diagram | Parameter |
|---|---|
| X | Length (width) of the room at the level of the base of the kitchen furniture |
| Y | - at the tabletop level |
| Z | - at the level of hanging kitchen cabinets |
| Such measurements are necessary, since these three values are not always equal to each other, and this can cause certain difficulties when placing furniture, for example, if the room narrows upward. The corresponding levels are indicated by the following symbols: | |
| - A– height of the base, usually 100 ÷ 150 mm; | |
| - b- tabletop height, 820 ÷ 870 mm; | |
| - With– top of kitchen cabinets – 2100 mm | |
| H | Total room height |
| D, G | Position of the gas riser relative to the corners, above and at the level of the slab connection point |
| V | The height of the ventilation vent. Its size and position relative to the angle are immediately measured. |
| R | Window position relative to the corner of the room |
| U | Dimensions (window length and height) |
| Similar measurements are carried out for a door not shown in the diagram. | |
| k And h | The height of the window opening and the height of the window sill above the floor level |
| W | Location of the heating riser. At the same time, the position and dimensions of the battery itself (if necessary) and its connection points are measured. |
After taking all the necessary measurements, you can proceed to planning the layout of the kitchen.
Planning your kitchen layout
The process of planning a future kitchen will require the owners to concentrate all their creative forces. The work is carried out with the expectation of many years of use without additional alterations, so there is a rush in this matter. absolutely inappropriate.
Surely the owners already have some established preferences for kitchen furniture, refrigerator, gas or electric stove or hob. This means that it will be necessary to determine exactly whether this choice corresponds to the size of the kitchen, and how it would be more correct to organize the placement of all items in the room with the expectation of maximum comfortable operation and taking into account existing rules.
How to approach planning from a practical point of view is up to everyone to decide for themselves. People with artistic talent prefer to make sketches in color - this makes it easier for them to imagine the future interior of the kitchen.

For lovers of the modern approach, if they have the appropriate skills, many computer applications have been created, from purely graphic programs (such as CorelDRAW) to real engineering CAD, which allow you to work, including with 3D layouts.

You can do it differently.
It’s easy to glue together a model of a room from a piece of packaging cardboard on a scale of, say, 1:10 (1 m of a real room = 10 cm on the model). On the same scale, models of large household appliances that will be placed in the kitchen and pieces of furniture are cut out of a piece of foam plastic.
By “playing with cubes,” that is, moving objects around the “kitchen” and hanging “cabinets” with a piece of plasticine, you can arrive at the optimal layout.
- Things to consider: The gas riser cannot be moved. True, flexible ones are now allowed gas hoses
- up to four meters long, so the owners have a certain degree of freedom with the location of the stove. ).

- Nobody forbids extending water and sewer pipes or completely laying new ones. At the same time, the permissible length of flexible hoses for connecting the faucet in the sink should not exceed 1.5 m (the shorter the better, since this is always a vulnerable area For safety reasons, a gas or electric stove should not be located near a window or near a sink. Also absolutely unacceptable
- its proximity to tall vertical pieces of kitchen furniture and a refrigerator. If planned exhaust ventilation
, then it is more advisable to place the slab as close as possible to the vent so that you do not have to pull a long pipe or box.
Now let's move on to the comfort of accommodation. There is a concept called the “kitchen work triangle.” This is a conditionally limited space, which accounts for the bulk of the housewife’s movements during the cooking process. Typically, such a triangle is defined by three “vertices” - gas stove
 , sink and refrigerator.
 The kitchen work triangle is the area where the housewife’s activities when preparing food are concentrated.
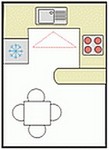
It is clear that in practice it is not always possible to achieve the ideal. Depending on the configuration of the room and its area, one of the basic schemes is selected, which can be slightly varied to suit specific conditions. Miniatures of such schemes are presented in the table. The red line marks the kitchen working triangle.
| Scheme | Short description |
|---|---|
 | Linear arrangement. Characteristic for narrow or elongated rooms. The triangle turns into a line, with the center - the sink, refrigerator and stove at the edges. Suitable for wall lengths from 2 to 3.5 meters, otherwise it will either be very crowded or the extreme points will be too far apart. |
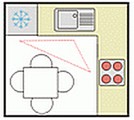 | Angular, L-shaped arrangement, usually used in typical small kitchens, although it is perfect for a spacious room. Even in the most cramped conditions, it becomes possible to isolate a surface that does not interfere with the working triangle dining area. |
 | Double row layout. It can be as shown in the diagram, or with rows arranged along opposite walls. The latter is relevant in those rare cases when a through passage is organized through the kitchen. |
 | The U-shaped placement spans three adjacent walls. One of the most successful locations, if the space of the room allows, since there should be a space of at least 1.3 ÷ 1.5 m between opposite rows. |
 | Island arrangement - either the sink or the stove is placed in the center of the room. It is clear that such an arrangement is only possible in very spacious kitchens, and, frankly speaking, it is designed “for an amateur.” |
 | G-shaped or peninsular arrangement involves a protruding part separating working space from the dining area. A bar counter is often used for this purpose. It is clear that the kitchen area should be quite impressive. |
Drawing up a project and selecting suitable pieces of furniture and kitchen appliances for it will certainly take a lot of time. However, without this there is no way to move forward. There are communications to be laid, power lines to be laid - all this is often associated with dirty and dusty work on gating walls and even floors, and you need to clearly know what should be done and where.
If planning is successfully completed, they proceed directly to practical repair work.
Video: some interesting ideas for a small kitchen
Carrying out repair work
Surface cleaning
If the renovation is carried out in a kitchen that has seen a lot of service before, then the surfaces of the walls and ceiling, doors and windows are probably saturated with old fumes, which must be gotten rid of.

All old covering is removed from the walls - be it wallpaper or painting, tiled cladding (if it is not intended to be left). When it comes to cleaning, there are no common tips - all possible means are used: spatulas, scrapers, wetting the wall or firing with a hair dryer. If areas of swollen plaster are identified, then they are mercilessly beaten off to the base of the wall. Similar actions are taken on the ceiling - there should be no weak or dirty places left, even if you have to reach the bare brick (concrete) of the wall or floor slab.
It is recommended not to limit yourself to cleaning, but also to thoroughly rinse the surfaces with a solution made from water and kitchen detergent (1:20) with the addition of table vinegar. Cleaning is carried out with a metallized sponge, and then washed at least twice. clean water.
After the surfaces have been cleaned and washed, it is advisable to carry out the first stage of their “treatment” by treating them twice with a penetrating agent with an antiseptic effect. This will not only provide a disinfecting effect, but will also temporarily strengthen the surfaces until finishing work is carried out.
 All surfaces must be “treated” with a primer - an antiseptic.
 In the case where old wooden windows and doors are planned to be left, then all their surfaces are also cleaned of old paint - by washing, scraping, firing, sanding, etc.
Prices different kinds primers
Primer
Preliminary preparation of floor and ceiling
On the floor, as a rule, the old coating requires replacement. It is dismantled, construction debris is taken out, and the condition of the surface is carefully inspected. Very often you have to beat off the old screed to get to the “healthy” floor slab.

Carrying out further work with an uneven floor under your feet after dismantling will be extremely inconvenient, so it is better to immediately start installing the screed. It is poured in such a way that the thickness of the planned finishing coating is taken into account.
The baseboards remain. The peculiarity of their use in the kitchen is that they are not only a decorative element, but also protect the junction of the floor and walls from penetration of moisture and dirt into the corner. This places special installation requirements on them - skirting boards must be mounted to the walls not only with fasteners, but also with a sealed solid adhesive base (for example, “liquid nails”). There should be no gap between the wall and the baseboard. If, however, a small gap remains (due to the slight curvature of the wall), then it should be sealed with a color-matched sealant.
 Installation of skirting boards using “liquid nails”
 It is not worth installing wooden skirting boards - they do not like high humidity. There are many different models made of plastic or other composite materials on sale.
Flooring prices
Floor coverings
⃰ ⃰ ⃰ ⃰ ⃰
In fact, you can “put an end to it” - the renovation of the kitchen space can be considered completed. All that remains is to import the selected household appliances, carefully unpack them and sequentially install them in their planned places. Installation and connection are carried out in accordance with the instructions supplied with the products - but this is beyond the scope of our article.
This is approximately the “thorny path” that owners will have to go through if they wish to carry out kitchen renovations themselves. It is worth assessing your capabilities very well, and it is possible that the choice will still be made in favor of calling qualified craftsmen. However, “it’s not the gods who burn the pots.” Be bold!
Video: transforming a small kitchen
Anton Tsugunov
Reading time: 7 minutes
The kitchen is the main place in any home. This is where all family members most often gather for a meal. Therefore, it is so important to create an atmosphere of comfort that is conducive to a calm, unhurried meal and pleasant communication. Where to start when renovating a kitchen? Its arrangement should be approached with utmost responsibility. Especially if you decide not to involve specialists in the repair, but to do the work yourself.
Kitchen renovation stages
The initial stages of repair can be divided as follows:
- Come up with the idea of renovation, think through every little detail, for which you need to clearly understand what you want to get as a result.
- Decide to bring your idea to life.
- Start completing the task, start making repairs. The first step is the main one.
The process of doing repairs yourself is not as scary as it seems at first. Difficulties will definitely arise, but everything can be solved. Besides, what satisfaction will there be from doing the work with your own hands when you get the planned masterpiece! Now from the lyrics - to the repair process.
Preparatory work
The kitchen serves many functions. As a rule, the area of this space is limited. Therefore, it is very important to correctly arrange all pieces of furniture and household appliances so that it is convenient to use. Where to start renovating a kitchen correctly, what should you consider first?
When cooking food, the kitchen will always be humid. Therefore, materials for surface finishing and furniture must be chosen that are moisture-resistant and easy to clean. Do right choice It’s difficult without professionals.
- First you need to draw up a diagram of the future kitchen. The sketch will allow you to decide on the color scheme of the room, the correct arrangement of furniture and other items. This will help in choosing accessories.
- Calculation of required materials. This stage should be entrusted to specialists. It is necessary to carefully think through the plumbing and sewer system, location of electrical wiring, .
Main stages of work
If replacement of door and window openings is required, they begin with dismantling and replacing windows. If necessary, create new partitions. The walls, floor and ceiling are leveled.
The walls are usually decorated with washable wallpaper or tiles. finished with tiles.
After all the work has been completed, the surfaces have been finished and thoroughly dried, you can begin installing household appliances and furniture.
Important! Particular attention should be paid proper lighting. High ceiling can be decorated with multi-level lighting fixtures. If the ceiling is low, spot lighting will do.
Separately, it is necessary to create lighting above the work area. Ideally, install the backlight on bottom part hanging cabinets. The dining area also requires additional lighting. Here you can choose a wall lamp.
The last stage will be the placement of accents, for which various accessories are used that are designed to make the kitchen individual and cozy.
When planning a room, we should not forget that the main “backbone” of the kitchen consists of three items: a stove for cooking, a sink and a refrigerator. They should be in any kitchen. Moreover, the convenience of using the room depends on their location. These items should be located nearby.
For people who have finally decided to stop living in monotonous old walls, it comes to their mind to do a major remodel of the entire kitchen area. There are some dangers awaiting them here. In order to avoid making common mistakes, you should figure out where the repair begins, what should you pay attention to first? The main stages of its implementation are detailed.
- The beginning of repairs is always very long and labor-intensive. It’s not very interesting to uproot old floors with your own hands, tear off wallpaper blackened by age, or lift up flooring. The main thing at this time is to be patient and take out all the trash. More enjoyable work will follow to create a new space.
- First of all, it is created electrical wiring. The location of sockets and switches is marked. If you don't do this right away, it will be difficult to add another element in the right place later.
The main places where you will need sockets:
- electric stove;
- hood;
- wall near the work area;
- space for TV;
- location of the microwave, dishwasher;
- fridge.
- Finishing is always done from top to bottom, from ceiling to floor. Before you start finishing ceiling, you need to decide on the type of hood and its location.
There may be two options here:
- installation of a convector;
- ventilation duct device.
The second option is great for creating two-level ceilings that allow you to hide the ventilation pipe. The best option to create a ceiling - . It is easy to use and allows you to create any shape.
- Wall finishing requires priming of all old surfaces. It is recommended to design the corners. They are mounted on plaster. Be sure to plaster the depressions and cracks.
High-quality putty and primer of surfaces forms the basis of a good kitchen renovation.
- Marking the work area. You can decorate it with tiles or hang it. When decorating a wall with tiles, it is very important to maintain the following parameters:
- the horizontal level of the wall must be ideal;
- the angles must be exactly 90 degrees;
- choose the right height for the work area. You should focus on the height of the slab.
Advice! In places where you plan to hang wall cabinets in the kitchen, you can save a little on material.
- Preparing the walls. It includes putty work. It all depends on the chosen design material. You don't need too much layer under the wallpaper. And if the choice fell on, then the work should be done most carefully. The surface is then sanded.
- The next step is covering the floor. The ideal material for this is . You can lay it with your own hands; the process should proceed slowly and carefully. Here you should also maintain a horizontal level. This is very important, otherwise the furniture will not stand up straight.
All the dirty work has been done, the finishing can begin.
Common mistakes when renovating a kitchen
When starting a DIY kitchen renovation, many people make the same mistakes. They subsequently turn into operational inconveniences. kitchen space. To avoid this and do everything correctly, you should familiarize yourself with some nuances.
- When determining work surface and floors, it is worth choosing non-porous materials. Otherwise, there will be difficulties with cleaning. Smooth tiles are much easier to clean. Moreover, you should not make wooden floors.
- There is no need to create bulky air ducts. They do not look aesthetically pleasing and take up useful space. If the stove is located far from vent, it is better to choose a hood that does not require an air duct.
- An unimportant decision - a lot of seams on the work apron. When covering this wall with wallpaper, you should think about protection, for which you need to choose a holistic material. For example, large glass.
- IN large kitchen You should not make a work surface along one wall. This creates additional inconvenience when cooking. It is better to create a U-shaped area where all the necessary devices are located within walking distance.
- Narrow passages between furniture. This prevents you from moving freely around the kitchen and opening drawers and cabinets. A distance of at least 1.2 meters should be maintained. You should choose furniture with slightly protruding handles, especially in corner cabinets.
- Replacing wall boxes open shelves. This gives the space airiness and lightness. But at the same time, it brings a lot of problems with cleaning and constant maintenance order. Floor furniture elements are more convenient with drawers than with shelves.
- A glossy facade is beautiful and elegant, but completely impractical. Cleaning will be required daily.
- Not having enough space for small appliances can be a big problem. It is worth considering that the housewife uses many small appliances. They require free location and access to electricity.
- Heavy wall cabinets can only be hung on a solid wall. Plasterboard partitions they simply won't stand it.
- The ideal location of household appliances is at waist level.
- Lack of lighting is the main problem in the kitchen. Lighting should be multi-level. It is worth placing the switches conveniently so that you do not have to walk through a dark room to them.
If you have some free time and some cash, and life has become too monotonous, you can do a kitchen renovation yourself. This will not only save money, but also acquire useful skills and even improve your health, because physical activity has never harmed anyone.
The chances of getting a result in which you are not afraid to invite people into your kitchen after doing your own renovation will increase significantly if you take the advice of a specialist.
When deciding how to renovate a kitchen, you must first consider the finishing materials, taking into account the costs of purchasing them and the possibility of self-installation.
Style selection
So that the kitchen does not stand out too much from the rest of the rooms, it is advisable to do everything in the same style
When determining where to start renovating a kitchen, the first thing to do is choose a style. There are more than a dozen of them for kitchen decoration, the most famous: classic, hi-tech, modern, minimalism, baroque - the implementation of many requires considerable funds.
The classics use expensive natural materials- wooden kitchen set, parquet flooring. High-tech and modern require the presence of expensive materials made of plastic and glass and are more suitable for modern young people; baroque with carved furniture looks better in living rooms and bedrooms.
For established people, one of the options that is simple and affordable is to decorate the kitchen in the Provence style on your own, allowing you to create a beautiful, cozy interior characterized by comfort and elegance.
IN Lately Provence is quite popular; it presupposes the presence of light pastel colors in the decoration of the room and the furniture itself (finishing like natural light wood), the presence of plants and decorative elements. Provence excludes the presence of bulky interior items (heavy curtains, massive chandeliers), the kitchen should be light and a little romantic.

Provence will give your kitchen coziness and warmth, as it looks organic
It is not difficult to do a kitchen renovation with your own hands on a small budget in the Provence style; it does not require much construction experience or special expensive tools.
Ceiling
The most common ceilings used in the kitchen are plasterboard, suspended, painted or wallpapered. You can also use ceiling trim made from expanded polystyrene or foam ceiling tiles or PVC panels - repairs are easy to do yourself, although in the latter case you will need to install a wooden or metal frame to attach the PVC panels.
Coloring

Painting the ceiling is not difficult, all you need is a roller with a long handle
Typically, kitchen ceilings are painted with waterproof paints - acrylic latex, water-based. If the ceiling is fairly smooth and has been painted with waterproof paint, repainting it with a roller will not be difficult.
This must be done at least twice, the first time painting occurs perpendicular to the direction of light from the window, the second time along.
In some cases, it may be necessary to level the ceiling - to do this, you need to rinse it very well and clean it down to the floor slab, prime it and apply putty, and after it dries, rub it sandpaper.
Wallpaper

Wallpaper on the ceiling looks unusual, but it is advisable to buy a waterproof version
Gluing thick, waterproof types of wallpaper to the ceiling will eliminate the need to level it and give it a more interesting aesthetic appearance than if painted.
Choosing wallpaper for the ceiling is a budget option, and besides, pasting the ceiling is quite simple work, which even housewives can handle. It is advisable to prime the ceiling before wallpapering; the stripes should be glued in the direction of the light.
Floor
Do-it-yourself Provence style decoration requires a light wooden floor. Naturally, in a kitchen with high humidity, natural wood is expensive and impractical; it can be replaced with such common finishing materials for flooring, such as ceramic tiles, laminate or linoleum - all of them are available with a natural light wood finish.
Ceramic tile

Ceramic tiles are a durable material with water-resistant properties, but require care when handling heavy objects
Not the best suitable option To decorate a kitchen with your own hands, to lay tiles on the kitchen floor you will need a special tool (tile cutter, grinder) and the skills of a qualified tiler.
In almost all kitchen areas, due to the fact that the tile floor is quite cold, it is laid on an electric heating mat in the form of a wire about 5 mm thick. on the grid. This further complicates the task of laying tiles and requires connecting the heater control unit with knock-out holes in the wall and a groove for connecting the electrical wire to install it.
Considering that finishing a kitchen in the Provence style on your own will require hiring specialists to lay the tiles, and the work will be quite expensive, you can refuse this option.
Laminate

It is advisable to choose a waterproof laminate, since there is quite a lot of humidity in the kitchen, and there is a high probability of frequent water getting on the floor
Regular laminate is not very suitable material for the kitchen due to its low water resistance, therefore more expensive moisture-resistant types with special surface treatment and locking joints should be used. Carrying out a kitchen renovation with your own hands by laying laminate flooring on a substrate is quite simple if you follow simple work technology.
Moisture-resistant types of laminate can withstand exposure to water for about 6 hours without consequences, while water-resistant types are not afraid of its impact. Waterproof laminate is also made in the form of panels of various thicknesses or glued to the floor; its only drawback is its very high price.
Linoleum

If the linoleum breaks in one place, you will have to replace it in the entire room
A budget option for laying on the kitchen floor, modern views They have a wide range of colors and patterns; commercial brands are highly durable and wear-resistant.
The disadvantages of linoleum when laying in the kitchen include its small thickness, which leads to different levels floor if laminate flooring is laid in the corridor. This is why many people prefer to lay out the kitchen floor from impractical ceramic tiles.
This problem has a simple solution - the floor in the kitchen is filled with a leveling, self-leveling mixture to the required thickness (3 - 10 mm) - this allows you not only to raise the level, but also to level the floor.
You can do the filling work yourself if you have a special toothed roller and a mixer for mixing the solution (self-levelling equipment is sold in bags as a dry mixture).

Before laying linoleum, it is necessary to make a perfectly flat floor so that there are no differences in height.
Construction mixer You can replace it with a household drill by purchasing an inexpensive whisk for mixing the solution, a roller with a metal comb with teeth (using this option is very risky, the liquid self-leveler may not spread well on the floor and it will be damaged).
You can repair the floor by laying linoleum on KS or PVA construction adhesive yourself; this is not a very complicated construction job.
Walls
The walls in the kitchen should also be practical and easy to clean
Kitchen renovation in the Provence style involves light colors; for wall decoration, MDF or PVC panels, ceramic tiles, painting, wallpapering are most often used, and often the types of finishing are combined.
Nowadays, it is rare for anyone to decorate the entire kitchen even up to the middle of the walls with ceramic tiles; it is too expensive and has gone out of fashion; the work area is mostly tiled.
MDF, fiberboard or PVC panels come in 2 types: from a single sheet ( the average size 1.2 m by 3 m) or type-setting, which are mounted on a wooden or metal frame.
In the latter case, the use of stacked panels is impractical, since this significantly reduces the free space of the kitchen by the thickness of the frame and panel. In kitchens, it is better to use MDF panels covered with moisture-resistant PVC film or one of the types of fiberboard - laminated hardboard. The sheet panels are about 3 mm thick and are attached to the walls using glue.
Painting

Choose only waterproof paint that will not lose its appearance after washing
To paint walls, preparation is necessary by leveling using putty and rubbing, otherwise the light falling from the windows will highlight all the unevenness. The work is quite complicated for a non-specialist and will require additional financial expenses; also, plain painting of the walls looks rather boring and is unlikely to decorate the interior.
It is common knowledge that waterproof acrylic paints can be washed, but this statement is not entirely true. In the area of the work area, drops of food and grease often fall on the wall, which are absorbed into the porous surface of the paint and practically cannot be washed off.
Wallpaper

3D wallpaper has an unusual texture that will help hide unevenness
The most budget-friendly option is to wallpaper the walls; the most practical way to do this is with glass wallpaper for painting or vinyl. The latter, due to their thickness, will hide unevenness on the walls, and their smooth water-repellent surface perfectly removes all types of contaminants, including grease.
A comfortable, beautiful and functional kitchen is important for everyone. But what to do when your kitchen has been in use for 10 years or more? Are the surfaces of all the kitchen cabinets worn out or peeling in places, the tiles are perhaps cracked or look like a legacy of the distant pre-revolutionary past, is the paint on the walls faded?
Having carefully looked at the picture that you observe every day, a completely logical decision comes to you: kitchen essential urgent repairs! At the same time, you decide to do DIY kitchen renovation. Well, it’s a completely sensible idea to do this. Read this material and you will understand that making repairs without involving builders is a difficult task, but it is doable...
Think about it and you will agree. Kitchen renovation is not only an ideal opportunity to change it appearance and aesthetics, this is also the right time to improve the ergonomics and functionality of the kitchen. This is the time when we can change the system of functioning of the premises. To change what for a long time did not allow us to feel absolutely comfortable in the existing space. This is the time to add individual elements that are still missing or to abandon something that is not functional. Basically, it's just time for a revolution!
The word repair even evokes a feeling of fear in some people and creates a great reluctance to do anything. This attitude is understandable. It's no secret that repairs, as a rule, guarantee much more problems than building from scratch. Even for designers and architects and planners. When renovating, it is not always possible to fully realize your desires. Sometimes even the biggest revolution is not able to satisfy all the intended plans, mainly due to the existing installations and room parameters.
The main reason for dissatisfaction with the results of a kitchen renovation is the lack of a clear, well-thought-out plan of action, a clear plan. In any case, if you decide to do DIY kitchen renovation, be prepared for unforeseen difficulties. But don’t be scared, move step by step, step by step and deliberately and everything will work out as you planned.
2. Where to start renovating the kitchen?
The answer to this question depends on your plans. How big will your kitchen revolution be, and what do you want to get as a result?
- Will it only be replacing or updating furniture and perhaps equipment?
- Perhaps this is a partial change in the functional system or a small redecorating?
- Maybe you are planning a large-scale major renovation with replacement floor coverings, wall decoration, ceiling finishing, or replacing furniture and equipment?
A clear answer to these questions is the beginning of the whole process. So, where to start renovating a kitchen step by step? Have you decided on the answer? Then you can start.
3. Repair and renovation of kitchen furniture
If you do not want to replace the kitchen unit, but want update your old furniture, you have several known and available options to solve the problem:
- The first option is the simplest, most reliable and the most effective in terms of quality. This contacting a specialist in the sale of kitchen furniture. That is, you need a manager for a company that sells furniture and components. He will select and order new furniture facades for you. And your update will take place quickly, without headaches and unnecessary stress, but with significant costs.
- The second option is search through advertisements of a private owner specialist, which specializes in furniture repair. He will inspect your headset and suggest the most convenient solution to update it. The option does not guarantee an excellent result 100%, but has an optimal balance between quality and price.
- Third option - self-execution repair work furniture. This can be an order of ready-made facade panels in an online store or from a manufacturer or dealer of a furniture production company. Or maybe this is a DIY façade repair. This is the most difficult one, but cheap option problem solving.
The method of restoring kitchen items largely depends on the material from which it is made.
When did you decide to do-it-yourself repair, then you need to clearly know what material the furniture is made of. If this material is wood, then simply remove the old varnish or paint with sandpaper, clean the surface and cover it with a new coating. If it is made of veneer or laminate, you can use durable decorative film or special paint. Such facades are not sanded with sandpaper; the surface is degreased and painted a new color. Depending on the extent of the transformation, you can also replace individual furniture components, such as handles.
If repairing a kitchen set is not an option for you and purchasing new kitchen furniture is inevitable, read the information: how choose a kitchen set, about what color will suit you and why chipboard for furniture is worse than MDF in the article.
The issue of updating furniture facades is a separate big topic. You can see examples of updating facades using paint in the kitchen renovation photo at the end of this article. If this is not your case, we move on to major or cosmetic repairs.
4. Major or cosmetic renovation of the kitchen
If you are planning a cosmetic or major renovation, in combination with a change in the functional layout and arrangement of elements in space, it is worth remembering a few very important principles and rules. These include:
- The principle of unity of design and style in the kitchen;
- The principle of kitchen zoning;
- Forms of kitchen organization;
- Kitchen design rules
Kitchen design, its style in a house or apartment
The ideal room is what you want to see as a result. These are functionality, convenience, design and style. You need to think about what the available space allows and what you want from it. What will this place serve you for? Will it just be a place to prepare food, or will it be a place for small snacks or regular meals?
It should be remembered that the kitchen should not be stylistically and aesthetically separated from the rest of the house or apartment. Especially it should be combined with a cozy living room. The next step after determining its nature is to determine the maximum repair budget. This greatly facilitates the planning stage, and partly determines the appearance of what you want to achieve and achieve.
Compliance with the principle of zoning the kitchen space
You know that the principles of ergonomics oblige us to ensure that the kitchen has 5 functional zones. As a rule, it is recommended to follow a certain sequence in the location of these zones. However, the real, not picture, layout and dimensions, especially of small rooms, make their own adjustments. That is why the sequence is conditional, desirable but not required. So, 5 functional zones in the kitchen:
- Preparation area
- Cooking area
- Storage area
- Washing area
- Food supply area
Each zone in the kitchen has its own purpose and ensures that certain work is carried out and that certain items or food are stored. You can see the detailed list of storage items in each zone in the figure.
It is optimal, if possible, taking into account the functional layout of the room and specific installation points for furniture and equipment, to create a working triangle between the refrigerator, stove and sink.

Of course this is ideal, but unfortunately a rare option. Therefore, you have the opportunity to organize your life, taking into account the shape of the room and your own preferences.
Organization of the kitchen space
Depending on the size, shape and functionality, you choose one of forms of organization. It could be:
- Single row configuration (linear);
- Double row configuration (two-line);
- L-shaped configuration;
- U-shaped configuration;
- Island configuration
Single row kitchen configuration
The name itself suggests that all the furniture, as well as the stove, refrigerator and sink are located in one line. This means arranging furniture and equipment along one wall. This is the ideal configuration for a long, narrow room.

Single-row kitchen space configuration is ideal for narrow kitchens
With this shape of the room, it is not possible to create a working triangle, so you must pay attention to maintaining the recommended order of zones: storage, washing, cooking. In this case, it is desirable that the stove is not located next to the refrigerators, but is separated by a sink.

Small single-row kitchens with the right configuration are fully functional
In addition to using this option in narrow rooms, it is also used in studio apartments, where permanent zoning is very conditional and easily changeable.

Table placement when choosing a single-row configuration is often associated with certain problems
Double row kitchen configuration
This configuration of the kitchen space is recommended for relatively narrow spaces, which, however, allow for the organization of two rows. The window, as a rule, with this option is located opposite the door to the room. This allows you to organize a work triangle, which is a big plus when working constantly.

Proper organization of the workspace using a two-line arrangement of elements makes the kitchen comfortable and cozy
The optimal distance between cabinets is 120-130 cm. As a proven option, you can consider the following arrangement: side A - sink, separated by the work surface from the stove; side B is the food products area, including a refrigerator and cabinets and an additional work surface.

If it is impossible to locate the dining table in the kitchen area, you can consider installing it in the living room at the entrance
With this choice, the question often arises of determining the optimal place to install the dining table. But the issue of placing additional kitchen equipment: mixer, coffee machine, multicooker, juicer, kettle, etc. So when making a decision, think it over a hundred times and determine your priorities.
L-shaped kitchen configuration
Like any other L-shaped configuration, it has its own advantages. Its choice makes it possible to clearly separate the dining area from the working area, as well as install an additional countertop and storage cabinet. The L-shaped design is used in rectangular and square rooms and is not suitable for narrow ones.

An L-shaped kitchen can be conveniently placed in any room, but is most often used in small kitchenettes
The well-planned L-shaped design allows even small kitchen functional and comfortable. In addition, this system allows you to install a table on a free wall for sharing meals. So this is a good choice For big family, or in a situation where your home often receives guests.

L-shaped kitchens are the ideal solution for both open and closed spaces.
U-shaped kitchen configuration
The U-shaped design is relatively simple, but the most desirable. It, like the two-row configuration, provides a full functional working triangle. But at the same time, due to the use of the third wall, it reduces unnecessary movements and makes working in the kitchen more comfortable. This is ensured by the proximity of all work areas. Therefore, if the room allows you to use this choice, then go for it.

A kitchen with a “U” shaped space organization is ideal for both rectangular and square spaces.
The U-shape fits especially into rectangular and square spaces. Keep in mind that the distance between rows cannot be less than 110 cm. Optimal minimum distance 120-130 cm.

“U” shape is also suitable for small spaces
An extremely popular option is to install a U sink under the window in kitchens. This is not surprising; washing dishes comes much easier. Oddly enough, this is facilitated by natural light and the view from the window.

A narrow and long kitchen is not an obstacle to choosing a U-shaped layout
Island kitchen configuration
The island configuration is today a fashionable and at the same time practical solution for organizing the kitchen. It is becoming increasingly popular. It is only suitable for large, spacious interiors and open spaces, but each of us would like to have just such an option.

Kitchen island in a spacious room combined with the living room
This arrangement has many features. She represents interesting design kitchen and provides additional storage space for kitchen utensils and food. It is a real bar, a mini dining room, a spacious washing area, in general it is an integrated food preparation center. As a result, everyone will find enough space to work and cooking together doesn't turn into a constant clash.

The photo shows a modern island kitchen with an aquarium
With this choice, the classic triangle should not intersect with the island part, otherwise cooking will be absolutely uncomfortable. The area of the room should not be less than 17-19 meters, and the width of the passages should be at least 1.1 - 1.3 meters.

Choosing this form for organizing space in the kitchen initially requires the maximum area for the room
Kitchen design rules
Kitchen design rules are a rather difficult stage when carrying out a major renovation. To be honest, they are all small, but important nuances can only be taken into account by professionals who have practical experience in design and data on actual operation based on customer reviews. However, knowing the main points will not only be educational, but also useful. Therefore, familiarize yourself with the basic functional distances that must be maintained when designing a kitchen.
There are justified recommended distances and locations.
- The distance from the refrigerator to the sink should be from 120 to 210 cm.
- The distance from the stove to the refrigerator is from 120 to 270 cm.
- The minimum distance for wall cabinets from the working surface is 50-70 cm, the recommended distance is 55-60 cm.
- The distance from the stove to the sink should be 50 cm.
- The recommended distance on both sides of the stove should be a minimum of 40 cm.
- Do not place the stove directly next to a window or immediately in front of a natural gas supply pipe.
- The standard height of a kitchen mirror is on average 855 cm.
Built-in kitchen appliances such as hob or stove, Dishwasher or oven are selected at the kitchen design stage. Of course, when designing a kitchen, you need to know and take into account the dimensions of the specific appliances you have chosen.
5. Do-it-yourself budget kitchen renovation: example with photo
In the kitchen, as you can see, amber brown reigned, fashionable 15 years ago. The set was already in poor condition, but its complete replacement was not included in the renovation plans. And the repair itself was not planned to be expensive. That's why it was chosen option using special paint. In a word, replacing the floor covering, walls, and even the kitchen unit itself was not included in the kitchen renovation plans. Just painting! Although this option is not yet very popular and many people treat it with caution, see for yourself what the result is.

Photo of the old kitchen before renovation - general view
Before painting the kitchen set, the old coating was removed from it. But it was not just the furniture that needed repairs, but also the tiles on the floor and wall, and even the scratched washing machine.

Photo of an old kitchen set
The design of the new kitchen was developed in cool gray tones with the addition of white and black. The renovation started with wall tiles . The entire area to be painted was thoroughly cleaned and degreased. After the tiles had dried, special paint was applied to the wall. Painting was done using a brush and a fine-pile roller.

Special paint for DIY kitchen renovation using a roller and brush
To paint the tiles on the walls, we used a special Polish-made CERAMIC paint V33, color GRAY MARENGO. The paint container consists of 2 parts. The bottom part contains the paint itself, and the top cover is used as a tray, which is quite convenient. Before use, an additional component is added to the paint and everything is thoroughly mixed. You must remember that after mixing the two components, the paint should be used within 10 days.

Step-by-step photo of painting walls in a small kitchen
To repaint tiles you need: sticky mounting tape, a brush and a good roller. First, the surface around each tile is painted with a brush, and then the main area with a roller. Depending on the color of the paint and the surface to be painted, at least two layers of paint are required.

Stages of updating a window sill and kitchen unit using paint
The window sill was also repainted so that it would fit into new interior. Next came the turn kitchen set. To paint the cabinets, we used special paint for kitchen furniture, the same Polish one. trademark V33. In addition, it produces other targeted coatings: for heating radiators, for household appliances. For example, you can paint a refrigerator or the facade of a washing machine. However, you can from any manufacturer. But at the same time, read reviews from real users of the product.
Before painting the kitchen set, it must be thoroughly cleaned and washed with clean water. After drying, you can begin painting. Since the doors had embossing, for high-quality painting it was necessary to use a brush, and then a roller. The method of applying the coating to a flat surface is the same as for conventional painting work. Drying time after applying the first layer is 20-30 minutes. The second coat is applied after approximately 6 hours.
After painting the furniture, it's time to transform the floor tiles, also by painting. Clear contrasting color underneath chessboard looks very elegant. Painting tiles on the floor is done in the same way as on the walls.

Painting floor tiles when renovating a small kitchen with your own hands: a budget option
At this point the work can be considered completed in full. Although, in addition to painting, the countertops, sink and faucet were replaced. And additionally, several small decorative elements were purchased to completely update the appearance.

Modern kitchen renovation does not mean expensive and time-consuming

After painting, the kitchen looks fresh, light and spacious
The kitchen looks fresh and modern after repainting. After painting the furniture white in combination with a contrasting black and white floor, the kitchen seems more spacious and brighter. Decorative elements from Ikea: a wardrobe, flowers and herbs in white pots and metal candlesticks now fit harmoniously into the interior.
We can safely say that the radical transformation with minimal costs, both labor and financial, we succeeded to the fullest.

General view after renovation
Once again about the paint that can be used for this solution. When choosing paint, first consider the individual properties of these products. The manufacturer must ensure that these paints have the following practical characteristics:
- They can be applied directly to the surface without a primer.
- After drying, the coating becomes stain resistant.
- In addition, they are heat resistant, which is very important in the kitchen.

General view after renovation. The washing machine was also painted, as were the walls in the room.
6. In conclusion
Always remember that the kitchen should be a reflection of culinary tastes, lifestyle and housekeeping habits household. If cooking is not your passion or lack of time forces us to choose simple dishes, let's consider whether you need a large set with a huge number of cabinets that reach to the ceiling? Likewise, if you love culinary experimentation and often cook with children or friends, you should not opt for a minimalist design that reduces the number of countertops and cabinets to a minimum.
If you dream of a place where it will be convenient and comfortable for you not only to cook, but also to have breakfast and dinner, pay special attention to the quality of the set. Visit a professional furniture showroom, get acquainted with the materials, colors, styles of furniture fronts and countertops in person. When in doubt, consult a professional who can help you make your choice and create the perfect space for you.
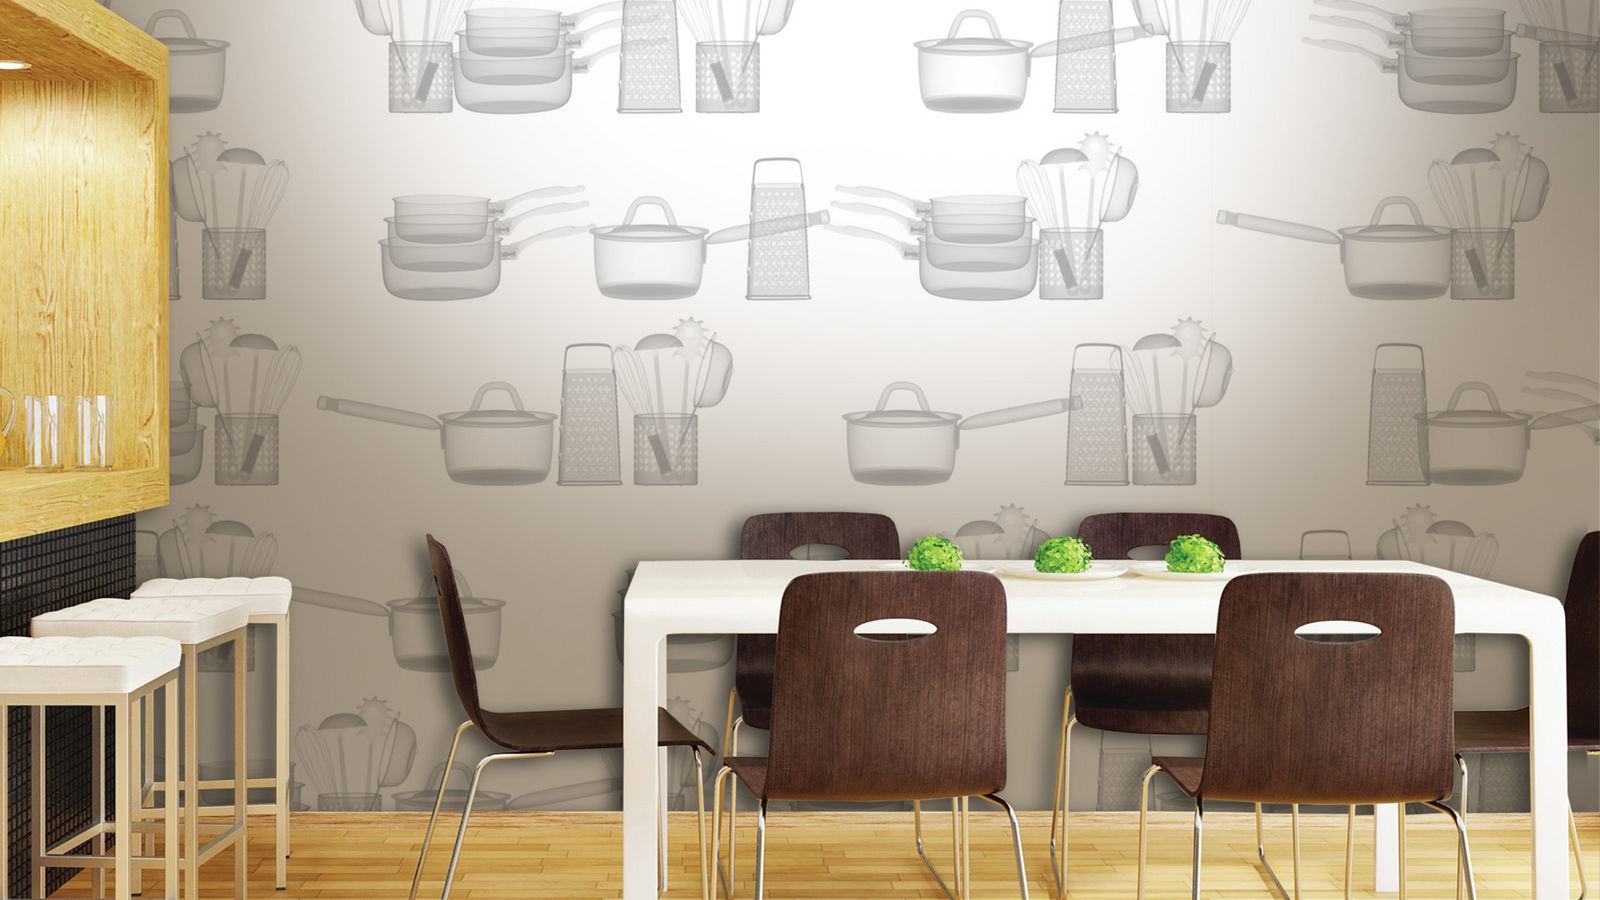
IN modern world kitchen spaces often combine the functions of a kitchen and a dining room. It is in these rooms that the whole family gathers for breakfast and dinner. In addition, relaxation areas are often set up in kitchen areas, where you can drink a cup of coffee and chat with a friend.
In this regard, the question of where to start renovating a kitchen is very relevant. After all, in this multifunctional room you need to rationally place many useful things and at the same time maintain the comfort of the environment.
To make all your dreams come true and imagine what your future kitchen will look like, you need to do three-dimensional drawing. It should display all furniture, kitchen accessories and necessary household appliances with dimensions. Since the kitchen is a multifunctional room, it is always installed a large number of electrical appliances.
Almost any room has:
- Cooking stove;
- Hood;
- Microwave;
- Fridge;
- TV.
In addition, in the work area it is necessary to provide lighting and connections for various household appliances, for example a mixer, blender, meat grinder. To increase comfort, it is recommended to zone the kitchen space, and this is usually done with the help of various lighting fixtures. In this regard, kitchen renovation should always begin with the organization of electrical communications, and the location of all sockets must be thought out very carefully. In parallel with the arrangement of electrical communications, it is possible to install double-glazed windows. It is also important to consider the location of the hood and how it is connected.
Can be used:
- Convector, when the air purified by the device returns back to the room;
- Connecting the device directly to ventilation.

Features of kitchen renovation
Having decided on the design of the kitchen and having provided for the furnishings down to the smallest detail, you can make a list of the necessary materials. Of course, it is important that the planned expenses correspond to your financial capabilities. It is advisable to purchase all materials at once and, if necessary, make adjustments to the design before starting repairs.
If you are planning to carry out a major renovation of the kitchen, then it is necessary to completely vacate the room before carrying out any repair activities. In addition, you need to remove all old finishing layers. For example, whitewash needs to be washed, and old paint remove on the walls mechanically or using a special wash. We should not forget that, most likely, the door will need to be replaced or an arched opening installed instead. Therefore, it is also necessary to dismantle the old door.
You should be prepared for the fact that with this approach to repairs, there will be a lot of garbage. But there is no way to do without this, and it is the process of preparing the kitchen space for renovation activities that can be considered the answer to the question of where to start renovating the kitchen.
Finishing work
Upon completion of the arrangement of the electrical part and the organization of ventilation, you can proceed to the finishing work. They always need to start with repairing the ceiling.
To do this you can:
- Level the ceiling surface with special solutions and subsequently paint it;
- Install a special structure on the ceiling, onto which plasterboard sheets are fixed, which are subsequently finished using any of the modern methods.
Both methods are quite labor-intensive and require certain construction skills. Therefore, if you are not confident in your abilities, it is better to involve specialists. After finishing the ceiling is completed, you need to start decorating the walls. This event does not require high qualifications and all work can be done independently.
The most common finishing methods are:
- Wallpapering;
- Laying ceramic tiles;
- Painting the plastered surface.

You can combine different types of finishes and thus zone the space of the room. Moreover, for finishing the working kitchen area It is better to use tiling or paint wall surfaces. But it’s better to accent the dining area with wallpaper. The best option are paintable, which can be coated with durable alkyd and acrylic paints. These materials are environmentally friendly and guarantee easy maintenance of wall surfaces during operation.
Laying the floor is carried out at the final stage of decorating the kitchen space. The floor in the kitchen should be practical and, in addition, fully consistent with the interior being created.
The most common materials for flooring in kitchen area are:
- Laminate;
- Linoleum;
- Parquet board;
- Ceramic.
The choice of building materials depends entirely on taste preferences and financial capabilities. Floor installation is a complex process, so whenever possible, the work should be entrusted to specialists who will carry it out efficiently and in a short time. Upon completion of the finishing work, the renovation of the kitchen area can be considered complete. After this, you can begin arranging furniture and filling the kitchen. household appliances and various useful accessories.
Of course, it is optimal to order built-in kitchen furniture, in the development of which the designers will take into account all your requirements and wishes. But since this is an expensive pleasure, much more often, ready-made kitchen units are purchased that are easy to install yourself. We should not forget about proper lighting; the kitchen room should have several separate lamps, work area lighting and overhead lighting. It is equally important to provide for the presence beautiful curtains and other decorative elements.
If you know where to start a kitchen renovation and how to finish it, then you will be able to create a surprisingly comfortable room that fully matches your taste preferences.