Corner joints of tiles. Internal corners for tiles: types and applications
29478 0
Wise people said: a house cannot be built without corners, and, therefore, any of the rooms in which there is a need to glue tiles will only confirm the truth of the saying by the presence of not even one corner, but two, three or more.
You can divide them:
- An internal corner is the area of a room where the surfaces of two walls meet.
- An external corner, the junction of two adjacent walls, with the formation of protruding sections.
If tiling the walls does not raise any questions, then laying tiles in the corners can lead the home craftsman into a dead end. There are many places in a house or apartment where tiles are used for decoration. This could be a kitchen, bathroom, hallway or corridor, and even a balcony. But most telling is the bathroom, where there are many intersections of adjacent walls. Installation of niches in the bathroom, communication boxes, door and window openings associated with the formation of external or internal wall joints.
And here the difficulty arises, how to correctly and beautifully reduce the intersection of two planes of the walls; the most difficult thing is to maintain the same level of two adjacent walls.
Preparation stage
Before you start gluing tiles in the bathroom, you should lay out the tiles. The quality of the work performed will depend on the correct execution of this process. When starting the layout, they measure the bathroom space, then inspect and evaluate the surface of the walls on which it is planned to glue the tiles.

If necessary, additional preparation of the base is carried out. During the laying process, all wall joints are subject to inspection to select a ceramic laying method. When the corner is not visible due to furniture or plumbing in the bathroom, the installation method can be simple.
To ensure that the intersection of walls is perfect and flawless, several methods are used. It should be noted that some of them can be implemented only with special equipment, and having experience in the work will not be superfluous.
Existing methods for joining tiles in corners
- Arrangement of the angle using trims.
- Perpendicular arrangement of tiles of adjacent walls.
- Trimming tiles at 45 degrees.
- Installation on the outer corner of a special format tile.
For the right choice method of designing the intersection of adjacent walls, we will describe each of the listed methods in more detail.
Trim method
The most common method, of course, will be the use of special devices - trims. This is a decorative profile forming an external or internal corner. They come in a wide range of colors, which allows you to match this element to almost any color of wall tiles. Made from metal or plastic.

The use of special corners - trims
The external corner is formed using L-shaped convex trims. To install the internal corner, trims with a concave arc are used; they can also be used as a kind of plinth when transitioning tiles from the walls to the bathroom floor. In addition, joints are made using trims different types ceramics on one wall plane.
Along with aesthetic and decorative qualities, design external corner with the use of trims, the profile perfectly protects the corner from various types of mechanical influences. The advantages include the relative simplicity of the work performed and the absence of the need to use special tools and equipment.
The profile can be glued using silicone or acrylic sealant, liquid nails or special adhesives. There are some trim designs that allow their installation on glue solution, used for facing the main body of tiles, with part of the trim going under the tile and glued there with an adhesive mixture. Cladding the walls and corners of the box using this method is applicable to any type of tile.

There is also a simplified version of trims on sale - this is a decorative corner. It is placed around the perimeter of door and window openings, and mounted on a tiled mortar vertical row one of the walls, and the tiles of the vertical row of the other wall are adjacent to the product butt-to-end.
It is advisable to make the outer corner of the bathroom walls with whole, uncut tiles.
Ceramic tiles in the bathroom
This is the usual laying of ceramics end-to-end, and is the easiest way to lay tiles to form a corner of a wall or box. In this option, you need to glue the tiles at 90 degrees of one element relative to the other. As a result, one end of the tile is covered with the top tile, and the second is visible.
If the joining is performed using a cut fragment, then it should be done at the bottom, covering the cut with a whole tile.
There is another option for perpendicular joining of elements at the intersection of walls; it is applicable for the installation of curb protrusions. The principle of the method is that the horizontal top tile needs to be glued with an overhang over vertical row. The edge of the protruding tile should be without a cut and overhang no more than 4-5 mm, then it will look beautiful and aesthetically pleasing.

The method is applicable only if it is impossible to view the finish from below.
Trimming the end of the tile
Let’s immediately make a reservation that for high-quality implementation this method is mandatory special equipment and appropriate skills to perform this type of work. This task is very complex and time-consuming; it is necessary to cut the tiles of adjacent walls at an angle of 45 degrees, so that at the junction an angle of 90 degrees is formed. Washed down elements can be done in three ways:
- Using an electric tile cutter with a diamond blade.
- Make a cut with a grinder.
- Make the required cut using sandpaper.

Laying tiles in this way is a difficult task for a person who does not have the appropriate skills, and therefore it is advisable to practice on unnecessary fragments. The sawed-off elements must be glued in such a way that the undercuts of adjacent tiles fit perfectly together, forming a right angle.
To obtain a straight line, it is best to make a cut using an electric tile cutter with an inclined bed.
Making a joint with specially shaped tiles
And finally, the method is to lay a corner using a tile made in a special way in the form of two perpendicular elements creating an angle of 90 degrees. Such a product must be glued using the same adhesive mixture as the main body of bathroom wall cladding. In this case, the tiles should be laid away from the product.
Elimination of possible defects
There is no need to be very upset if minor defects arise during the execution of work. Even professionals sometimes make some mistakes, the main thing is to know how to correct them without damaging the overall appearance.
- If, when tiling, the joint of the walls turns out to be uneven, you can correct the situation by adjusting the layer of adhesive mixture under one or another tile.
- If the required 45-degree cut is not formed during the cutting of the material, then a more precise fit can be achieved using sandpaper.
- In case of flaws at the junction, there are two methods to solve this problem:
- possible joint defects are treated with standard joint grout;
- chips and gaps are covered with a decorative profile that can be glued to silicone sealant or liquid nails.
Tiling does not involve using ceramics alone. The finished appearance and operational reliability also depend on other materials. Tile corners (also called tile spacers) are one of them. They mask imperfections, decorate corners and protect tiles from chips, mildew and mold.
Today, they often abandon the use of tile layouts in favor of more decorative method- grinding corners at 45 degrees. Monolithic installation is appropriate when using expensive ceramics; in this case, the tile corner may not look very presentable. And yet, tile layouts are still in the lead. Moreover, in some cases you cannot do without them, for example, when facing steps (anti-slip profile) or an apron. On dangerous outer corners in the bathroom, where you can easily slip, it is better to install a plastic corner rather than leaving a sharp corner made of sawn tiles.
Tile corners come in all sorts of colors and various forms. When facing, you may need an external profile for tiles, internal and for stairs. Let's consider each option in more detail.

Quick navigation through the article
External corners
The most popular type. Used when facing external corners. The sizes on sale are mainly 7, 9, 11 mm (with a length of 2.5 m). One side is a groove for tiles, the other serves as decoration and protects the slabs from impacts and chips. The hidden part is perforated for better adhesion of the tile layout and ceramics. Decorative elements are produced from:
- plastic;
- aluminum;
- brass and other materials;

Installation of corners
Profiles for tiles are installed when one of the two walls forming outside corner. Sometimes trims (layouts for tiles) are left until the end of the work. This happens under unforeseen circumstances: there are problems with delivery, there is a defect, etc. However, such a situation requires the tiler to have advanced qualifications and more serious calculations. The slightest inaccuracy can lead to refinishing or resignation to flaws.
When moving on to the next wall, a tile layout groove is placed on the back side of the finished wall. The product must match the size of the tile. The tiles will not fit into a corner of a smaller format, and a larger trim will force you to use more glue and will dangle.
If the tile does not fit into the corner, grind it with a grinder reverse side(3-5 cm from the edge).

To start laying the next wall, and the corner for the tiles does not slide, it is attached with tape or tile adhesive is used. The perforated side should be parallel to the tile to allow the perpendicular ceramic to lie tightly and evenly. Be sure to fill the joints with glue - voids deprive the structure of its functional meaning. Without a trained eye, it is better to spend time squeezing out excess mixture than to accept the hollowness.
The video shows the installation of the layout using an example difficult place- slopes with double external angle:
http://www.youtube.com/watch?v=b-9JPxPx2ks
Trimming corners
If the ceiling is suspended and rests on tiles, cut the layouts to fit the tiles, do not leave yourself or others the need to do further trimming.
The installation of trims in the area of door and window openings (or in similar situations) deserves a separate discussion. To position the elements perpendicularly, you need to cut their edges at an angle of 45 degrees. Do this very carefully, otherwise there will be gaps or profiles for the tiles and will not lie without bends or burrs.

Cut tile layouts with a metal blade or grinder. Better first, since the method involves the possibility of using a miter box. And without this tool it is very difficult to achieve the required angles. In any case, precise trimming is impossible without practice, and it is not as easy as it seems at first glance. Sometimes the geometry involves combinations of trims, for example, horizontal corners for tiles and a vertical one are joined at one point. It takes skill to masterfully juggle meeting the requirements for cladding and installation of profiles.
Corner repair
It happens that you no longer like the layout for the tiles, or maybe the profile for ceramic tiles was damaged. In such cases, repairs are needed, but how to remove the trim, much less install a new one? This is a tedious task, but doable:
- Carefully, so as not to damage the tiles, cut off the old outer corner for the tiles;
- prepare a new one;
- trim the back of the trim;
- if necessary, level the area under the profile without touching the space under the tile;
- with help liquid nails or glue the layout with silicone;
Inner corners
Unlike external ones, these are not very common. To decorate the outer corners, you need to trim the tiles or decorate them with profiles. Internal ones are not necessary, since without them the interior does not suffer at all. Still, a certain percentage of people feel sympathy for them, so let’s consider them. 
Represent a little more complex design, consisting of:
- groove;
- perforated rib;
- facial concave part;
As in the previous case, install the layout under the tiles, covering one of the walls. In fact, it’s easier to cut off the back and glue the corners with silicone. This makes the installation process easier:
- easier to glue;
- work can be done after finishing the cladding;
Using both types of corners, before grouting the joints, you need to clear the glue from the joints between the profiles and the tiles. If the profile is plastic, be careful not to scratch it or cut off the layer.
Design options for internal corners:
Corners for steps

The use of profiles on stairs is controversial. The question concerns the aesthetics and durability of the cladding. There are two types of layouts on the steps:
- ordinary - similar to wall-mounted;
- invoices;
The former do not provide much functionality and serve decorative purposes. However, their use undermines the solidity of the structure; the risers end up at a half-centimeter distance from the covering slabs. On the one hand, tile layouts provide a certain protection for joints, but on the other hand, they result in a reduction in the service life of the stairs. They allow the possibility of accumulation of water, which, due to temperature fluctuations, gradually destroys the integrity of the steps.
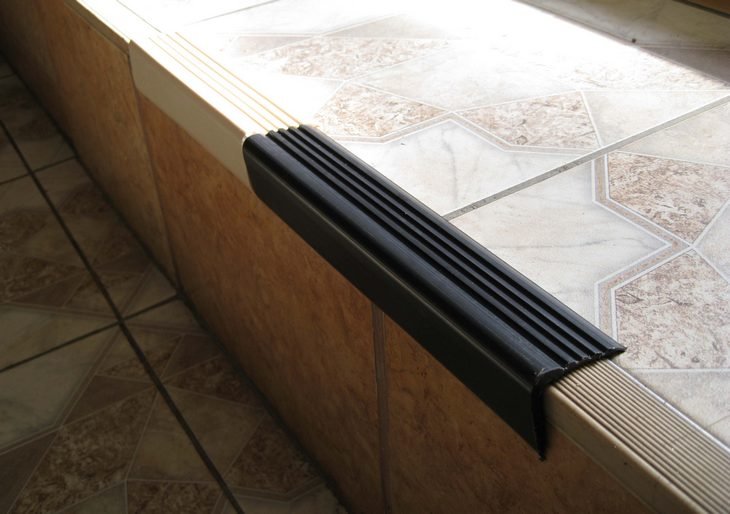
Overlay profiles provide slip resistance and, unlike simple ones, are often necessary. It is important to understand the nuance of operation: water accumulating near the corners negatively affects the cladding. To avoid this, it is not recommended to install as a continuous sheet. Make drainage spaces between tile layouts, and the staircase will last much longer.
When installing on steps we are talking about metal materials, no plastic.
Other corners
Profiles are required when constructing thresholds and at the joints of dissimilar materials. There are many variations; as a rule, they are mounted mechanically- using fasteners. Installation involves the edges of the tiles, so be careful to avoid chipping the tiles.
Sometimes you need layouts for tiles when installing a low winding step. For such cases, there are corners with a flat working part and a ridged back side, which allows you to smoothly bend the profile. It is important not to violate the boundary of a “painless” bend.
We looked at options for corners for tiles. Despite their collective-farm appearance, you still shouldn’t refuse them in hazardous areas and inexpensive repairs.
comments powered by HyperCommentsEvery home craftsman who has started tiling for the first time knows how to join tiles in corners. And only with experience comes the understanding that in construction there are no perfectly right angles, and therefore laying tiles is not at all as simple as it might seem at first glance. Over the years comes true mastery, and it turns out that there are not one, not two, but many more ways to design both the outer and inner corners. And each of them has the right to exist, and can be the only true one in a certain situation.
First thing's first - layout!
And the cladding of any room begins with the layout, since in standard apartments Not only do there not exist perfectly right angles, but there are no ideal angles either. smooth walls. The tiler carefully measures the room, assesses the condition of the walls and floors, and inspects the corners to choose a design method for each. It depends on which method of joining tiles in the outer and inner corners is chosen:
- choosing a tool to perform the work;
- the amount of tiles purchased in excess of the norm, in reserve;
- actually, the layout itself.


Basic layout rules
The layout begins with the surface that will be most noticeable. For example, for a bathroom - this is the wall located opposite front door. It is laid out first, and only then the walls adjacent to it. The temptation to start tiling from the corner is great, but if you succumb to it, it is almost guaranteed that cracks will appear in the corners and under the ceiling, sometimes several centimeters wide, which will have to be laid out with tiny scraps. As a result, the deviation of the wall from the vertical will be very noticeable, and the customer will have an extremely negative impression of the work of the master. Therefore, when making a layout, you need to adhere to certain rules:


How to join tiles in inner corners
There are very few options for decorating an internal corner. You can do this in the following ways:
- using an overhead angle (trim)
- design of a regular seam without additional details.

Making a corner using a plastic profile
This option is used in internal vertical corners, as a rule, by novice craftsmen. With experience comes the understanding that plastic part, rarely perfectly matching in color with, rather cheapens than decorates the interior. An exception to the rule is the use of trim at the junction of floor and wall coverings. Here, a corner is almost always appropriate and desirable. Housewives also don’t like plastic corners in the bathroom because they quickly become dirty, but tiles are much more difficult to maintain.

Easy pairing of 2 rows of tiles
Joining the tiles yourself in the inner corner has clear advantages. Firstly, a corner designed in this way looks more organic, especially in small rooms. Secondly, this method does not require additional parts, which will further increase the cost of repairs.
Of course, the simple pairing method also has disadvantages. This is the professionalism of a master like necessary condition and a high probability of cracking along the seam due to the natural tendency of the tiles to both contract and expand. This problem especially often occurs when facing plasterboard structures, but on brick walls that's great rarity.
To prevent the formation of cracks, use:
- correct calculation of seam width;
- use of sanitary silicone in vertical internal corners.

Important! Making an internal corner without using an overlay corner and without finishing a seam is unacceptable! The result of this installation will be a black gap at the junction. To correct appearance It will be possible only with silicone. But it’s unlikely to be able to match it exactly to the grout.
How to join tiles in outer corners
There are many more ways to design an external corner. This:
- use of trims and ;
- technology for cutting tile ends at an angle of 45°;
- simple laying of one row of tiles on the edge of another;
- forming a corner using grout.

Method 1. Using a trim corner to lay out external corners
Today stores offer a wide range of corner profiles for laying tiles. They are made from plastic, aluminum and even brass and can be the most different colors and sizes. The size of the corner must be selected based on the thickness of the selected tile, which is usually 7, 9 or 11 mm.
Interestingly, in most European countries, trims are used everywhere, due to the ease of the method of decorating corners. In Russia, the mass fashion for corners is slowly but surely declining for a number of reasons:
- the desire to be different from everyone else;
- the small size of most apartments, in which unnecessary details in the cladding split the room, visually making it even smaller;
- the fragility of plastic trims and their high tendency to become dirty;
- high cost of metal corners;
- the emergence of new, more aesthetic methods of cladding external corners.
Installation of trim corner
Installation decorative corner This is done after one wall in the room has been completely lined. Then along the entire height of the corner using mounting gun Silicone sealant is applied. The flat side of the trim is applied to the already laid tile, while the groove of the part remains free to lie on the adjacent wall. Subsequently, the tiles are laid along this wall from bottom to top, and the master inserts the edge of the facing material into the groove of the corner. A day after finishing the work, the seams between the tiles and the trim are rubbed down. Installation is performed in the same way decorative element and in horizontal corners.
Method 2. Cutting the edge of the tile at an angle of 45°
If the question “How to connect tiles in the outer corners?” the master replies: “Of course, at an angle of 45°!” - in front of you is a real professional. Simply because this method is too difficult for beginners, because it requires experience, firmness of movement and a lot of time. In addition, it is impossible to do without good tool, namely angular grinder. It works using a diamond disc. If you need to cut double-fired tiles, it is better to use a tile cutter with a rotating frame.
The disadvantage of this design is the fragility of the resulting angle. You just have to hit the edge of the masonry well, and with a high probability the tile will break off. However, fans of the method are ready to put up with this, because no other method of designing a corner gives such a harmonious result: the beveled edges fit perfectly together and form a perfectly right angle with a thin, barely noticeable gap.

Method 3: Laying one row of tiles on the edge of another
This technique is good for beginners, because there is nothing complicated about it. First, one wall is completely covered with facing material, then another, the outer tiles of which simply overlap the edge of the tiles laid perpendicularly. Very often, this installation method is chosen for laying tiles with relief, because in most cases it is chosen, succumbing to the opinion that seams, joints and unevenness of the walls will not be so noticeable on the textured surface. This is true, just like the fact that the relief one is very difficult to join beautifully in the corners.

Another variation of the laying method is staggered: in the first row, tiles of one wall are placed on top, in the second - another, and so on. Very often this method is used when tiling rooms. The result is a deliberately careless masonry, most appropriate in country or loft style interiors.
Method 4: Forming a corner using grout
Its essence: laying tiles without trimming and without protrusion on the outer corner. The resulting gap is shaped into a semicircle using grout or other adhesives. It must be admitted that this technique is still unpopular, both among craftsmen and customers. Although it solves a common problem: eliminating the fragility of the outer corner and preventing seam cracking, which is especially common on plasterboard walls. Therefore, any tiler should know how to close joints in corners using grout.

/page/pub/view/kak-styikovat-plitku-v-uglah
How to join tiles in corners
Nowadays, when conducting repair work in the bathroom of an apartment or house, in rare cases, they do without the use of tiles. And corners for tiles in the bathroom will allow you to achieve perfect result. Tiles are placed not only on the walls, but also on the floor. It is not only beautiful and convenient, but also relatively inexpensive. Also, tiles in the bathroom and kitchen can last quite a long time, especially if their installation is carried out by highly qualified craftsmen.
1
As for home professionals, laying tiles in the bathroom itself, as a rule, does not cause any particular difficulties. However, when it comes to exterior and interior corners, many face a significant obstacle. The inexperience of the master can lead to a dead end, although in fact the solution to the problem is more than simple.
They have been used for a long time in the renovation process. special elements, with the help of which you can quickly resolve the issue regarding the joining of complex coatings, including tiles. Here it is worth using tile corners, which are very convenient and easy to use.
At their core, tile corners are fairly long pieces that can be used to create smooth joints on the tiles. In addition, they make it possible to get rid of some defects on the material, that is, on tiles or plastic, which may form during cutting. The length of the corners is usually 250 cm. These building elements give a finished look to the covering and make the room more elegant.
Corner for tiles
Depending on the corner in which the element will be used, it is necessary to use one or another type. For example, at the outer joint the corners tile covering will often be exposed mechanical impact. To do this, they need to be strengthened. With greater strength and corner resistance, the tiles will better withstand the resulting loads that are inevitable in the bathroom. In addition to the fact that joints closed with corners will last longer, they will also become much safer. This is especially true for children living in the house. They will be protected from the dangerous ends of ceramic parts.
In some cases, there are special names for corners - trims. A similar name for these building elements can be found in the product descriptions of some companies.
And yet, regardless of the name, bathroom corners can be divided into two types, namely: plastic and metal. There are also slightly different options for use on internal and external joints. There is a slight difference between trims for horizontal and vertical installation.
2
Select corners for tiles based on the thickness of the tiles. In stores you can find these building elements from 6 to 12 numbers. By this designation you can find out what the distance is from the edge of the corner to its base.
Professionals recommend choosing tiled corners of such a size that the trim is 1 mm larger than the thickness of the tile. For example, if the bathroom is tiled with 8 mm tiles, then to process the joints it is worth purchasing a “nine” corner profile, that is, 9 mm in size.

Choosing a tiled corner
Before you go to a hardware store to buy trims, you should carefully calculate the number and type of elements you will need for further work. As mentioned earlier, the trim is selected in such a way that the profile is one millimeter larger than the thickness of the tile. If you are working with tiles different sizes, it’s worth taking this into account when purchasing corners.
3
First, you need to figure out what kind of ceiling will be in the bathroom. If we're talking about about a hanging or plasterboard option, you can save on tiles. In this case, the corners should be installed up to the mark where the edge of the ceiling will be located.

Corner under the ceiling
Most often, when installing tiled corners, you have to trim the elements. You should definitely take this into account and do the work in advance. The length must be clearly calculated.
It is worth noting that now in specialized stores there are a lot of different trims that are offered in a wide range color scheme. This is very convenient if you are using color tiles. Before you go shopping for bathroom corners, you should take some of the tiles with you. This will help you determine the color more accurately. Specialists know in advance about the need for corner profiles when renovating a bathroom, so they purchase them along with the tiles.
4
Craftsmen still cannot come to a consensus on what should be done first - laying tiles or installing corners. Half of those who do repairs try to first attach trims, adjust them in level, taking into account horizontal and vertical. After this, they begin to lay the tile itself and trim the joining parts of the tile.
The second option involves laying tiles on the walls in the bathroom. And already on top finished coating corners are installed. This method is considered simpler, but one should not forget about careful monitoring of the correct fastening of the trim. And yet, a better and more accurate coating can be obtained by first securing the corner.

Installation of tiled corners in the bathroom
Experts recommend that you carefully mark and saw the joints of the tiled corners so that they fit well in difficult corners. The overall impression made by the bathroom renovation will depend on how well this part of the work is done.
To mark 45° angles, you should use a universal or regular student triangle. It wouldn’t hurt to remember the basics of geometry for more accurate calculations. When working with tiles, you need to periodically check whether the position of the trim has gone astray, and if necessary, make timely adjustments. Only with the right approach can you achieve the ideal quality of tile work.
After the main task is completed, you should wait until the tile adhesive has completely dried. As a rule, it takes a day to complete this process. Next, it’s worth looking to see if there are any shortcomings. They are easily removed with tile grout.
5
Construction stores offer plastic or metal corner profiles. Many people get lost when choosing such elements, although the difference between them is not very big.

Metal corner profiles
Of course, metal corners will last a little longer, but their plastic counterparts are not much inferior in this matter. An additional advantage of metal is its interesting color range. If this is appropriate in the bathroom design, you can purchase a profile with a chrome or gold finish. Such options can significantly decorate a room.
As for plastic, it is much easier to work with. It is easy to cut with simple tools, which can be found in any household. He is not capricious and is easily amenable even to non-professionals. As a rule, a plastic profile strip is sold 250 cm long. Corners of this type are made of PVC, which is considered the most practical option for use in bathrooms, since this material is absolutely not afraid of fungi or mold. An additional advantage of plastic is its low cost.
When installing a corner made of any material, you don’t have to worry about water getting under the tiles; trims provide reliable sealing of the joints, and also make the room more attractive.
A profile corner for a bathroom under tiles is something that at first glance is insignificant, but is actually very important detail, which can save apartment residents from many negative consequences after the repair.